Appliquéing on Cuddle® Fabric

Appliqué is a wonderful sewing technique that allows you to sew one piece of fabric on top of another in a decorative manner to form pictures or patterns. It can be used on clothing, quilts, accessories, or basically anything that you can sew.  The hard part is getting the two fabrics to stay in exactly the same place while you are sewing.  Of course, for some people, it may be one of the other processes such as the actual sewing or the precision cutting, which is a challenge.

IMG_2800.JPG

Appliquéing Cuddle® fabric adds another wonderful dimension of a plush nap that must also be taken into account when appliquéing, but the soft plush nature of Cuddle® makes it well worth an extra step or two to get perfect and easy appliquéing. 

There are a few of you that read my blog that are relatively new to sewing, so I do not want to assume that you know what I mean by the term “Cuddle® fabric.”  Here is a link to a blog post on Cuddle® fabric that is manufactured by Shannon Fabrics.

One great thing about Cuddle® is that it does not fray, which means that you can appliqué on the raw edge and do not need to take the extra step of turning the fabric under.  That is an advantage that I love.  I have always loved appliquéing wool for that same reason. 

There are many methods of appliquéing Cuddle®, but I am only reviewing two of them in this blog post. Of course, they are the two that I use and love. One technique uses a sticky backing designed just for appliqué and the other does not. Using the backing is super simple, but I have included the instructions on how not to use it because sometimes you want to appliqué right away and you just do not have it on hand. I know that one all too well.

We live in a day and age where there is a product for everything and appliquéing is no different. There are so many different products for appliquéing. Since I am a machine embroiderer, I have a tendency to stay with a company that I trust for that purpose – Floriani (a division of RNK Distributing). I love all of their stabilizers for machine embroidery, so it was natural for me to try their Appli-Kay Wonder product and I love it just as much as I love all their other stabilizers. It is a double-sided fusible with an iron on fuse on one side and a sticky adhesive on the other. You iron the backside of the fabric that will be cut so you can trace the design directly onto the back and THEN cut it out.  This saves the step of cutting out the paper design to trace. 

IMG_2776.JPG

The other alternative to using a double-sided fusible product is to cut the appliqué out and spray the back of it with a temporary adhesive like Odif’s 505 Spray and Fix or Sulky’s KK 2000. Personally, when it comes to appliquéing, I love the Sulky just a little bit better. I have a tendency to use the 505 when I baste quilting and the Sulky for appliquéing.

You may feel timid about ironing a fusible on the back of a polyester microfiber plush fabric, but if you are using a good quality microfiber plush fabric like Cuddle®, you have no worries. Because it is high quality, the back can withstand a medium heat setting on an iron or even a high setting for a few seconds. Follow the manufacturer’s guidelines for applying the double-sided fusible for appliquéing. If the guidelines call for pressing on the top side of the fabric, please use a pressing cloth on top of the fabric.  The Appli-Kay Wonder product has you press the backside of the fabric, so there is no need to use a pressing cloth. As always, it is a good practice to test the fabric with the fusible first.

IMG_2780.JPG

At this point, it is the same for all appliquéing. Applying the appliqué to the other fabric is where it starts to make a difference for a napped fabric such as Cuddle®.

HERE IS MY TIP:

To be honest, if that was the end of the story, this blog post would not be any different than everyone else’s on how to appliqué. It is this next step that takes appliquéing Cuddle® to the level of precision. The key is using a product that machine embroiderers call a “topper.” It is a clear water-soluble product that looks like the plastic wrap that you use in the kitchen. It is usually manufactured by companies that produce stabilizers and in an instance where a stabilizer is recommended, a topper can possibly be used in lieu of the stabilizer, with the exception of machine embroidery where a stabilizer is always needed and the topper is just added to the others.

IMG_2785.JPG

Now not all toppers are created the same. I have used just about all the different brands and let me tell you that most have almost brought me to tears when they rip while machine embroidering and I have to start all over again. I have found that the product, “Floriani Water Soluble Topping,“ is thin enough for the needle to glide through and yet strong enough not to rip.

IMG_2786.JPG

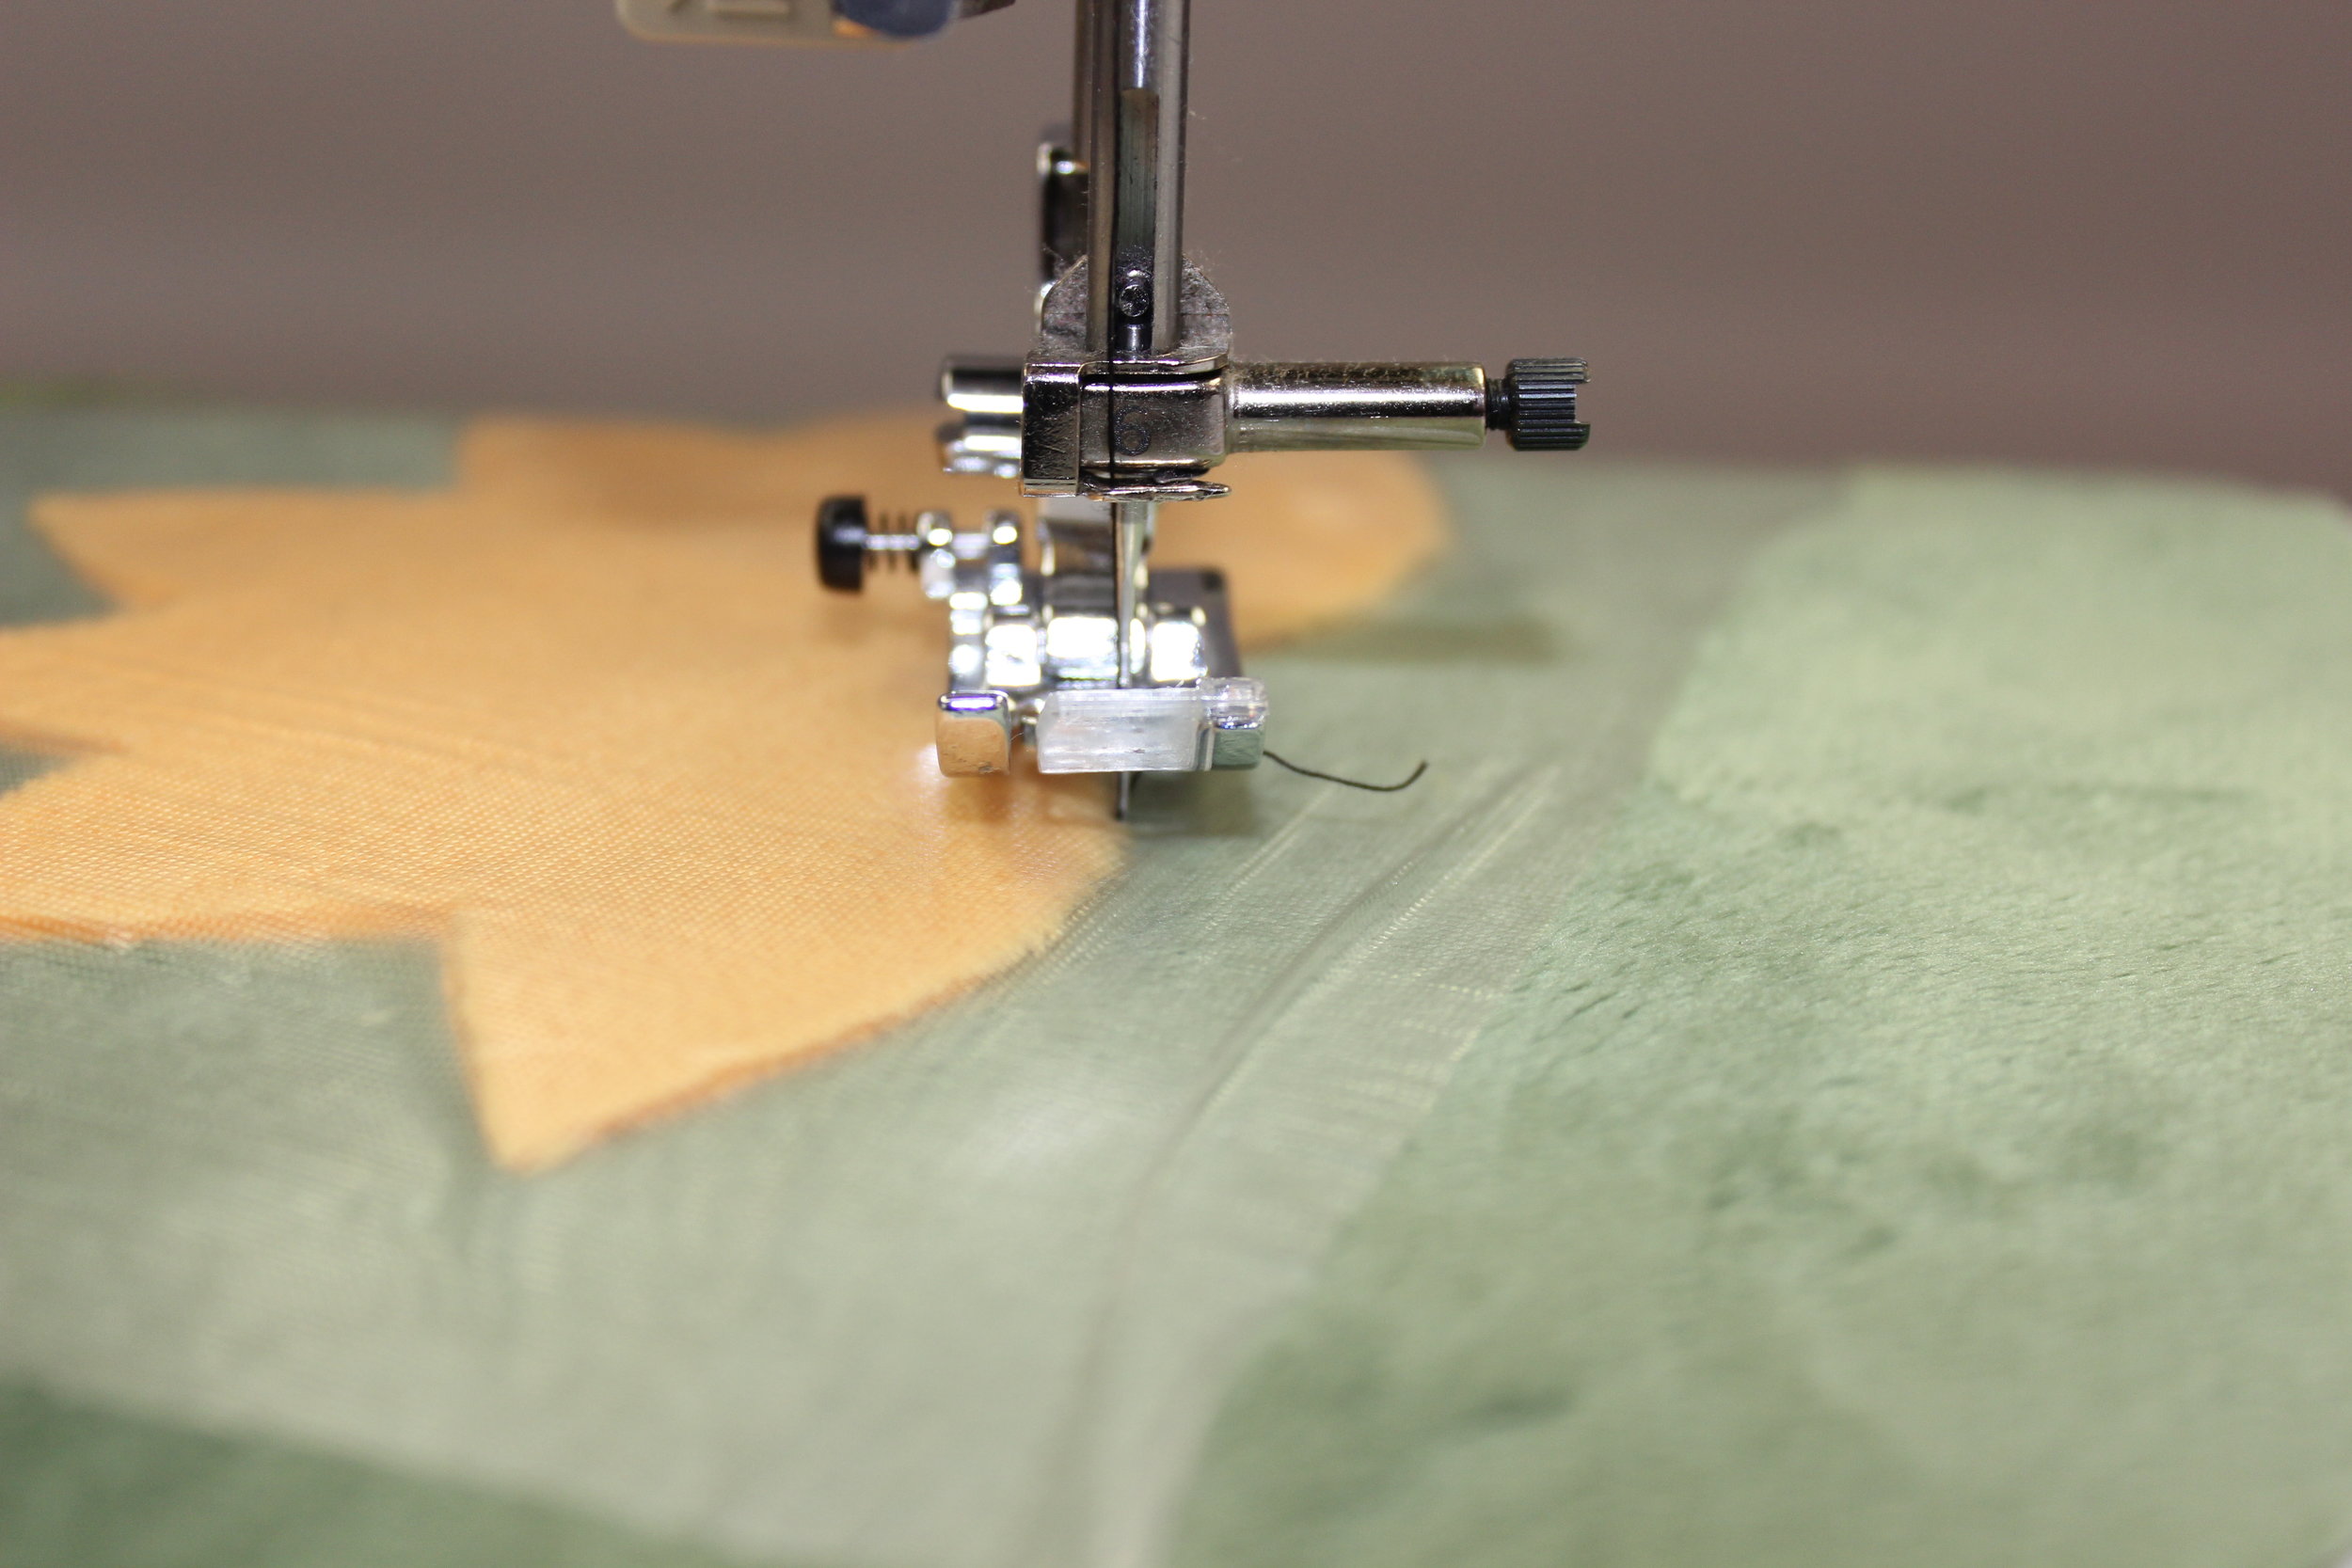
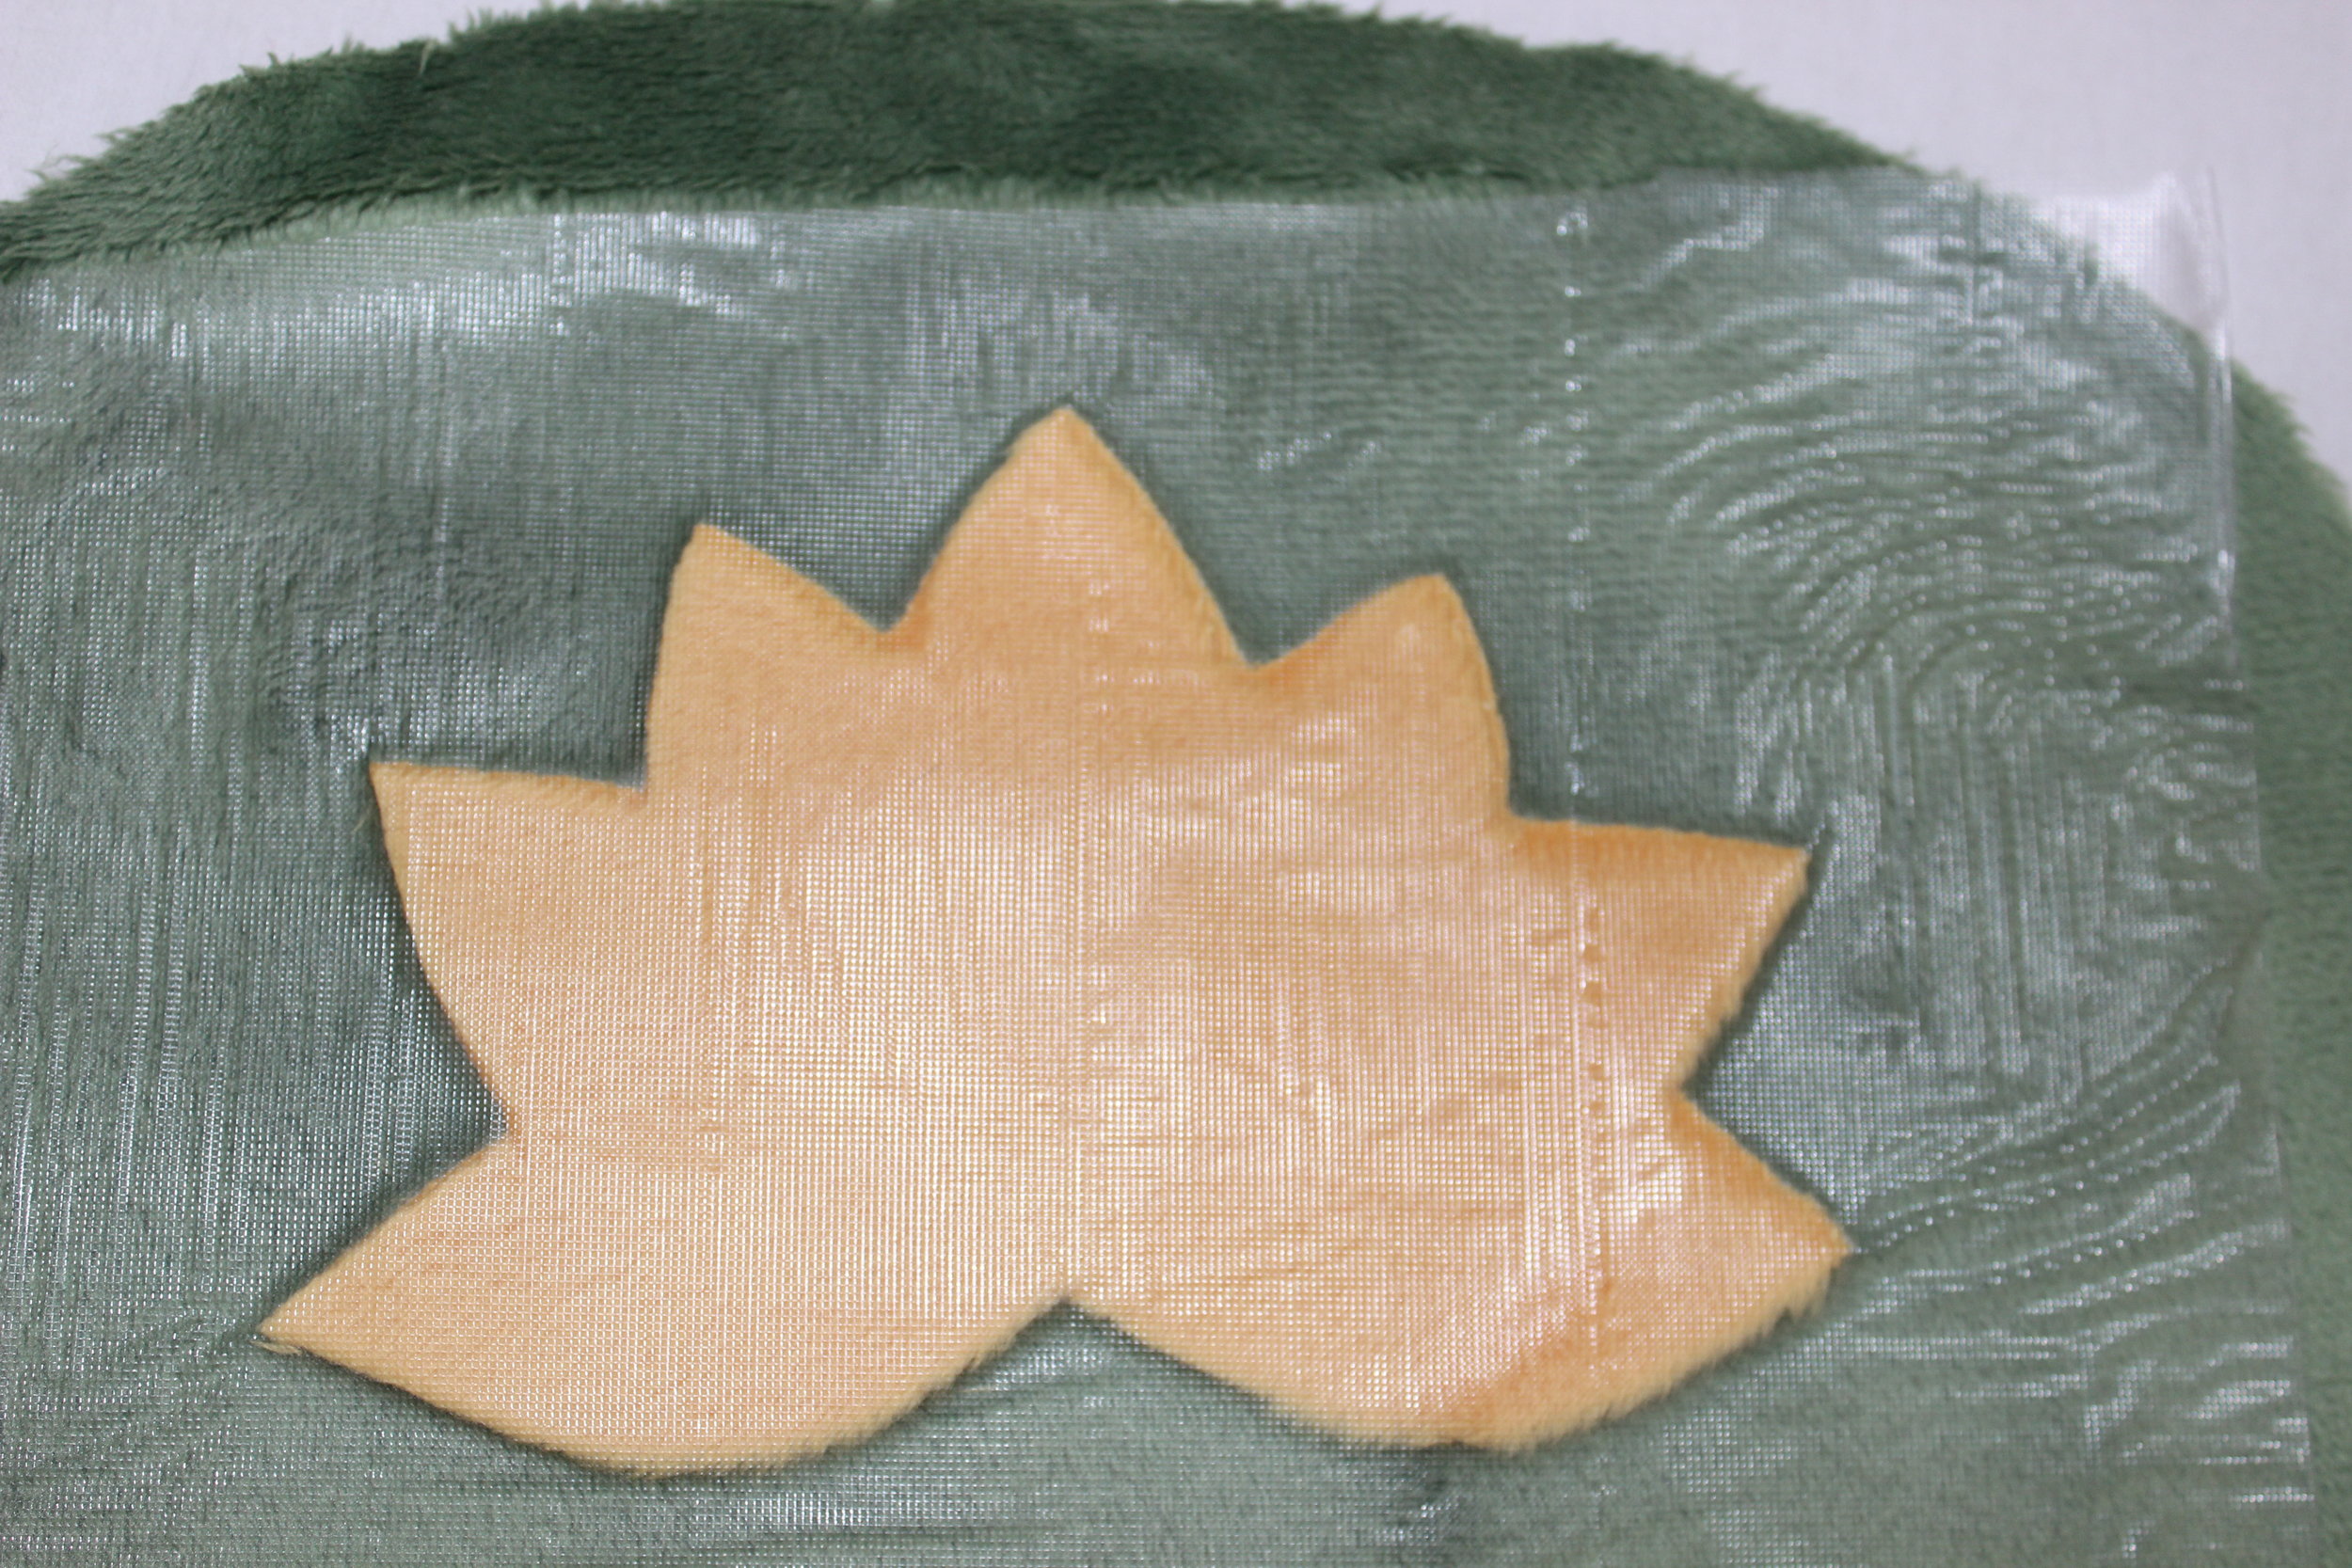
It is an interesting product.  The needle just goes right through it as if it does not exist.  This is not true of all toppers as some are so tough the needle has to work to puncture it. I apply the topper with Sulky’s KK 2000. I cut the topper, spray it, and then apply it to the top of the entire piece to be appliquéd, i.e., the appliqué and the bottom piece of fabric. I proceed to appliqué as if the topper was not there.  It keeps all the fibers in the same direction and leaves a distinct impression as to where you should appliqué the straight lines and the fingers of the stitch.

IMG_2791.JPG

INSTRUCTIONS for Appliquéing for Cuddle®

STEP 1

BEFORE any cutting, determine the direction of the Cuddle® fabric. The bottom fabric and the appliqué fabric should be going in the same downward direction.

STEP 2

Cut out the Cuddle® fabric that will be the top appliqué using the traditional trace and cut method,

IMG_2779.JPG

or adhering an appliqué product to the back and then cutting it out.

IMG_2781.JPG

STEP 3

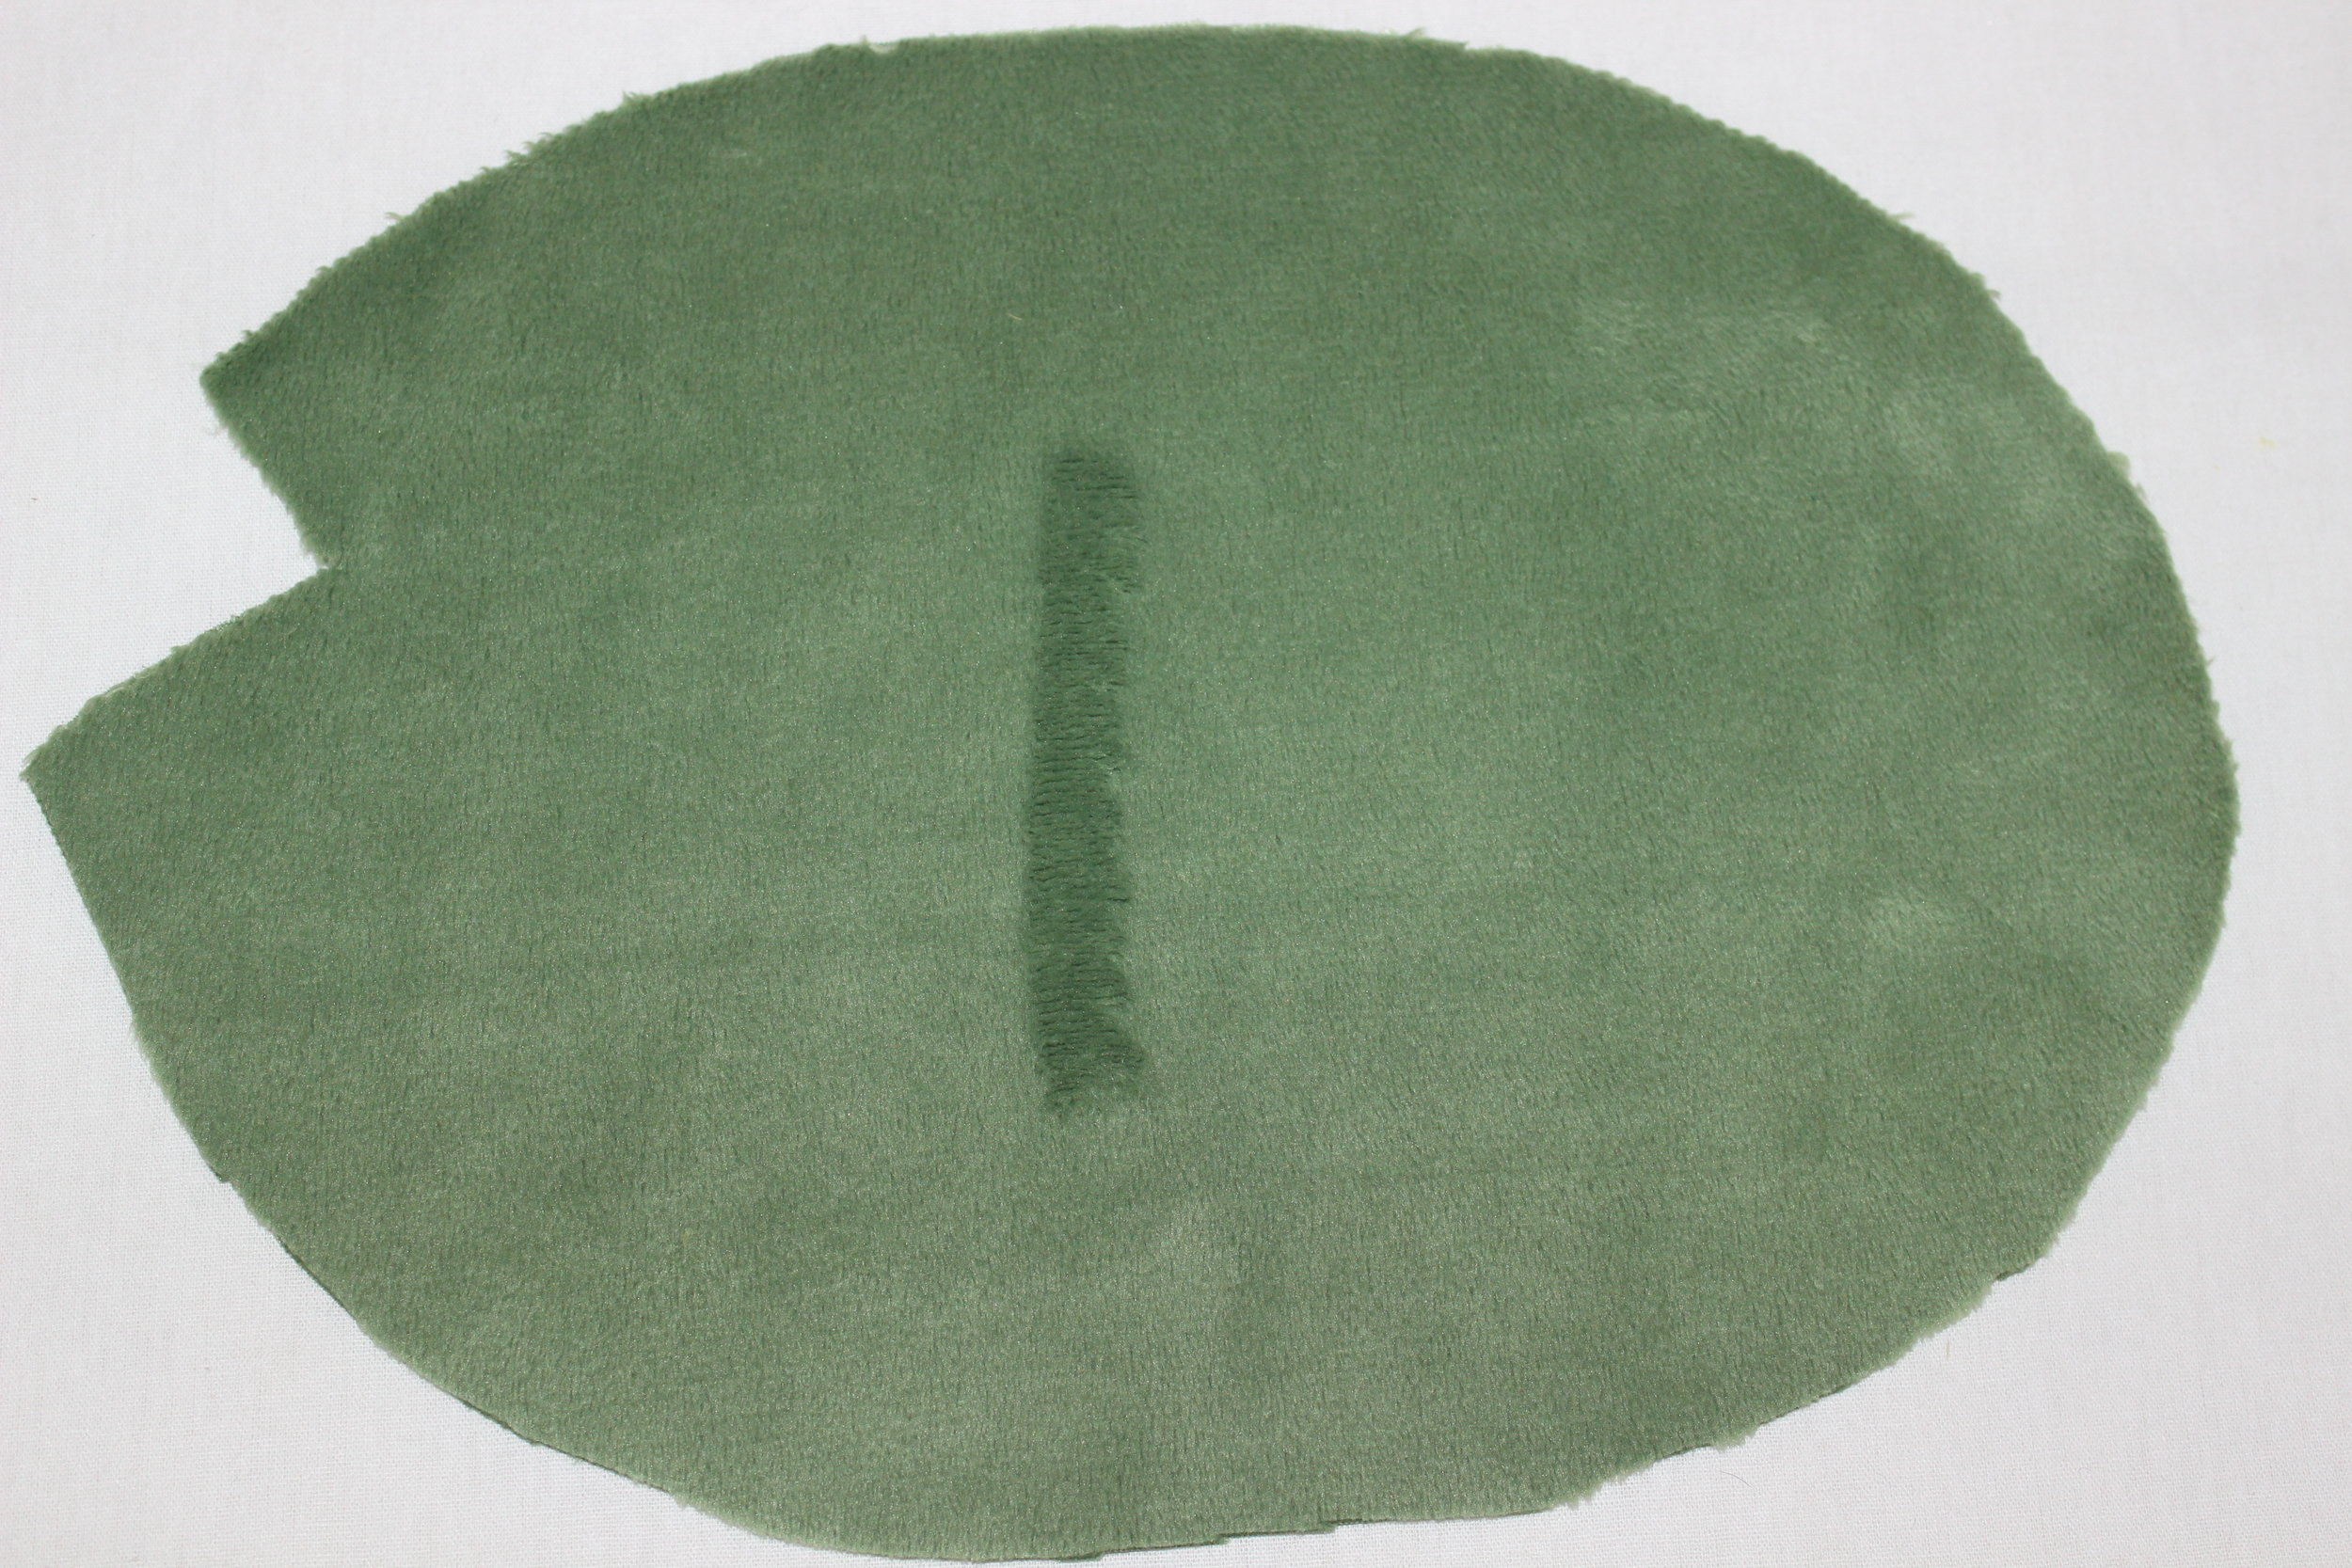
Lay the bottom Cuddle® fabric and the appliqué Cuddle® fabric next to each other and brush the nap in the same direction. This step is important. You want to smooth out the nap so that the fibers are all lying in the same direction.

TIP: Because Cuddle® fabric has a nap, you can trace the placement of the appliqué onto the bottom of the fabric with your finger or a blunt object. This allows for perfect placement without the need of using a tracing pen.

IMG_2782.JPG

STEP 4

If you are using a temporary spray adhesive, spray the back of the fabric and then lay it on top of the bottom fabric.

If you are using a fusible, remove the paper backing and apply it to the bottom fabric.

IMG_2783.JPG

Smooth the nap once again; making sure it is in the same direction.

IMG_2784.JPG

STEP 5

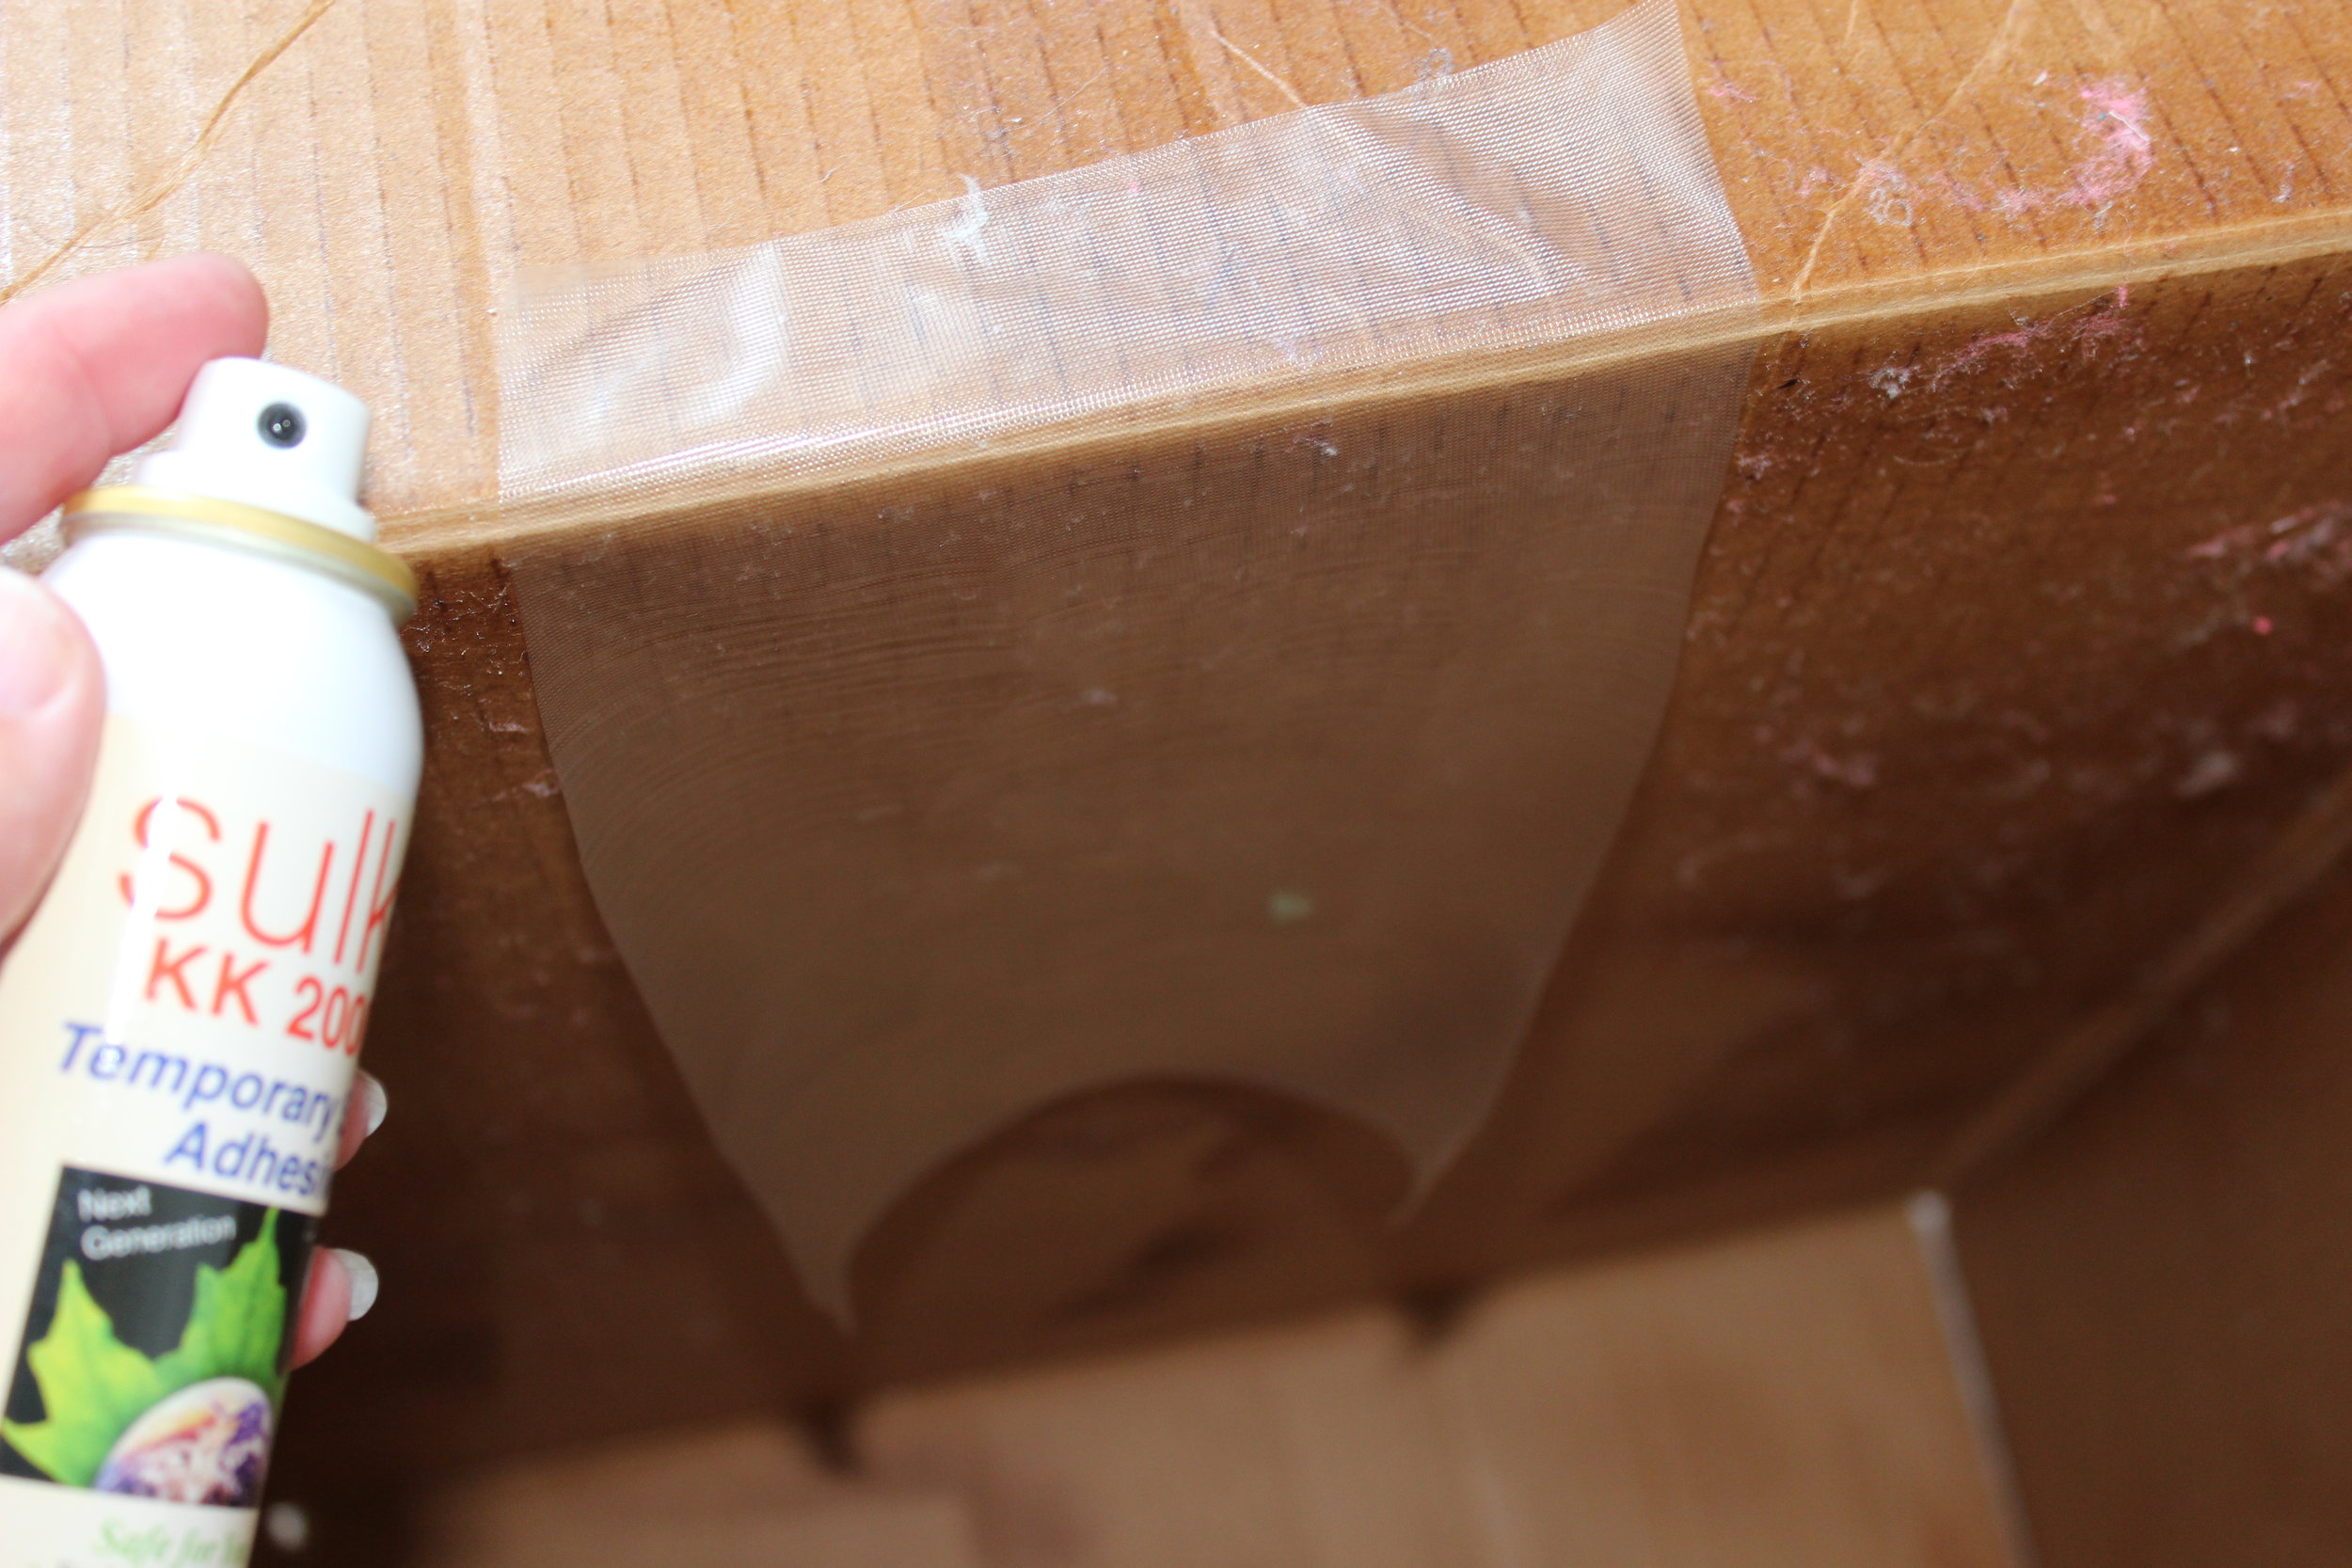
Cut out a piece of water-soluble topper that is larger than the appliqué. Spray one side of it with a temporary adhesive.

TIP: Always spray temporary adhesives in an area where there is no computer equipment or anything that can be harmed by the spray. I always spray into a cardboard box that I have folded up in my laundry room just for this purpose. 

IMG_2788.JPG

Apply the topper with the sprayed side down on top of the appliqué. It should cover the entire piece of appliqué as well as several inches of the bottom fabric.

IMG_2789.JPG

STEP 6

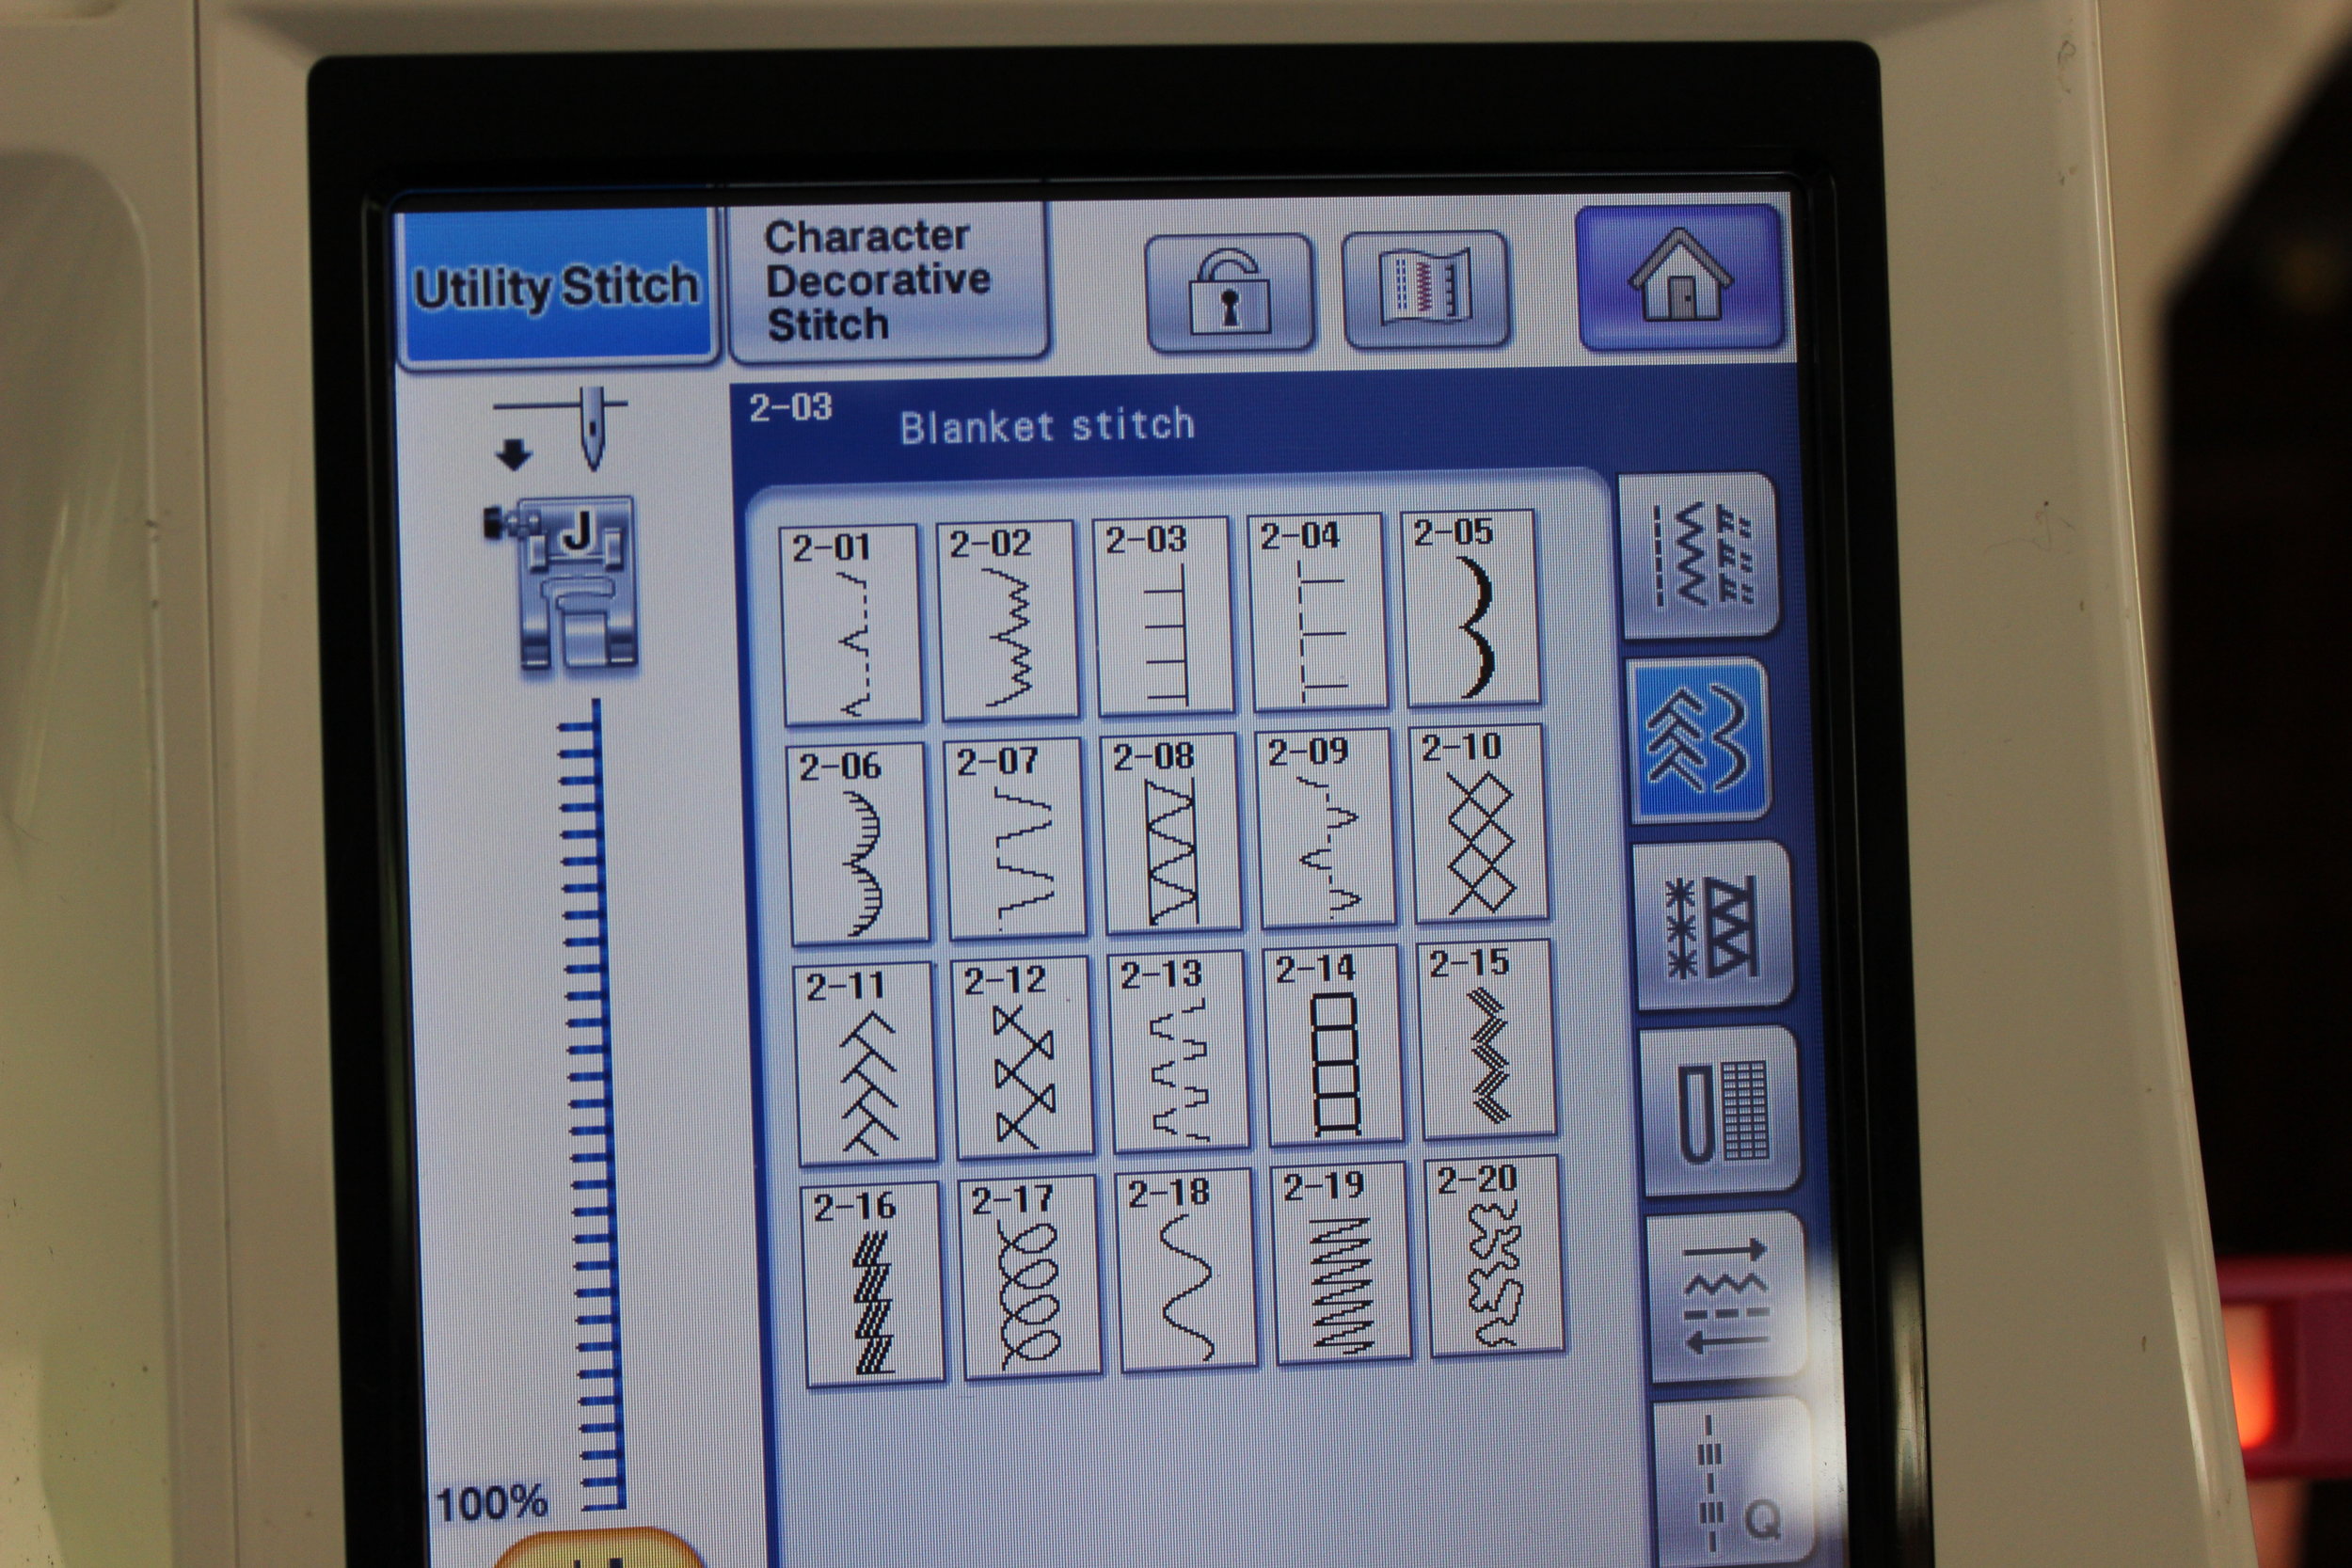
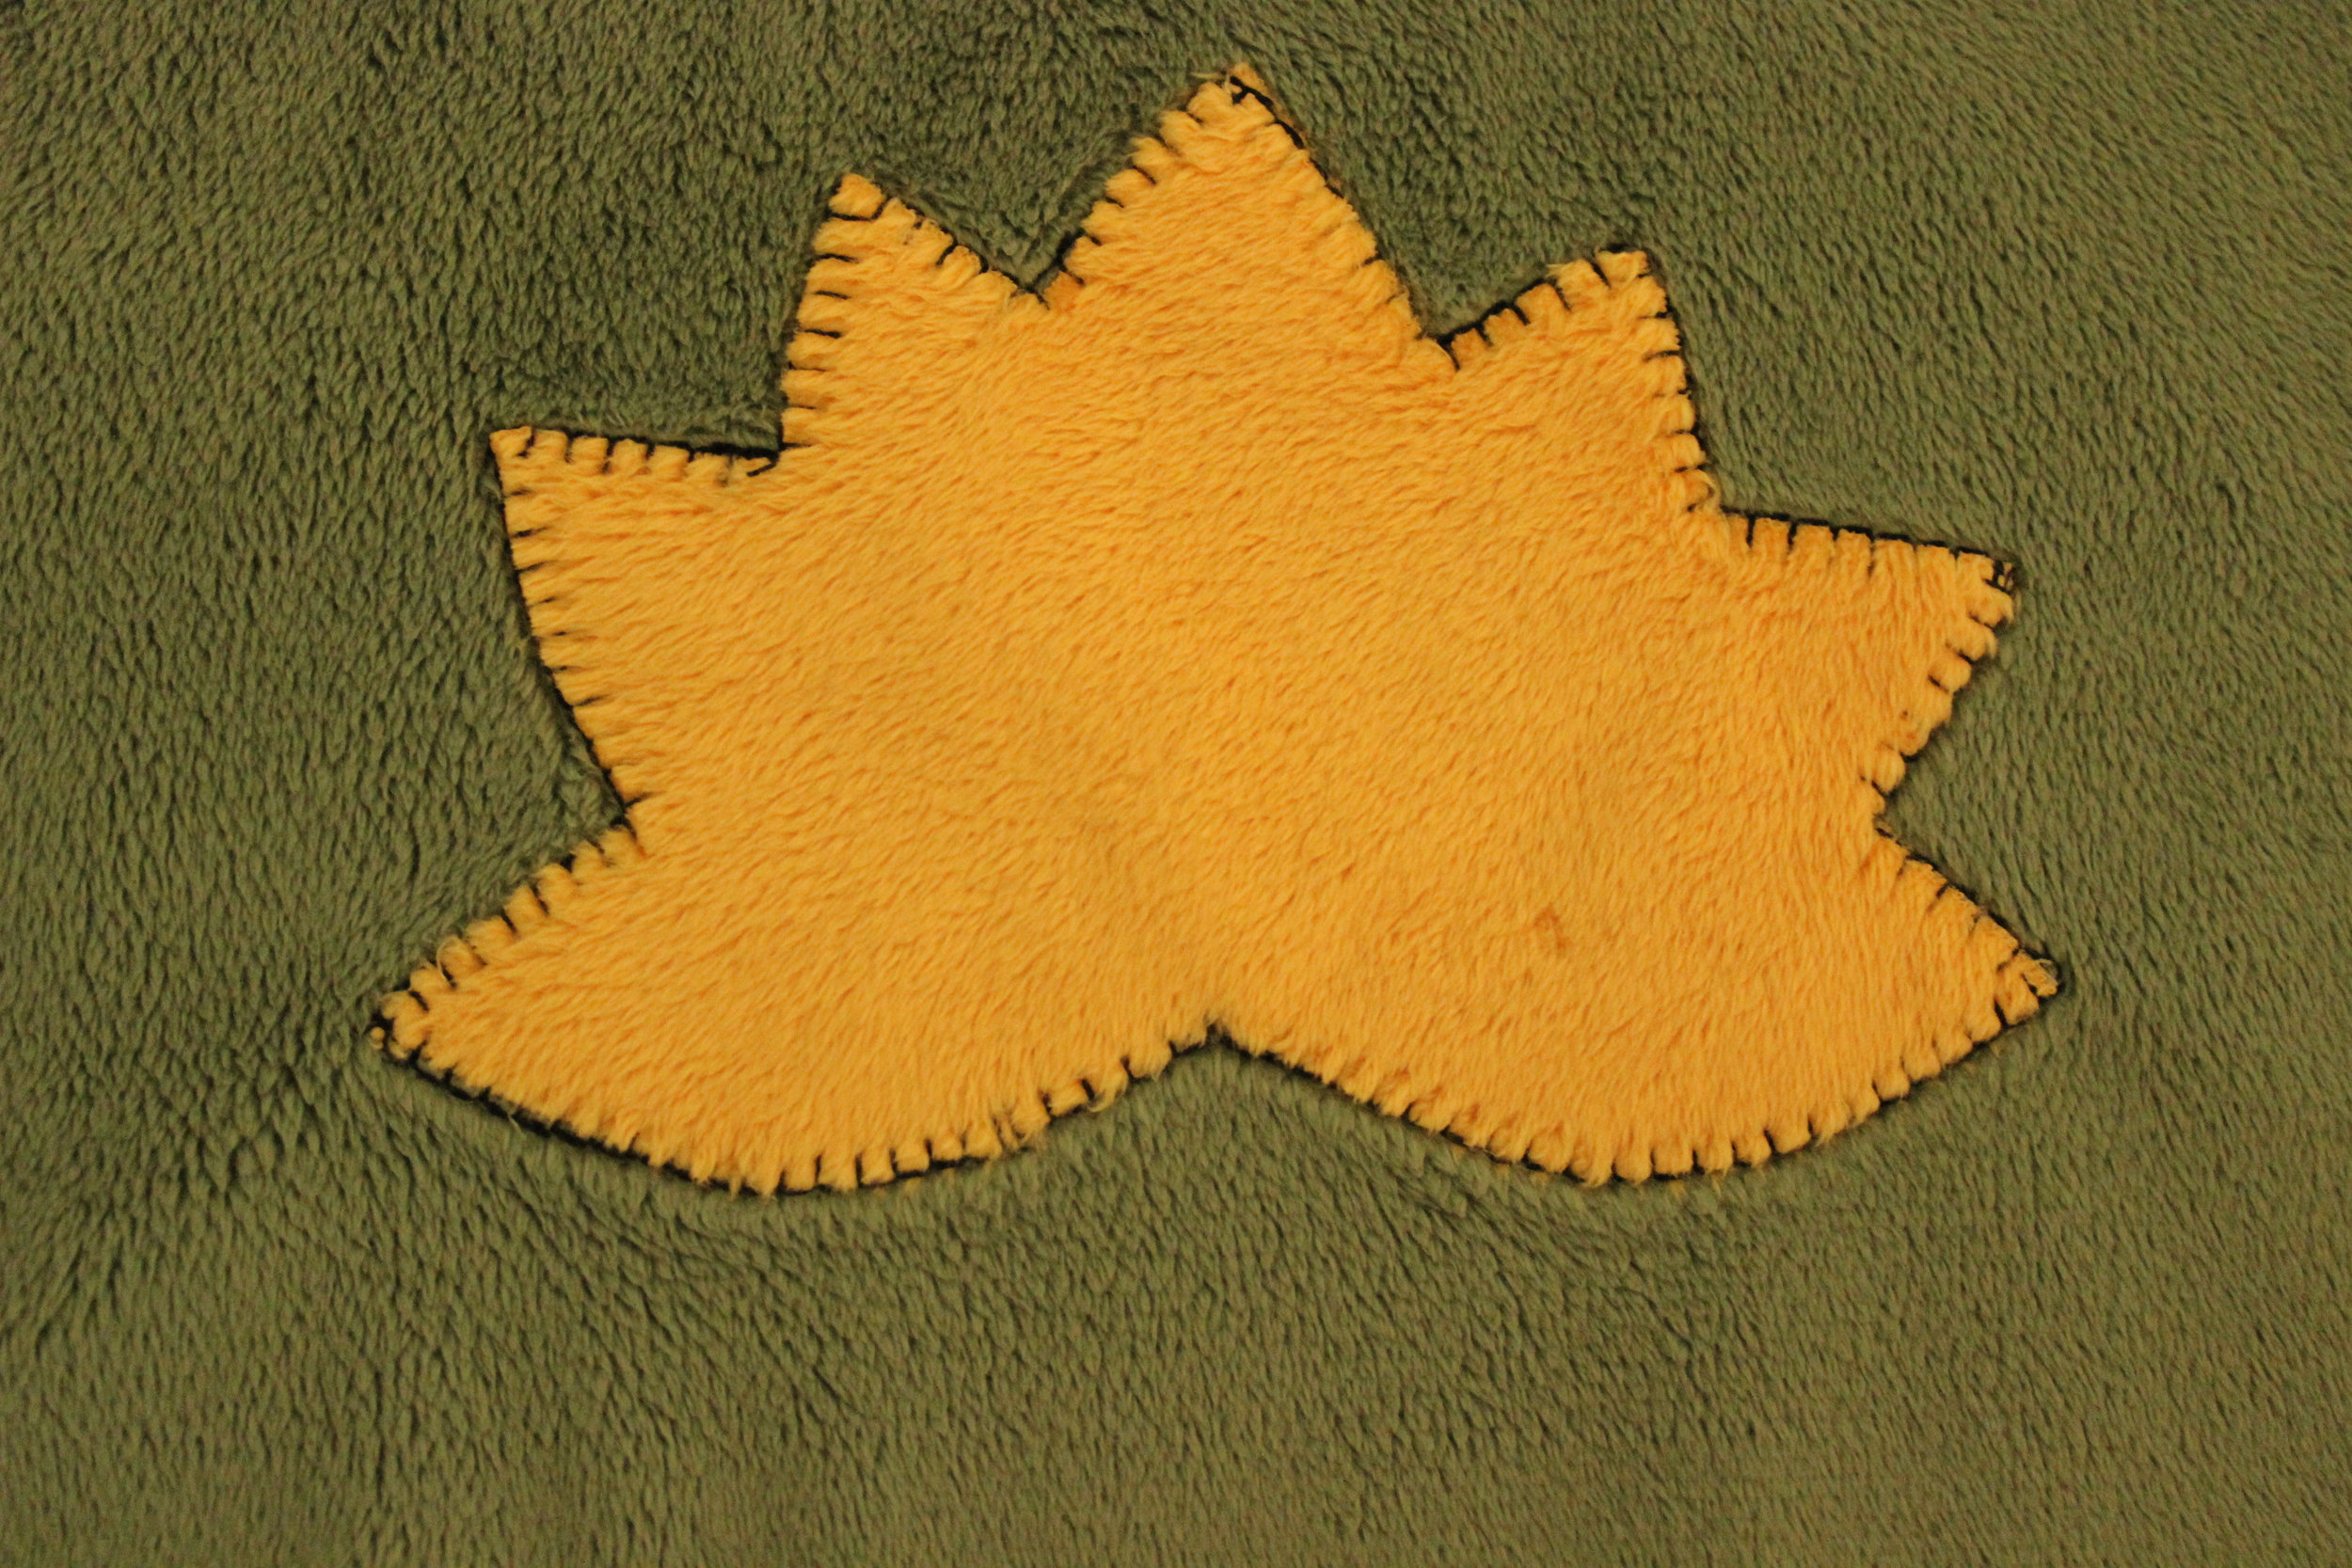
Appliqué like normal using a zig-zag stitch or your favorite decorative stitch like the traditional blanket stitch.

IMG_2790.JPG
IMG_2797.JPG

STEP 7

Once all the appliqué stitching is complete, gently tear the water-soluble topper away from the fabric. If any of the shiny filament remains, you can use a damp cloth to remove it or if you are going to be washing your Cuddle® fabric then it will quickly wash away then.

IMG_2799.JPG

Enjoy appliquéing. Please let me know what you think of this technique.

By the way, technically this article is not sponsored by Shannon Fabrics. Sulky, Odif, Floriani, or any other company, as I am not getting paid to write it and I paid for all the fabrics in the pictures, but yes, I am a Shannon Fabrics Brand Ambassador, which means I get paid to be an educator for them when I teach at a fabric shop for them. There will be later posts on how to sew with Cuddle® and some of its unique properties. 


What is “Cuddle” in the Sewing Industry?

That word “cuddle” conjures up so many warm and fuzzy feelings. Maybe you are thinking of that last lingering hug and kiss from somebody dear to you. But believe it or not, “cuddle” is also actually a type of fabric. Now that is brand marketing at its finest because let me tell you – this fabric really does make you want to cuddle up in it.

A picture is not worth a thousand words when you cannot feel it!

A picture is not worth a thousand words when you cannot feel it!

Cuddle® fabric is a brand of fabric. Cuddle® is like the word “Kleenex.” They are brand names. It is a type of fabric called minky, sometimes spelled minkee (another brand name). Minky is a product name like tissue is the product. So for those of you who took logic or remember those analogies, Kleenex : tissue :: Cuddle® : minky. Well, maybe you forgot those symbols, so it reads; Kleenex is to tissue as Cuddle® is to minky.

Normal
0


false
false
false

EN-US
JA
X-NONE


 <w:LatentStyles DefLockedState="false" DefUnhideWhenUsed="true"
DefSemiHidden="true" DefQFormat="false" DefPriority="99"
LatentStyleCount="276">…

Cuddle® comes in different colors, prints and textures.  This is their dimple - unbelieveably cute! 

Shannon Fabrics produces Cuddle®, which is a 100% polyester microfiber plush fabric. Microfiber is a very fine synthetic filament that is even finer than silk (Fairchild’s Dictionary of Textiles, by Phyllis G. Tortora). These yarns are knitted together to make this ultra plush textile that is used for so many purposes but is best known for the softest throws, blankets, and quilts. Interestingly, Cuddle® is not a fleece product, but it does have a very strong directional nap like velvet. Cuddle® is far superior to the microfiber plush fabrics in the clothing stores and the chain fabric stores.

This picture shows the difference between Shannon fabrics (top) and the chain fabric store version of minky (bottom).

This picture shows the difference between Shannon fabrics (top) and the chain fabric store version of minky (bottom).

Cuddle® is the softest fabric that I have ever felt. I know it sounds like I would be biased, but I was in love with this Cuddle® fabric years before I became a brand ambassador for Shannon Fabrics. To quote their sales manager, Sheryl Sapriel, “It is the most superior minky fabric in the world.” Even my husband (who is not a tactile person) was petting the fabrics strewn across the kitchen table and said, “No wonder you wanted to work for them. These are the softest fabrics I have ever felt.” Shannon Fabrics is living up to their motto, "Making the World a Softer Place!"

This is 


Normal
0


false
false
false

EN-US
JA
X-NONE


 <w:LatentStyles DefLockedState="false" DefUnhideWhenUsed="true"
DefSemiHidden="true" DefQFormat="false" DefPriority="99"
LatentStyleCoun…

This is Cuddle®  in French Blue, which is one of 96 delicious colors, with more in the works.

Personally, this is one of those frustrating blog posts because I can describe it all I want, but until you feel it, you will never know what I mean. It is like trying to explain a sweet scent to someone over a blog post. It just does not work. It is like someone who has never seen snow. You can read about it. See pictures about it and even experience ice, but until you see it in person, no words can adequately describe it.  It is amazing. In the same way, imitation and real things are very different, but yet so similar. You know it when you see the real thing.  I hope you have the privilege to feel the real Cuddle®.

By the way, technically this article is not sponsored by Shannon Fabrics, as I am not getting paid to write it and I paid for all the fabrics in the pictures, but yes, I am a Shannon Fabrics Brand Ambassador, which means I get paid to be an educator for them when I teach at a fabric shop. There will be later posts on how to sew with Cuddle® and some of its unique properties. Cuddle® can be purchased at Fabric.com or FabricDepot.com - no affiliation - just where I purchased the fabrics.
 

Officially a Brand Ambassador for Shannon Fabrics

It’s official! I am so excited to announce that I am a brand ambassador for Shannon Fabrics. Last week I spent an amazing three days just outside Chicago, Illinois, at the incredible Bernina Center.

Some of the Shannon Fabrics' executives,&nbsp;representatives and band ambassadors

Some of the Shannon Fabrics' executives, representatives and band ambassadors

Thirty people from all over the country were chosen out of four hundred applicants to be brand ambassadors. We were all chosen for different reasons and expertise, but we all have a common thread of sewing.  It was a time of a lifetime to be able to affectionately bond with so many different people.

Not only did we wear the same scarf, we were sewing partners that had the common bond of being the mother to large families - 8 for Pamela O'Neil and 9 for me

Not only did we wear the same scarf, we were sewing partners that had the common bond of being the mother to large families - 8 for Pamela O'Neil and 9 for me

Our mission as brand ambassadors is to teach others how to sew with the lush Shannon Fabrics. We are the Shannon Fabrics educators. We were trained on how to present demonstrations, trunk shows, and classes. This brand ambassador program is a new concept for them and we are proudly the first class to graduate. 

Our wonderful main educator and coordinator, Teresa Coates

Our wonderful main educator and coordinator, Teresa Coates

We spent three days in an intensive training. From six in the morning until eleven at night it was non-stop training (okay eating too), but it was truly a time of a lifetime.  I had so much fun, learned so much, and fell in love with the company’s culture. They are passionately family and quality oriented.

Even the executive, Julie Olds, had a hand at instructing us

Even the executive, Julie Olds, had a hand at instructing us

The actual fabrics of Shannon Fabrics are what initially sold me on applying to become a brand ambassador.  Their number one product is a line called Cuddle.

Cuddle comes in a wide range of 96 colors

Cuddle comes in a wide range of 96 colors

This is just one example of the lovely quilts that can be made from Cuddle

This is just one example of the lovely quilts that can be made from Cuddle

In my opinion, it is the softest fabric there is. It is in the broad category of textiles named minky, but this is far superior to the generic minky fabric that you would feel at the local chain fabric store. It has a thicker pile and is so much more luxurious. There are also many other aspects as to why it sews so much better, but that is for another blog post (of course).

The colors in the this quilt are just exquiste

The colors in the this quilt are just exquiste

This is one of my favorite colors and workmanship as I am amazed at the detail in this printing

This is one of my favorite colors and workmanship as I am amazed at the detail in this printing

Over the past few months in preparing for this venture, I have come to realize that Shannon Fabrics has so many more sumptuous fabrics beyond the simple Cuddle line. I am absolutely in love with their faux fur and to be perfectly honest, I do not know why people wear real animal furs when they can have these Tissavel furs that are so soft you get lost in them. Those Luxe Cuddle throws had a hard time being passed around as everyone wanted a chance to cuddle up with them and did not want to give them up.

The sweet Donna Thornton swaddled in a lucious Luxe Cuddle

The sweet Donna Thornton swaddled in a lucious Luxe Cuddle

During our three days, we were treated like royalty. Of course, we were all given our own set of fur throws, but Shannon Fabrics was also extremely generous with each one of us being provided an entire large suitcase full of fabrics and notions.

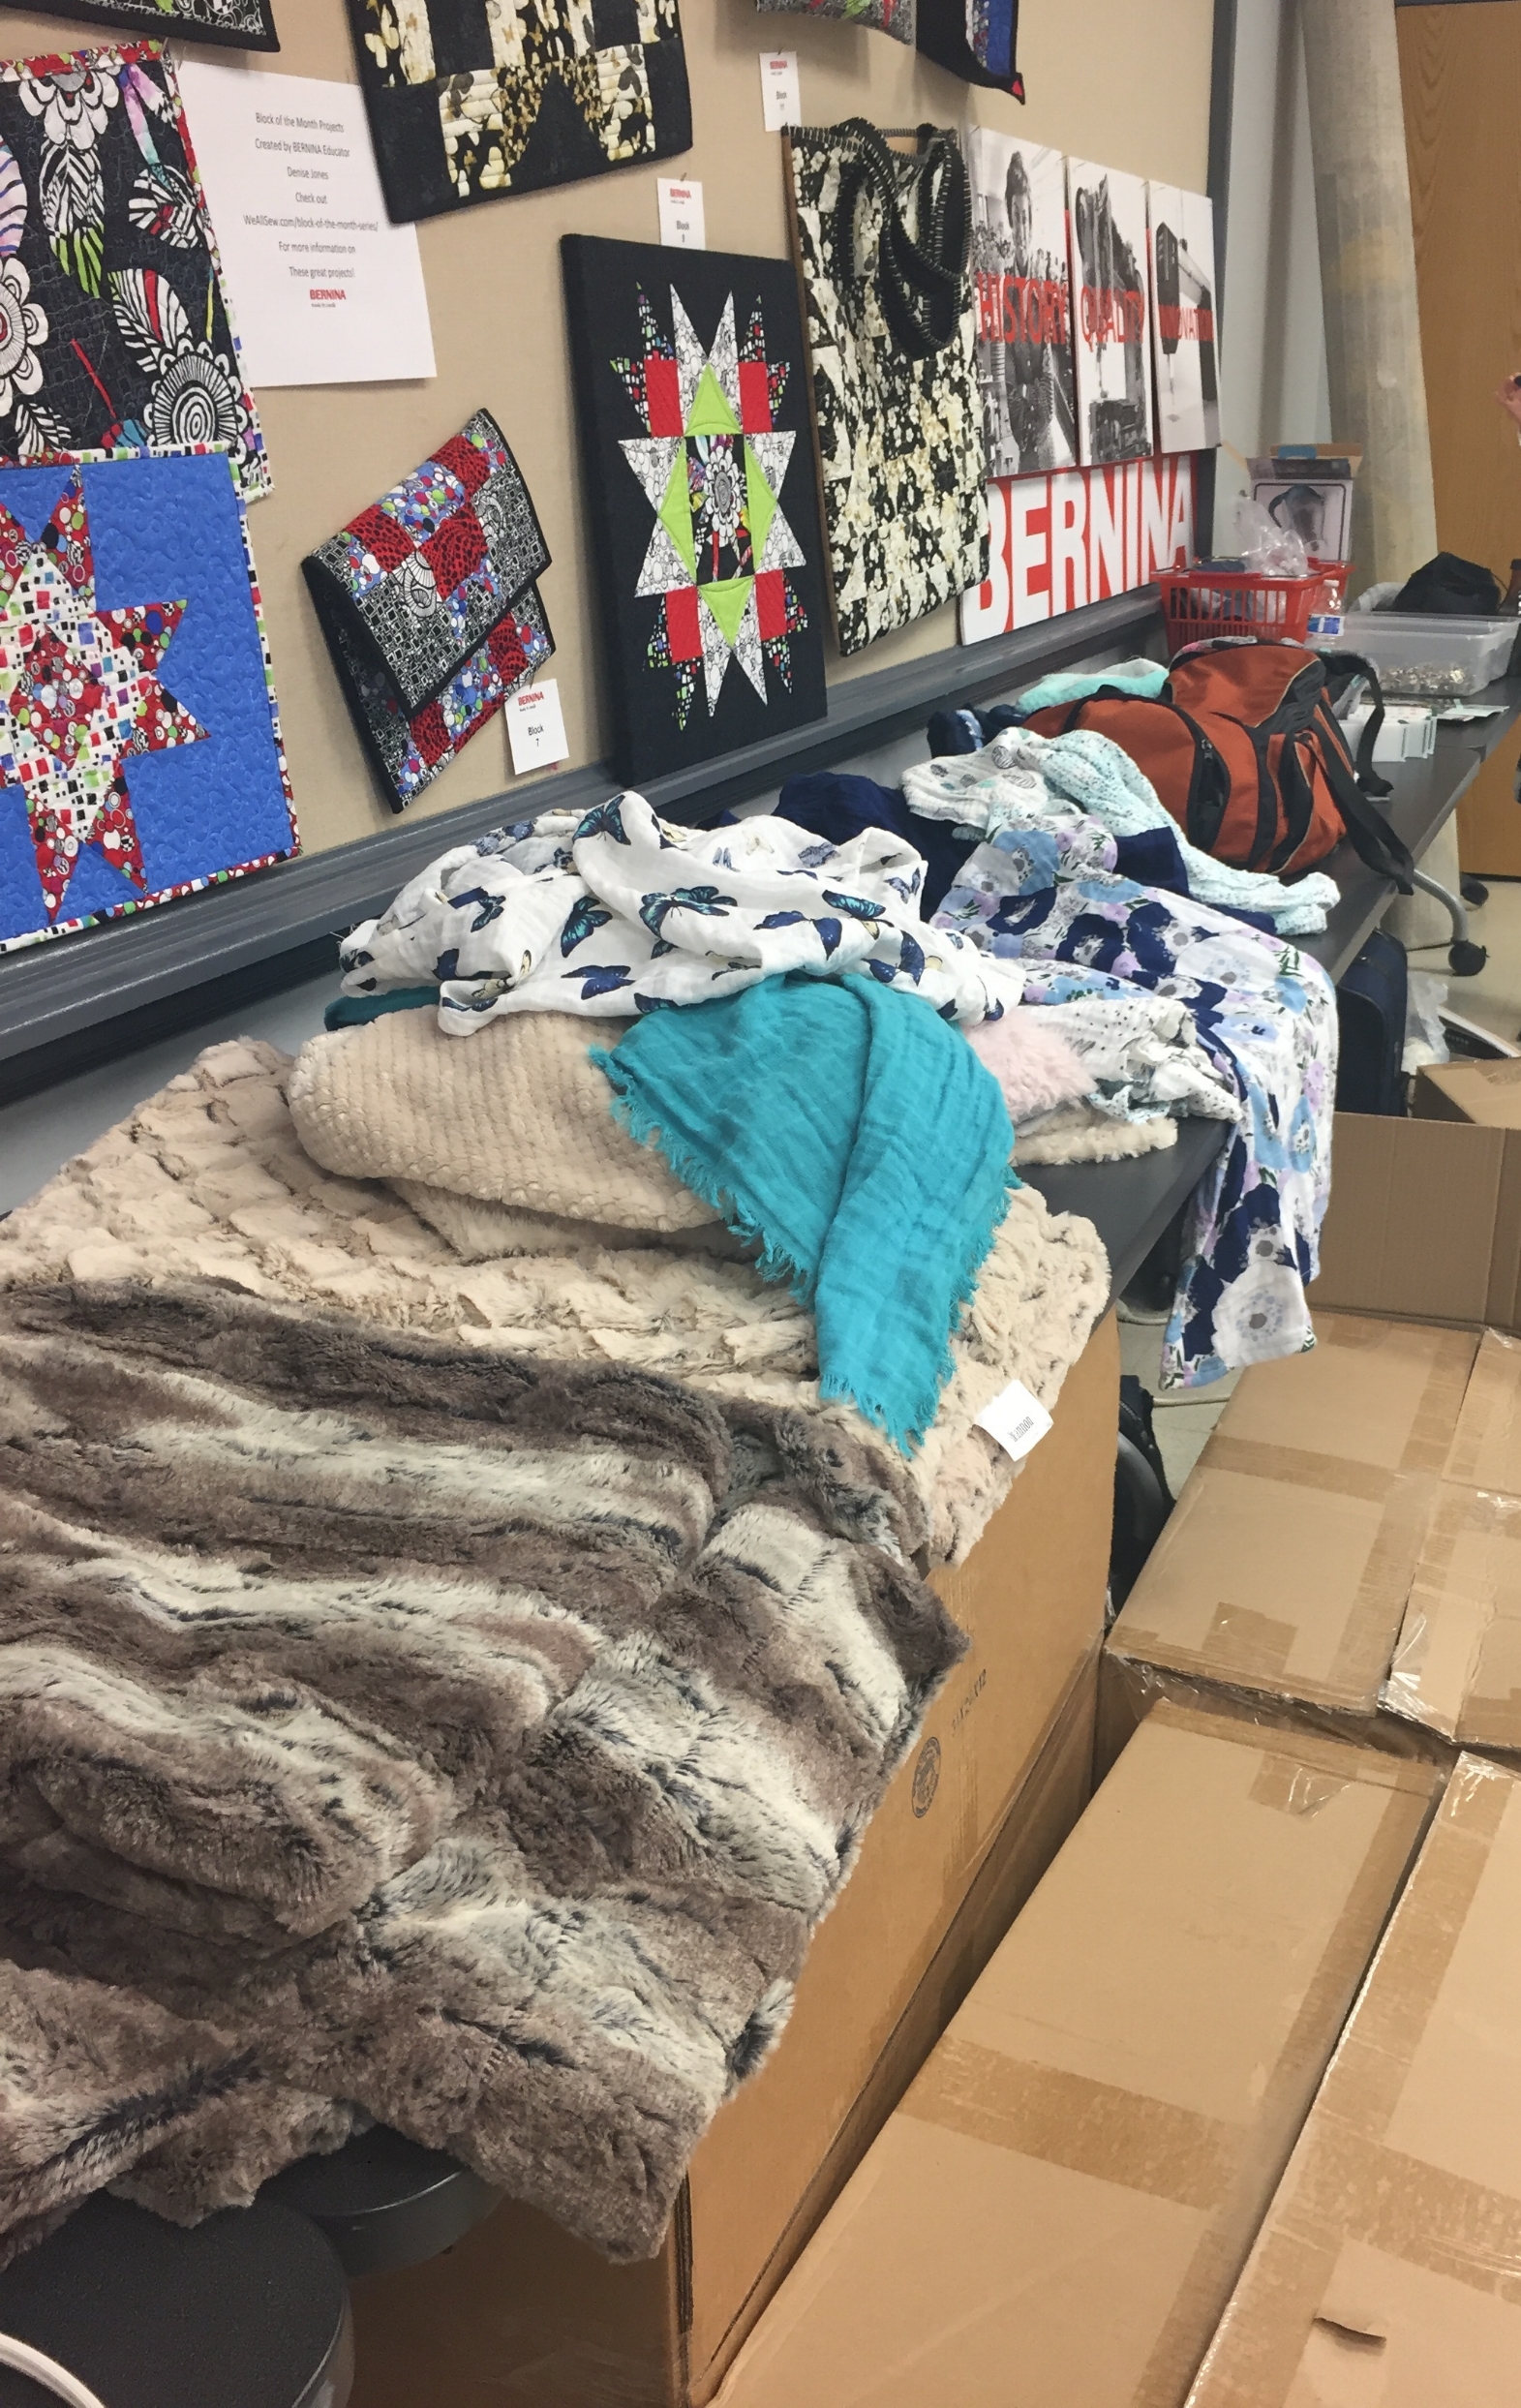
All those boxes are filled with fabric for each of us and an abundance of samples are on the table

All those boxes are filled with fabric for each of us and an abundance of samples are on the table

They had arranged with their sponsors to indulge us with so many notions. There were so many that they filled an entire bag. We were all so overwhelmed with the generosity of Shannon Fabrics and their sponsors.

A bag filled with sewing notions to begin, but it would be overflowing by the end

A bag filled with sewing notions to begin, but it would be overflowing by the end

As you would expect, we ate like the rich and famous with all their furs. The first night we had a wonderful sampling of those Chicago deep-dish pizzas and the next night we were privileged to be at the Aspen Lane Wine Company that follows the Newman model of donating all their profits. You can read about their giving hearts if you click here.

Dinner at the Aspen Lane Wine Company

Dinner at the Aspen Lane Wine Company

Shannon Fabrics also has many other lines of fabrics such as their Embrace, which is a contemporary and popular double gauze.  Have you noticed how many names are loving names? Let me tell you we had fun with those as each morning we cuddled. Yes, we gave hugs and kisses to everyone – people we had never known before this event. There were a few people that were stretched out of their comfort zones and I think the Bernina educator was the saddest to see us leave.

This is a sweet blanket made with Embrace on the top and a gorgeous Luxe Cuddle on the bottom

This is a sweet blanket made with Embrace on the top and a gorgeous Luxe Cuddle on the bottom

Some of the garments that can be created with Embrace

Some of the garments that can be created with Embrace

The Bernina Center was unbelievable.  There was a dedicated high-end Bernina sewing machine for all of us with a large workstation and the training was phenomenal.

The Bernina Center educational room

The Bernina Center educational room

Indubitably, Shannon Fabrics taught us well. We had thorough explanations as well as hands on construction, and evaluations. We saw garments as well as every other possible item that could be made with their fabrics. We even heard from a company that specialized in cosplay using Shannon Fabrics.  

The detail in this garment is impecable

The detail in this garment is impecable

It was a wonderful experience and one that I will treasure for a lifetime, but it was the people that made the difference. Without them, this would not have been the same. They were an incredible group of people and I hope that you have the pleasure to meet some of them. 

My lovely roommate, Susan Hastings, was so sweet that she wore machine embroidery every day

My lovely roommate, Susan Hastings, was so sweet that she wore machine embroidery every day

Beyond a doubt, I am so psyched. I just want to start sewing all that fabric in my suitcase.  Yes, there is so much that I am having a little trouble finding where to put it all. It is still in my suitcase. Do not tell my husband, but I have big plans for a new sewing studio.

Thank you, Shannon Fabrics for everything, but especially for “Making the world a softer place!” Words can never express my gratitude.

Meet Harry Hippo!

Meet Harry Hippo! He is a softie and I mean a real softie. He is stuffed with Fairfield World’s Poly-Fil Supreme® Ultra Plush Fiber Fill. Thank you, Fairfield for donating this wonderful Poly-Fil. It is so soft, I just cannot stop squeezing Harry.

Harry was created just for Sew-a-Softie month of July. Today is his day to debut. He is joining the Sew-a-Softie club that has been going on over at Facebook. He has lots of friends over there, even a piece of pizza and an amazing pencil with paper. They have a public group that you can join and see all the other softies that have been created for the month, with a few still left to join the club through the 31st.  Trixi, the originator of this event, has a list of all the month long softie tutorials on her website.

You can sew Harry by hand or with a sewing machine. In addition to the two resources for how to hand sew listed in my previous blog post of Sew-a-Softie, I thought you would like this more comprehensive one also that is a pdf

INSTRUCTIONS

TEMPLATE:

Click here to download hippo template

MATERIALS:

Fat Quarter of cotton for the main fabric

OPTIONAL: Scrap of fabric for the inside of the ears

Good quality thread in a coordinating color

Hand Needle (or sewing machine)

Fairfield World’s Poly-Fil Supreme® Ultra Plush Fiber Fill

Embroidery Thread for the eyes and nose

Embroidery Needle

SUPPLIES:

Frixion Erasable Pen

Pins or Pattern Weights

Shears & Trimming Scissors

Point turner or some other blunt, but pointed object

Pen or pencil for tracing the pattern

STEP ONE

NOTE:

This project uses 1/4” seam allowances.

You may press this fabric, but finger pressing is sufficient if you use cotton. 

Please read the instructions below before beginning. Gather the materials and supplies. No need to pre-wash the main fabric.

STEP TWO

Download the template and print it. Cut it out along the solid lines.

STEP THREE
Position pattern pieces on fabric to verify the placement before cutting. Fold fat quarter cotton fabric in half. Place the gusset pattern along the fold. Pin in place. Cut out.

STEP FOUR

Place the hippo body and ear pattern over the remaining fabric, pin in place, and cut out. Using the Frixion pen, mark point A and B on the hippo body and gusset. Also, mark an opening on the hippo back about 2” long.

STEP FIVE

Cut out the inside of the ears from the scrap fabric.

STEP SIX

Embroider the eyes and nose with French knots on the body of the hippo.

STEP SEVEN

Place the two hippo body pieces right sides together. Pin along edges matching point A with A and B with B.

STEP EIGHT

Stitch from point A to point B, but do not sew over the opening.

STEP NINE

Lay the hippo body on its back with the underside up. With right sides together, pin the gusset to the underside, lining up point A with A and point B with B.

STEP TEN

Stitch the gusset in place.

STEP ELEVEN

Clip the curves and check that all seams are closed on both sides.

STEP TWELVE

Turn right side out and push out corners with a turner.

STEP THIRTEEN

Through the opening in the back of the body, fill the body generously with poly-fil.

STEP FOURTEEN

Stitch the opening closed.

STEP FIFTEEN

Place the outside fabric of the ear right side up. Place the inside of the ear fabric on top of it with right sides together. Stitch around the curve and not the flat side.

STEP SIXTEEN

Turn right side out. Fold the flat edge up 1/4" into the ear opening and finger press the flat edge to the inside of the ear. Stitch the ear closed.

STEP SEVENTEEN

Fold the ear in half lengthwise with the inner part facing the front of the face. Stitch the ear to each side of the head of the hippo.

Watch out! You never know where you may meet a hippo.

Have fun introducing Harry to his new family. 

July is Sew-a-Softie Month

Softies are simple sewing projects that can be stuffed with poly-fil. They are anything from super easy to more complex creations. This Sew-a-Softie project started as an initiative to encourage young people and adults who have never sewn that sewing is easy and fun. It was started in Australia by Trixi Symonds who was recently featured in the magazine, Creative Machine Embroidery.

2016 was the debut of this international event and this year it has evolved into a month long affair. There is a dedicated website at www.sewasoftie.com and a Facebook group - Sew a Softie

You will want to follow "Sew a Softie" on your Facebook account as there will be a great giveaway, or follow the Sew a Softie blog for a chance at the giveaway. Click here is a list of all the items on the giveaway list .

If you have never sewn before or would like to teach someone else, this is a great place to start.  All month there will be free patterns and tips. Here are two excellent resources to learn how to hand sew:

Red Ted Art has great videos explaining the basic stitches

Red Ted Art has great videos explaining the basic stitches

There is a roundup of crafty people coming together to share their talents for this project. Below is a list of the first 15 days of the roundup. Please click on their website on their day to see what they have designed just for you.

July 1 – Trixi Symonds at Coloured Buttons

July 2 – Tina at Miss Daisy Patterns  

July 3 - Mignon Prider Design 

July 4 – Maggy at Red Ted Art

July 5 – Abbie at While She Naps

July 6 –Mollie at Wild Olive 

You will not want to miss Mollie's adorable alpaca today.  Llama's and alpacas are the rave lately. 

July 7 - Elisa Allen at Make Film Play

July 8 – Laura at Colourful Minds

July 9 – Zoe at Love Patchwork & Quilting

July 10 –Amie at Sewing School Book

July 10- Nic Hahn at Mini Matisse

July 11 - Damjanaat AppleGreen Cottage

July 12 – MaryAnne at Mama Smiles

July 13 – Amalia at Handmade by Amalia

July 14 – Joanna at The Blue Barn

July 15 Penny at Mother Natured 

Have fun sewing and if you can, teach someone else to sew too. 

Domed Dish Cover with Thermal Protection

Summer time is such a wonderful time to entertain.  It starts off with Memorial Day and Labor Day with July 4th tucked in the middle.  Of course, those winter months are pretty awesome for entertaining. They start with Thanksgiving and end with New Years with that big Christmas Day in between. Wow! We do love our holidays.

Thank you to Fairfield Processing for graciously donating the Aluminor Fabric used in this project and sponsoring this blog post. While they provided the impetus, all the opinions, comments and designs are mine.  They did not influence me.

This project is great no matter when you entertain, or if you are just serving everyday food for your family.  It is sure to bring a little festivity to the table. This project is perfect for keeping food warm or cold.  It uses this glitzy fabric from Fairfield called “Aluminor.”

It can cover a 12” round dish that is heaped full of food or even a bowl. I plan on using it for those high domed pies this summer. Here are two blueberry recipes from our favorite cookbook “Spices of the World Cookbook” by McCormick.

Spices of the World Cookbook&nbsp;by McCormick

Spices of the World Cookbook by McCormick

Blueberry Cobbler and Blueberry Crumble Recipes from Spices of the World Cookbook&nbsp;by McCormick

Blueberry Cobbler and Blueberry Crumble Recipes from Spices of the World Cookbook by McCormick

While this project is domed and looks difficult to make, it actually was amazingly easy.  I designed it, sewed it, took pictures of it, and wrote the instructions all in one afternoon.  But I must confess that it would not have been that easy if I had not found an awesome website on the Internet.  It calculated the exact dimensions of the gores and how many gores.  All I had to do was put in the diameter that I wanted and push the enter button.  I have been going around for the past few days feeling like a mathematical genius, when all I really did was find a great website with Google. If you want to make yours a different size just use this awesome site to calculate the size of your gores and add ½” seam allowance and I promise you, you will feel like an Einstein. http://www.domerama.com/calculators/cover-pattern/ But don’t feel intimidated.  I copied my gore, so is all you have to do is download it and cut it out. 

You might want to note that there are seven gores – an odd number, so when I made my alternating silver and gold Aluminor I had 2 colors next to each other.  To offset this I decided to highlight it by putting a label on it.  This will eliminate everyone lifting the lid to see what is underneath since they cannot see through it.  So it accomplished more than I anticipated. Of course, this label is optional and you are welcome to make yours all one color.

For this project, I decided not to use machine embroidery since it is not lined and the Aluminor is on the outside.  I did not want it to lose any of it thermal properties through the needle holes. It is not lined, but there is no worry if it touches food because of it also being food-safe.

My family is starting to think that Fairfield paid me to test these fabrics, but they did not. I just decided to conduct my own unscientific experiment to see how well Aluminor really worked. Here is how I conducted this experiment:

·      3:22 PM - At the same time, I placed 10 ice cubes in a glass container and put them on the table with another 10 ice cubes in the same style glass container, but this one I put under the domed Aluminor dish cover.
·      4:29 PM - After 37 minutes the ice cubes without the cover were already melting and the ice cubes under the cover were starting to melt.
·      5:16 PM – It has been almost two hours since I started the experiment and the ice cubes without the cover are completely melted. The ice cubes under the cover are more than halfway melted.

Conclusion: The Aluminor definitely showed that it was able to keep the ice cubes cold longer when it was used.

DISCLAIMER: While this test showed that the ice cubes stayed frozen longer with Aluminor, it does not mean that all foods would be safe for extended periods of time, so please always be food-safe and follow the USDA Basics for Handling Food Safely.

INSTRUCTIONS

TEMPLATE:

Click here to download circle template

MATERIALS:

12”  piece of gold Aluminor

12” piece of silver Aluminor

Neutral color of good quality thread

Large shank button

Medium sized 2-hole button (strength underneath the shank button)

Coordinating upholstery thread (for the buttons since it is used as a handle)

OPTIONAL: Self-adhesive chalkboard label

SUPPLIES:

Sewing machine and related supplies

Rotary cutter and mat are helpful, but not necessary

Shears & Trimming Scissors

Ruler

Wonder Clips® are preferred, but pins are acceptable

Point turner or some other blunt, but pointed object

Pen or pencil


STEP ONE

NOTE:

This project uses ½” seam allowances.

Do not press this fabric.  Finger pressing is sufficient.  Please see Fairfield’s website for tips on using this fabric. (Please note that there is no longer a sale on the fabric.)

Please read the instructions below before beginning. Gather the materials and supplies. Pre-wash the main fabric, press, and starch. Do not wash the Aluminor.

STEP TWO

Download the template and cut it out.

STEP THREE

Cut the fabrics as follows:

·      Using the template cut four (4) pieces of gold Aluminor

·      Using the template cut three (3) pieces of silver Aluminor

STEP FOUR

With a pen or pencil mark a ½” line at the top of each gore where it comes to a point.

STEP FIVE

With right sides together, sew one gold gore to one silver gore. Start sewing at the bottom of the gore and stop sewing about 2 stitches after the ½” mark at the top of the gore.

Stop sewing about 2 stitches after the ½” mark at the top of the gore

Stop sewing about 2 stitches after the ½” mark at the top of the gore

STEP SIX

Continue sewing the gores together, alternating between silver and gold, until all the gores are connected.

STEP SEVEN

Finger press the seams open. With the wrong side up, zig zag each each seam along the stitched seam. This will keep the seams open.

STEP EIGHT

Place the first and the last gore right sides together and sew in the same manner as above. Zig zag as before.

STEP NINE

Fold the bottom of the dish cover up ½” and edge stitch.

STEP TEN

Sew the button on by hand using upholstery thread so it is stronger since it will be used as a handle. Reinforce the button by simultaneously sewing a 2-holed button on the inside.

STEP ELEVEN

Follow the manufacturer's guidelines and place the chalkboard label in the center of the two gold gores.

Please do not put Aluminor in the washing machine. Please wash by hand and do not crinkle, keep flat while washing and storing.

(Have fun wearing your new hat. LOL! This will definitely need a Clorox wipe as all my children keep wearing it.)

Enjoy your holidays and travel safe!


Dish Cover with Thermal Protection

It is so much fun to entertain during the summer.  Maybe because you can be outside and barbeque. One of my favorite summer dishes is “Deviled Eggs.”  I have this scrumptious recipe for which everyone asks. It is so good that I serve them all year round.

Thank you to Fairfield Processing for graciously donating the Solarize Liner Fabric and Stiffen 2 used in this project and sponsoring this blog post. While they provided the impetus, all the opinions, comments and designs are mine.  They did not influence me.

Deviled Eggs are the type of food that you can prepare the day before, so when it comes time to set the table, I like to put them out early and inevitably there is one or two that do not get eaten, so they wind up sitting on the table for longer than they probably should.  This project is just the solution to solve that problem.

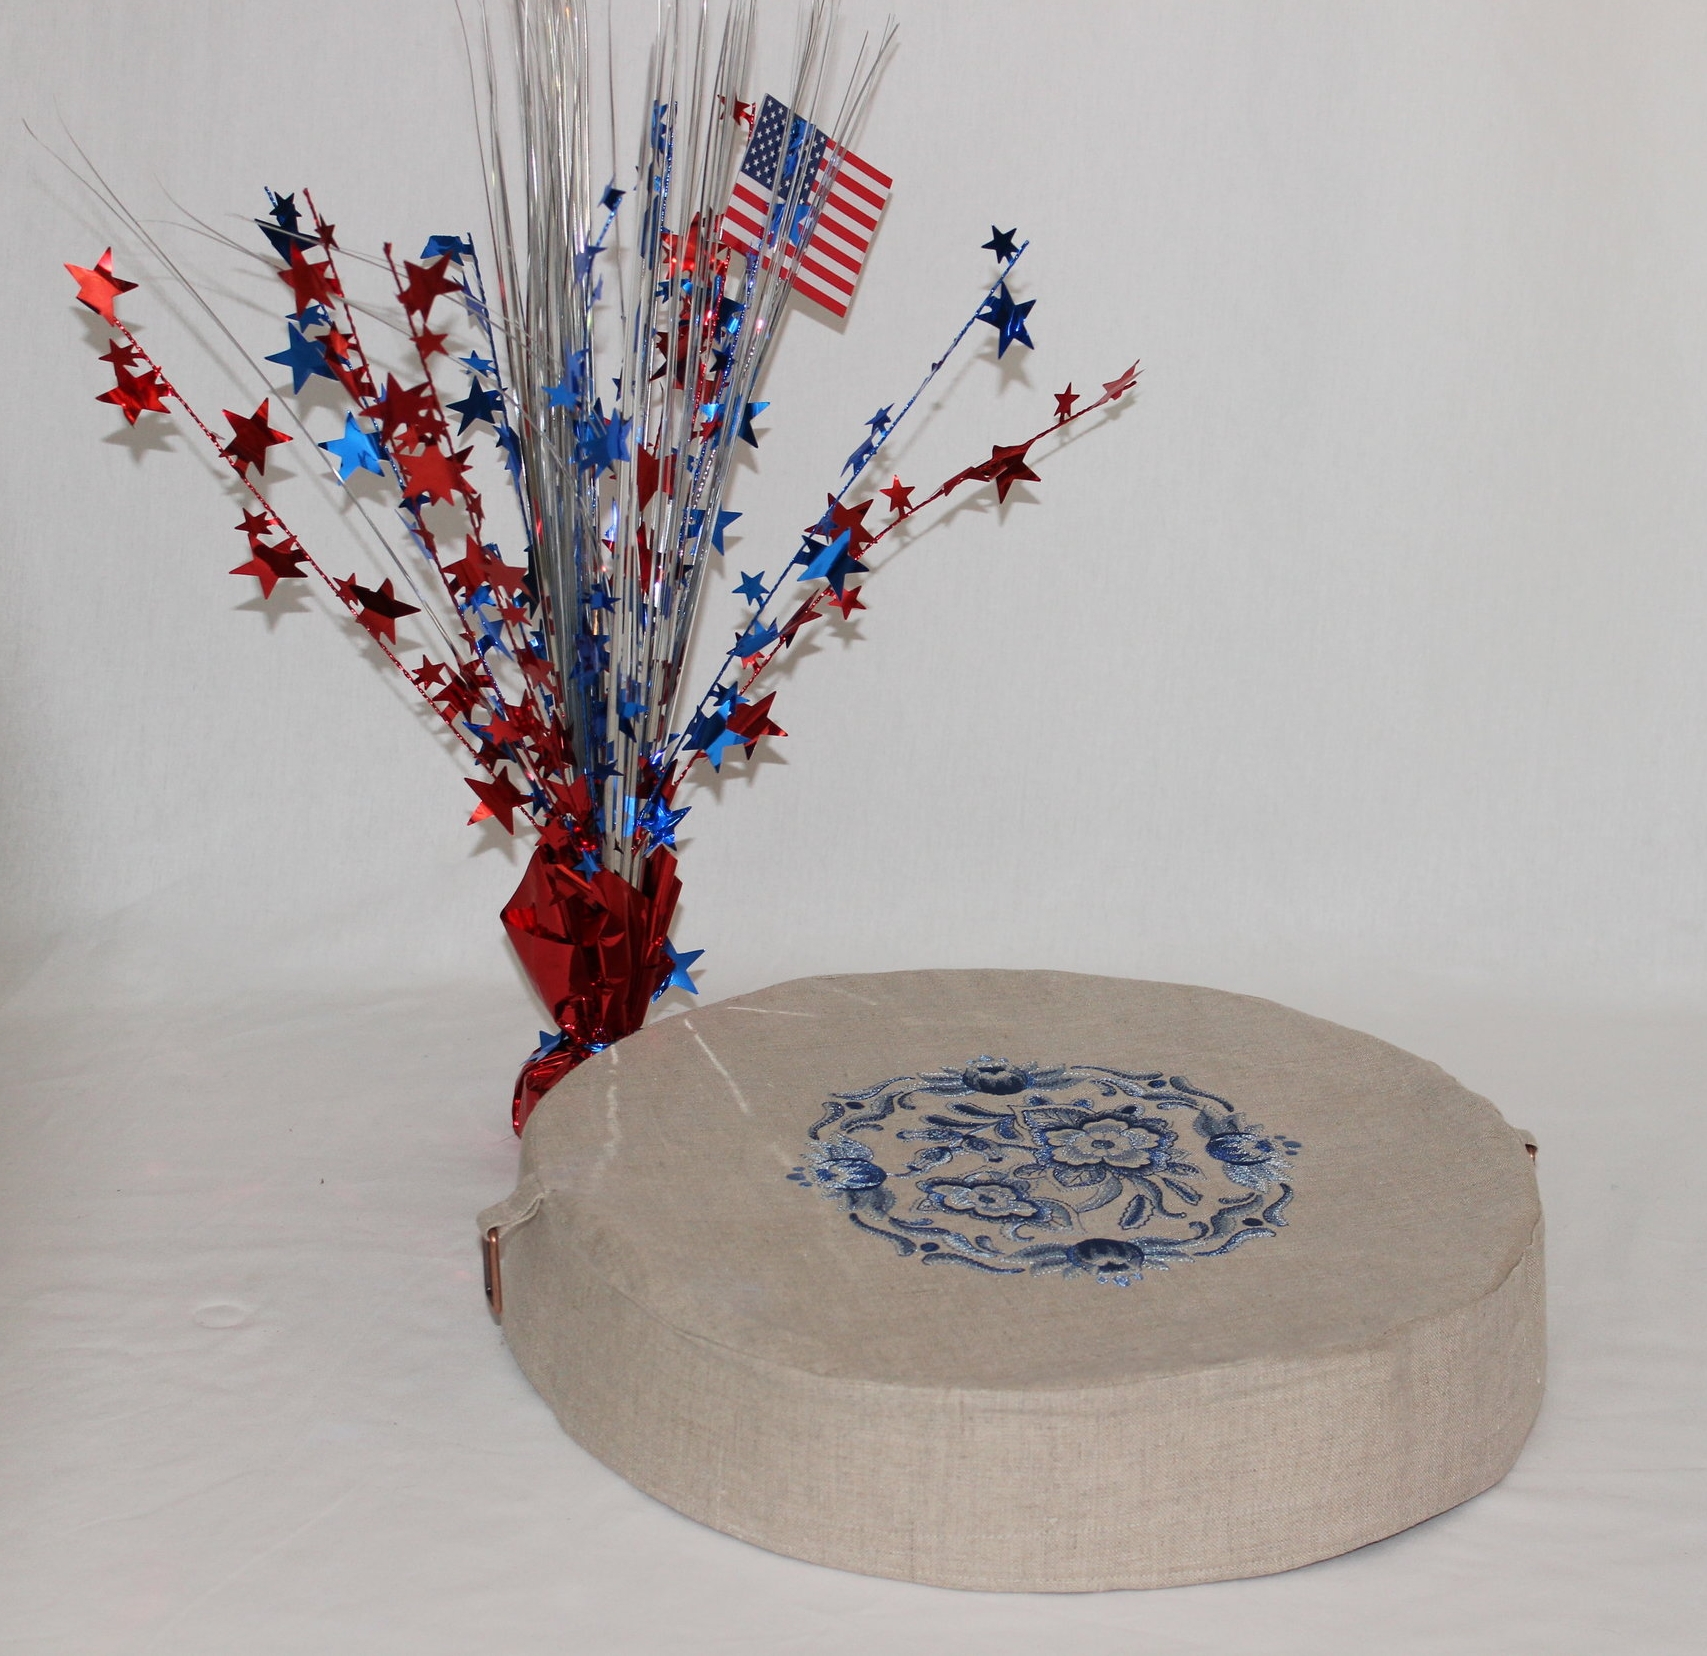
Machine Embroidery Design by Embroidery Library:&nbsp;Delft Blue Floral Medallion I (F8541)

Machine Embroidery Design by Embroidery LibraryDelft Blue Floral Medallion I (F8541)

My deviled egg dish is quite large – 14” diameter, so it is not easy to cover and if I use aluminum foil or plastic wrap, it has a tendency to flatten my nicely piped centers, so I thought a self-standing dish cover was just the trick. The best part is that this project uses Solarize Liner Fabric from Fairfield Processing.  Not only do I now have a dish cover that will not touch my deviled eggs, but they will also be kept cool while they sit on the table.

While I created this dish cover for my deviled eggs, it is extremely versatile.  The Solarize Liner Fabric maintains both cold and hot temperatures and is food-safe.  When my children are home, I make 3-5 pounds of bacon each morning (there are 11 of us and their spouses) and this cover will be great to keep that platter warm while I am serving up the other dishes.

Here is the deviled egg recipe from our family’s absolute favorite cookbook, Spices of the World Cookbook by McCormick. I have not found a recipe in that book that I did not love.

Spices of the World Cookbook by McCormick

Spices of the World Cookbook by McCormick

Deviled Egg Recipe from Spices of the World Cookbook by McCormick

Deviled Egg Recipe from Spices of the World Cookbook by McCormick

Here is my own unscientific experiment to see how well Solarize Liner Fabric actually works. This is how I conducted the experiment:

·      11:123 AM - At the same time, I placed 10 ice cubes in a glass container and put them on the table with another 10 ice cubes in the same style glass container, but this one I put under the Solarize Liner Fabric dish cover.
·      11:53 AM - After 30 minutes the ice cubes without the cover were already starting to melt and the ice cubes under the cover were still whole. (I took off the cover just for the picture.)
·      1:29 AM – It has been two hours and 6 minutes since I started the experiment, and the ice cubes without the cover are completely melted. The ice cubes under the cover are more than halfway melted.
IMG_2567.JPG

Conclusion: The Solarize Liner Fabric definitely showed that it was able to keep the ice cubes cold longer when it was used.

DISCLAIMER: While this test showed that the ice cubes stayed frozen longer using Solarize Liner Fabric, it does not mean that all foods would be safe for extended periods of time, so please always be food-safe and follow the USDA Basics for Handling Food Safely.

INSTRUCTIONS

TEMPLATE:

Click here to download circle template

MATERIALS:

15”  piece of Solarize Liner Fabric

14”  piece of Stiffen 2 by Fairfield (a double-sided fusible, rigid material that is similar to cardboard)

½ to 1  yard of main fabric (I used 100% linen. Amount varies depending on if you want to piece your bias strip or have one continuous piece.)

Coordinating good quality thread

OPTIONAL: 2 Dritz 1” Rectangle Rings in Copper

SUPPLIES:

Sewing machine and related supplies

Rotary cutter and mat are helpful, but not necessary

Shears & Trimming Scissors

Ruler

Wonder Clips® are preferred, but pins are acceptable

Point turner or some other blunt, but pointed object

Iron & ironing board

Pressing cloth

Teflon or Applique Pressing Sheet

Painter’s tape

OPTIONAL: Tailor’s ham


STEP ONE

NOTE:

This project uses ½” seam allowances.

Use a pressing cloth and test all fabrics before pressing.

Please read the instructions below before beginning. Gather the materials and supplies. Pre-wash the main fabric, press, and starch. Do not wash the Solarize Liner Fabric. Also, please read the manufacturer's guidelines on how to use their products.

STEP TWO

Download the template. Print it twice. Cut one for a 15” circle.  For the second circle, fold ½” under on both the straight edges. Now cut. This will be a 14” circle template.

STEP THREE

Cut the fabrics as follows:

·      Using the template, cut one 15” circle from the main fabric (this is the top)

·      Using the template, cut one 15” circle from the Solarize Liner Fabric (this is the lining)

·      Using the second template, cut one 14” circle from the Stiffen 2 (this is the center support)

·      Cut 1 band from the main fabric measuring 4” by 47”

·      Cut 1 band from the Solarize Liner Fabric measuring 4” by 47”

·      Cut 1 band from the Stiffen 2 measuring 3” by 46”

      OR to be cost effective ... use 1 strip measuring 3" by 20" and 2 strips measuring 3" by 13"

·      Cut a strip of the main fabric on the bias measuring 48” (or join several pieces to form this length)

·      Cut 2 pieces of the main fabric to measure 2” by 7”

STEP FOUR

If you are hand or machine embroidering the main fabric of this cover, please do it now; otherwise, any other type of embellishment can be done at the end. I used a machine embroidery design by Embroidery LibraryDelft Blue Floral Medallion I (F8541)

STEP FIVE

Adhere both pieces of the Stiffen 2 to both pieces of the Solarize Liner Fabric in the following manner. Place a Teflon mat on a flat ironing surface. Place the Stiffen 2 on the mat (either side, as both sides are fusible). Now place the Solarize Liner Fabric right side up on top of the Stiffen 2, making sure that it is centered. NOTE: the two pieces stick nicely together, so you can align them facing up and then turn them upside down to verify correct placement.

Place a pressing cloth on top of the Solarize Liner Fabric press to adhere the two fabrics together, following the manufacturer’s guidelines. Do this for the circle and the band. Set both pieces aside.

Please note that if you are using the three strips instead of one continuous piece of Stiffen 2 for the band that you should center the larger in the middle and put the two on each side.  Also, I zig zagged mine twice on the seams to stiffen the seams.

STEP SIX

With right sides together, sew the seam of the band of the main fabric.  It will now form a circle. Press seam open. Do this for the lining as well. Finger press the lining.

STEP SEVEN

To create the two handles, use the two short pieces of the main fabric (2” by 7”) and with right sides together sew each long side, then turn right side out and press.

STEP EIGHT

Fold each strip in half and slip the copper rectangle into the center. Pin each handle on each side of the circle with the raw edges matching raw edges and on the right side of the circle. Tape the handles in place with painters tape to keep them from getting sewn into a seam.

STEP NINE

With right sides together pin the band and the main fabric circle together along the edge.

STEP TEN

Stitch in place, easing for a smooth seam. Using a tailor’s ham, press the seam down towards the band.

STEP ELEVEN

With right sides together pin the Solarize Liner Fabric band and the Solarize Liner Fabric circle together along the edge.

(It looks like a birthday cake.)

(It looks like a birthday cake.)

STEP TWELVE

Stitch in place, easing for a smooth seam. Do not press seams

STEP THIRTEEN

Slip the main fabric over the Solarize Liner Fabric and pin in place.

Turn inside out. Press the main fabric to adhere it to the Stiffen 2, being careful to smooth out any wrinkles. Turn right side out.

STEP FOURTEEN

Fold the bias strip in half. With the raw edge of the bias strip against the raw of the bottom of the band, pin in place leaving three inches of each side. Sew in place, but do not sew the last three inches on each side.

STEP FIFTEEN

Fold the edge of one bias end a ½”. Place the other end of the bias inside this fold piece. Cut it on an angle if necessary. 

Now stitch in place

STEP SIXTEEN

Fold the bias completely to the inside. Press.

Edge stitch and topstitch on each edge. Press.

Please do not put Solarize Fabric Liner or Stiffen 2, in the washing machine, please wash by hand and do not crinkle, keep flat while washing and storing.

IMG_2561.JPG

Enjoy your summer holidays and travel safe!


Cold Trivet for Entertaining

July 4th weekend is here! Are you entertaining? Maybe it is a BBQ with friends and family. Inevitably you will be serving something cold. In just an hour, you can make this easy trivet to keep things cool while your BBQ is heating up.

Thank you to Fairfield Processing for graciously donating the Solarize Liner Fabric and sponsoring this blog post. While they provided the impetus, all the opinions, comments and designs are mine.  They did not influence me.  

Solarize Liner Fabric was totally new to me, but I am in love with this product. It is fantastic for entertaining.  I plan on making several of this project for when I entertain over the winter holidays. 

The unique part of this project is that the cold trivet has five tunnels and the tunnels are filled with frozen freezer pops – the long plastic kind that children love to eat. The Solarize Liner Fabric is under the freezer pops so the properties of the fabric allow the cold to rise. I used thin linen so the coldness would radiate through the fabric on the top.

IMG_2488.JPG

My family thought I was a little crazy, but I conducted my own unscientific experiment to see how well Solarize Liner Fabric really worked. Here is how I conducted the experiment:

·      11:15 AM - At the same time, I placed 10 ice cubes in a glass container and put them on the table with another 10 ice cubes in the same style glass container, but this one I put on top of the cold trivet that was lined with Solarize Liner Fabric and filled with five freezer pops. I also placed a freezer pop in the center because I wanted to see when it melted compared to the ones inside the cold trivet. 

·      11:30 AM - After 15 minutes the ice cubes without the trivet were already starting to melt and the ice cubes on the trivet were still whole.  The freezer pop is still whole.

·      1:01 PM – It has been an hour and 46 minutes since I started the experiment and the ice cubes without the trivet are almost completely melted.  The freezer pop in the middle is completely melted compared to the freezer pop on the right which I pulled out of the trivet. The ice cubes on the cold trivet are halfway melted and the freezer pops inside are starting to melt a little. 

This experiment proved that this simple cold trivet lined with Solarize Liner Fabric and filled with five freezer pops, could keep food longer for at least two hours. I will definitely be using this for all my entertaining whether indoor or outdoor.

DISCLAIMER: While this test showed that the ice cubes stayed frozen longer, it does not mean that all foods would be safe for extended periods of time. For example, if it is a large bowl of potato salad, the salad on the top may not be cold enough, so please always be food-safe and follow the USDA Basics for Handling Food Safely.

The good part is that the trivet can be used for anything cold.  Originally, I had a bowl of potato salad in mind, but then I realized it was great for cold drinks, salad dressings, condiments, and dips – anything that you would want to keep cold while you are entertaining.  Also, it can be used for hot items as a trivet.  Keep it handy in a drawer by your stovetop and when you need to pull that pan off, grab it to put in under the pan. It will keep the pan warm. Double duty!

INSTRUCTIONS

MATERIALS:

12”  piece of Solarize Liner Fabric

1/3 yard of fabric (I used linen)

Frixion Earsable Pen by Pilot (or some other temporary marking pen)

5 freezer pops

Coordinating good quality thread

SUPPLIES:

Sewing machine and related supplies

Rotary cutter and mat are helpful, but not necessary

Shears & Trimming Scissors

Ruler

Wonder Clips® are preferred, but pins are acceptable

Point turner or some other blunt, but pointed object 

STEP ONE

NOTE:

  1. This project uses ½” seam allowances.
  2. Use a pressing cloth and test all fabrics before pressing.

Please read the instructions below before beginning. Gather the materials and supplies. Pre-wash the main fabric and press. Do not wash the Solarize Liner Fabric. 

STEP TWO

Cut the fabrics as follows:

·      Cut one piece of Solarize Liner Fabric to measure 12.25” by 11”

·      Cut one piece of the main fabric to measure 12.25” by 11” (this is the bottom)

·      Cut one piece of the main fabric to measure 12.25” by 13.5” (this is the top)

STEP THREE

Place the top fabric (12.25” by 13.5” ) face up on a flat surface with 12.5” on the sides and the 13.5” is on the top and bottom. Draw the following lines with the Frixion Earsable Pen: (see the picture below for a guideline)

·      a vertical line ½” from the right side

·      a vertical line 2” from the ½” line

·      a horizontal line ½” from the top that runs from the left side to the last vertical line

·      a horizontal line ½” from the bottom that runs from the left side to the last vertical line

·      space four horizontal lines 2.25” from the last horizontal line that runs from the left side to the last vertical line (these are the tunnels for the freezer pops)

IMG_2442.JPG

If you are hand or machine embroidering this trivet, please do it now; otherwise, any other type of embellishment can be done at the end. Please note that the horizontal lines are where it will be sewn and this could affect the embroidery.

Machine embroidery Design:&nbsp;Delft Blue Floral Medallion I (F8541)&nbsp;by Embroidery LibraryBuilt-in Font on the Baby Lock Ellisimo Gold

Machine embroidery Design: Delft Blue Floral Medallion I (F8541) by Embroidery Library

Built-in Font on the Baby Lock Ellisimo Gold

Place this fabric aside and do not iron until the project is complete or you will lose the markings.

STEP FOUR

Find the long side of the back piece of the main fabric (12.25”). With right sides together, sew the Solarize Liner Fabric to the back piece of the main fabric at one of the long sides. Turn right side out. Press. Topstitch.

STEP FIVE

Baste the other 3 sides of the back piece and Solarize Liner Fabric.

Solarize Liner fabric topstitched at the top and basted on the 3 sides with linen on the other side

Solarize Liner fabric topstitched at the top and basted on the 3 sides with linen on the other side

STEP SIX

Fold the front fabric along the ½” mark that runs vertically on the right. Now fold it under ¼” towards the wrong side. This will be a ¼” hem on the opening. Stitch along the edge.

STEP SEVEN

Fold the flap back along the 2” horizontal line. It will be right side against right side. Pin the flap in place. 

Machine embroidery Design:&nbsp;Delft Blue Floral Border (D7039))&nbsp;by Embroidery LibraryBuilt-in Font on the Baby Lock Ellisimo Gold

Machine embroidery Design: Delft Blue Floral Border (D7039)) by Embroidery Library

Built-in Font on the Baby Lock Ellisimo Gold

STEP EIGHT

With right sides together and using Wonder Clips®, clip the front piece to the back piece. The flap will be on the inside facing the right side of the back.

IMG_2472.JPG


STEP NINE

Sew the three sides with a straight stitch. Do not sew the flap. Clip the 2 inside corners only. Then finish the edges with a zig zag stitch.


STEP TEN

Turn right side out and push the corners out with a pointer. Do not press with an iron (or you will lose the markings). Finger press. Make sure the flap is still on the same side as the front.

Machine embroidery Design:&nbsp;Delft Blue Floral Border (D7039)&nbsp;by Embroidery LibraryBuilt-in Font on the Baby Lock Ellisimo Gold

Machine embroidery Design: Delft Blue Floral Border (D7039) by Embroidery Library

Built-in Font on the Baby Lock Ellisimo Gold

STEP ELEVEN

Starting at the bottom of the trivet sew along the horizontal lines with a straight stitch.  When you reach the end of the drawn line stop and backstitch three times. Sew all four lines.

STEP TWELVE

Press to remove the markings. Insert freezer pops and flip the flap to close the opening. A small Velcro dot could be added if this is needed. Add any decorative embellishments. 

Please do not put Solarize Fabric Liner in the washing machine, please wash by hand and do not crinkle, keep flat while washing and storing.

By the way, they do sell tubular ice sticks on Amazon if you are interested in those instead.  This is just a short version.

Here is a BBQ recipe from our favorite Dutch cookbook.

Enjoy your holidays and travel safe!

ANNOUNCEMENT - Now a Designer for Fairfield™ Processing Corporation

This blog post is sponsored by Fairfield™ Processing Corporation. Not because they asked me to write it or that I am getting paid by them, or even though I have received generous boxes of products from them, but because I am now on their Design Team; however, all the opinions are mine.  I assure you that they have had no influence on me.

So many exciting things have been happening around here. I am so happy to announce that I am now officially on the Design Team for Fairfield™ Processing Corporation.  You may have guessed something was up when I blogged about visiting Fairfield in May.

When I first started this blog, I had deliberated on whether I would accept any products or money from sponsors.  Originally, I was going just blog and not accept anything after reading several other bloggers who were purists and felt that sponsorship was not the way to go. To be perfectly honest, I loved Fairfield products way before I ever became a designer so it was an easy decision for me. 

They have so many products and I was amazed to see all of them when I visited. They are a company that is behind the scenes of crafters and sewers.  They make gorgeous batting for quilts, volumes of different pillow forms, interfacings, foam, and many different specialty products.  Basically - Fillers. Their logo is "at the heart of your project." That just captures it! Three products that I was not aware of before I joined, I have come to adore - Shield, Aluminor, and Solarize.  

Shield Liner Fabric is the coolest fabric ever.  I know that if this had been around when my children were young, I would have purchased a bolt of it. Well, with nine children, I am sure it would have been more than one. You can plan on me using this in my designs even though I do not have young children. It is for adults too and besides, I am starting a grandma's hope chest, but do not tell my children. You could just use this product straight with no other fabrics and it would be fabulous for protection.

Fairfield's Shield Fabric Liner

Fairfield's Shield Fabric Liner

The awesome part is that it truly was designed for use everywhere as it is food safe and microwavable. Let Fairfield tell you in their words exactly what it is...

Shield, a moisture & allergen barrier fabric, is a PUL fabric that creates moisture and allergen barrier for improved health and comfort. Sew a layer to the top or inside of your project to create a shield against moisture, grease, pollens, dustmites and dander.

Aluminor is the one that caught my eye. It is a gold or silver quilted thermal fabric that can keep things cold or warm, basically maintaining temperature. This has so many potentials in the kitchen and on the body. The most obvious project would be a fashionable tote to carry food.  Of course, Fairfield  already thought of that.  Here is a link to their project: https://www.fairfieldworld.com/project/aluminor-tote-bag/

Fairfield Project using Aluminor for a Tote Bag

Fairfield Project using Aluminor for a Tote Bag

The next product is very similar but yet very different, It is Solarize. It is used like an interfacing and has the same thermal principles as Aluminor, but is used on the inside. Of course, this product is perfect around food and it is food safe. This product would also be wonderful as a liner in children's boots, and clothing in the winter harsh cold months when they go out to play. Put it in a pair of mittens with a liner of Shield and those children will be making snowmen and snowballs all afternoon. 

Fairfield has a resource center of projects using their products. They have recently started a back-to-school theme of which I have had the privilege to contribute three projects.  You will see those on the blog soon. I am in love with their new indigo dying technique for home decor. All the projects are just gorgeous and their dying technique is so clever. Personally, my favorite is the alpaca tuffet. I had the opportunity to see it in person and I know first hand that the pictures do not do it justice. It is the cutest thing ever.  

Fairfield Project for a Alpaca Tuffet

Fairfield Project for a Alpaca Tuffet

Their website has so many projects to keep you going for a long time. It is link that you will want to bookmark for a resource for projects. By the way, the website is not just for sewers.  There are many projects that do not require sewing.

Many of my readers are beginning sewers, so I know you will be able to use many of the upcoming projects that I have planned. The best part for me is that I have the freedom to even use machine embroidery on the projects I design. So if you have a project in mind that you would love to see come to fruition, send me an email. I would love to hear your ideas.

Happy sewing!


WEDNESDAY WEBSITE CRUSH – Amazing Designs

 Amazing Designs  is a very versatile machine embroidery resource. They are owned by Tacony Coporation, the mother company of Baby Lock, Madeira, and Koala Studios, so you know their name is reputable. Their high-quality designs are worthy of the family name. Their meta tag touts of having 11,000 embroidery designs.  That is a lot of designs from which to choose.

Amazing Design's Bazooples Collection and Baby Lock's built in font

Amazing Design's Bazooples Collection and Baby Lock's built in font

Amazing Designs has an artistic flair with their anthropomorphism that I just love.  

Amazing Design's Tiny Tailor Collection

Amazing Design's Tiny Tailor Collection

Their little animals all dressed in the cutest clothes and doing human activities are so adorable. 

Amazing Design's Tiny Tailor Collection

Amazing Design's Tiny Tailor Collection

My absolute favorite is their Tiny Tailors Collection by Janet Wecker-Frisch. If I were not afraid of embarrassing my family, I would wear these designs on everything, but as it turns out, I only have a cleaning jumper that I embroidered them on. Even then, I get the, “Seriously, Mom!”

Amazing Design's Tiny Tailor Collection

Amazing Design's Tiny Tailor Collection

For those of us who love coloring (so glad that is such the rave these days!), you will love many of their designs, as many of their designs are outlined in black.  I am so drawn to them (pun intended). I think the outlining makes them pop, but these are the kind of designs that you really have to make sure that it is hooped tightly or the outline will shift even so slightly.

Amazing Design's Bazooples Collection

Amazing Design's Bazooples Collection

As you would expect they have pages for tips and techniques, projects and lots of other resources. There are several links, so surf around, you will find lots of treasures.

They have a page of freebies that can be downloaded monthly.  Do you have a list of websites that you can click on to download their free designs monthly? I am in the process of developing such a list that I will share publicly, and would love to add your favorite, quality developers to the list.

Amazing Design's Tiny Tailor Collection

Amazing Design's Tiny Tailor Collection

While I have fun writing about quality machine embroidery websites regularly, I must admit that I do not have much will power, and wind up finding a collection or two to purchase when I am gathering the links for this blog. This week I noticed that Amazing Designs was having a great sale under the “Specials” category on so many of the designs I had on my wish list.

So many designs, so little time! Happy stitching!

Behind the Scenes – Fairfield™ Processing Corporation

As sewists, we cannot take anything for granted.  When we sew those projects we know completely how they are constructed, but for most people, those projects are a complete unknown to them. Take a simple stuffed animal. People may know that it is filled with a poly-fil since on some occasion they have probably seen one fall apart, but they do not know all the choices that it could have been filled with and if any stiffener was used to keep its shape.  So much goes into the construction of a sewn project and these fillers truly are “at the heart of your project.”

Fairfield Processing Corporation www.FairfieldWorld.com is “at the heart of your project” as a leader in manufacturing quality fillers.  Fairfield is located in Danbury, CT, and being a resident of CT, I had the privilege to have a behind the scenes tour with them.

The company is 77 years old and began as a manufacturer of natural fillers for hats and clothing. It is no wonder that they would be located in Danbury as at one time Danbury, CT, was the “Hat City of the World,” with 56 hat shops in Danbury by 1809. [https://connecticuthistory.org/the-danbury-hatters/ ]

I would surmise that the company name was derived from the name of the county which they resided, Fairfield. 

One could spend a whole day just reading the captions of the historical pictures that line the halls of Fairfield™ . It looks like a museum with its pictures of hat manufacturing and hat memorabilia. What an inspiring place to work with such a rich history.

History is not the only thing that lines the halls.  Gorgeous quilts and fiber art are everywhere.  Each office is a showcase. I wanted to know about the creator and history of each one, but there was not time – business must go on, and I did not want to impose.

IMG_4938-1.JPG
IMG_4931-1.JPG

Down at the end of the hall, is where all the magic happens. All those wonderful fillers are magically turned into creative, fun-filled projects. The door opens to the spectacular showroom that showcases most of their products. There are completed projects everywhere and there were even a few that they allowed me a sneak-peek.  They did not say, but I think they will be revealed this week at Quilt Market. I have been searching my Instagram account for them. 

Robin Dann and Tricia Santamaria, are the driving forces behind this creative “Design Team,” which is also comprised of sewists and crafters nationwide that create using Fairfield products. [I apologize that none of my pictures came out well of these ladies.  Next time I will have to check for blinking before I leave.]

As you would imagine they have a sewing room tucked in the midst of all this. Adilia Duarte has the wonderful privilege to be the sewist for Fairfield.

She has been with them for the past 29 years.  She started out in manufacturing and knew her first day on the job that she was not meant to be in manufacturing.  She told her supervisor and husband that she was not returning, but she did return, and I know she is glad she did, because just a few months later she found her way into a lifetime career of a sewist at Fairfield. When someone has an idea, she is the person that brings it to life. She creates simple stuffed friends, as well as beautiful ball gowns. Her closet is her inspiration. She knows what it has and what it can become. This Juki sewing machine has been her life-long friend.

She was so gracious to tell me all about her sewing adventure at Fairfield™, and as you would expect, she also provided me with tips along the way.

Here is one tip... be careful with your foam.  Do not take it out of its packaging too soon, as the oxygen turns the foam a different color.  It does not affect the integrity of the foam, but it can be an eye-sore.

Each one of the projects sitting out, she knows who made them and why they were made.  She is the Fairfield historian as well.

A sincere thank you to everyone at Fairfield who allowed me this wonderful behind the scenes tour and who have asked me to join the Fairfield “Design Team.” Followers will benefit from this relationship, as you can expect to be seeing many free sewing projects posted on this blog. A special thank you also to Abby Glassenberg at www.whileshenaps.com.  It was the article in her newsletter that lead me to Fairfield™.

Behind the truck in front, are several eighteen wheelers that are being loaded for a store near you. 

Wednesday Website Crush - Adorable Ideas

John Deer is the driving force behind the website Adorable Ideas and technically, Ultimate Stash is the website that offers the machine embroidery designs.  Adorable Ideas is the parent company that also owns Digitizing Made Easy, for which John Deer is really known. To make it even more confusing, do not type in “John Deer machine embroidery” into google or your hits will come back with lots of tractor designs. You probably noticed this, but John Deer does not spell his name the same as the tractor company John Deere.

Ultimate Stash Design Aspm051

Ultimate Stash Design Aspm051

John Deer is a third generation embroiderer.  His family began designing Schiffli lace on looms around 1910 and has passed down that skill to John Deer. [Digitizing Made Easy by John Deer, 2007] What an incredible heritage. 

On the top bar of their website is the Learning Center that includes: Classroom, Inspiration, and Tutorials. All three of these sections will keep you busy learning for a long time.  Personally, I love seeing the exquisite gowns made with the Schiffli lace.

Close up Ultimate Stash Design Aspm051

Close up Ultimate Stash Design Aspm051

The designs on the Ultimate Stash website are a very high quality. You can tell that it comes from many years of experience, but it is most evident when you click on the lace designs. They are gorgeous.  This is really authentic Schiffli lace that is available to every home embroiderer.  Before my husband bought me my embroidery machine, I never dreamed that I would have the ability to create such beautiful, authentic lace.  It has been such a joy to me to find this site.

Close up Ultimate Stash Design Aiml015

Close up Ultimate Stash Design Aiml015

My favorite purchases are from his “Vintage Lace Project Series” hosted by Janet Carley.  These lace projects are so elegant. You learn professional methods of using the lace designs on projects. I am not sure if they are still available as I could not find them on the website any longer.  I now wish I had purchased all of them. 

The website does have many designs that are not lace oriented.  They have a free design for you to try. In addition to regular designs, they specialize in “Sparkle Designs;” and they offer kits as well to accompany the designs.

This bride and groom lace motif is just lovely and makes a wonderful wedding card or can be added to even an anniversary gift.  

Ultimate Stash Design Mesa043

Ultimate Stash Design Mesa043

Have fun machine embroidering and I hope you enjoy the Adorable Ideas website. 

Wednesday Website Crush – Sue Box Creations

Lace is incredible to make on an embroidery machine. It is so gorgeous and so easy to sew.  It uses a technique called free-standing, which basically means that the design does not need it to be embroidered onto fabric.  It is embroidered on a stabilizer that is water-soluble.  It washes away and only the threads remain.  The digitizing for free-standing lace is a different technique than for regular designs. Each thread must connect to another thread and they must build upon each in order for the threads to not separate when washed.  This technique is difficult to master and it is where you can tell a novice from a master.

"Just Lace" machine embroidery design by Sue Box Creations

"Just Lace" machine embroidery design by Sue Box Creations

Sue Box Creations is a website from Australia that specializes in beautiful laces and exquisite designs. She offers a variety of free-standing laces that can be made into doilies and hankies, as well as traditional galloons.

"Just Lace" machine embroidery design by Sue Box Creations

"Just Lace" machine embroidery design by Sue Box Creations

While galloon laces are traditionally sewn free-standing and then sewn along the edge of a garment, they can be sewn directly onto the garment.  This is especially useful when it is a child’s garment that will used for every day use or as in this case a blue jean garment that is used around the house for every day chores and gardening.  It withstands a lot of abuse and has held up over the years because the lace was sewn directly onto the front of the jumper. This way it cannot snag or get caught on anything while I am working.

"Just Lace" machine embroidery design by Sue Box Creations

"Just Lace" machine embroidery design by Sue Box Creations

In my mind, there is nothing like her 3-D swan. It is so awesome and so impressive to give as a gift. People will not believe that it is all thread. We have made several of these swans that take many hours and lots of thread to complete, but they are worth every bit.  The picture below is from their website as we did not keep any for ourselves and did not take a picture before we gave them away.  Of course, I will have to fix that soon. As you can tell, they are just as much fun to give-away as they are to keep.

"3D Lace Swan"&nbsp;machine embroidery design and image by Sue Box Creations

"3D Lace Swan" machine embroidery design and image by Sue Box Creations

As with great machine embroidery digitizers, she has free downloads. There are currently thirteen free designs that show off her talents and one template. I personally just love the detail of the dragonfly.

If you love 3-D lace or are just curious on how it works, she has a free lace motif that when sewn together creates a lovely 3-D bowl. It takes 6 of the triangles to make one bowl.  You sew them together by hand or with the sewing machine. She has instructions with the download.

Free "Lace Gift"&nbsp;machine embroidery design by Sue Box Creations

Free "Lace Gift" machine embroidery design by Sue Box Creations

Make sure that you sign up for their newsletter as they offer complete CD’s with free shipping for half off, free designs, $1 and $2 designs, and many other wonderful offers. Hope you enjoy these designs as much as I do. 

Wednesday Website Crush – Martha Pullen Company

Martha Pullen Company is known for many wonderful things in the sewing world.  I think heirloom sewing and Martha Pullen's former magazine, Sew Beautiful, would be first in most people’s minds, but they are equally known for their exquisite machine embroidery designs. 

They have two ways to purchase machine embroidery designs.  The first is the standard way of searching for a design on their website and downloading it or having it sent to you in the mail, but they also have an incredible embroidery club. 

The embroidery club has an abundance of gorgeous designs for a set price. At $69 a year, it is a wonderful deal.  In the years past, you received at least two alphabets, a total of nine sets of designs to start the membership, and then at least two designs each month.  The design sets have included exquisite christening gown designs, smocking in-the-hoop, Christmas ornaments, baby booties with matching bonnets, and so many other designs. 

In addition to their designs, Martha Pullen Company offers videos and classes on how to machine embroider.

My all time favorite design from Martha Pullen Company is their free-standing lace nativity ornaments.  They are just beautiful and stitch out so precisely. I just love making and giving them every year as gifts. In case you are looking for them, they are still available in their 2013 collection.

While you are at it, if you are not familiar with heirloom techniques, you may want to add them to your repertoire. Martha Pullen is the originator of French hand sewing techniques on the sewing machine. 

Wednesday Website Crush - Urban Threads

There are some companies who just seem to know what is trendy and can set the pace before everyone else.  Urban Threads is definitely one of those companies in the machine embroidery industry. If you want to know the latest and impress your friends and family with your “in-the-know,” spend some time perusing their website


At first glance you might judge them to be all skulls and tattoo type designs, but look a little further and you will find something for everyone.  While they may have a very hip culture, they also are very diverse.  They range from a typewriter letter font to a gorgeous lace envelope to heraldic lions to French Napoleon bees. They even have unique wedding designs. These designs just do not get any better from a style as well as a quality perspective.


In addition to offering high quality and versatile designs, they provide a great “Lookbook” gallery and tutorials.   One year my teen boys loved the non-traditional placement of designs on their T-shirts that had been featured on the Urban Threads website. This website keeps me up to date with the latest trends that really surprise my children.


Signing up for their newsletter insures that you will be able to take advantage of those wonderful sales and keep informed on all the latest addition of designs.  However, it will not keep you up on the freebies.  You will have to check periodically for those. Have fun surfing through this great website and do not forget to try one their designs for free or on sale.

Wednesday Website Crush - Zundt Designs

Machine embroiders have the unique ability to create one of a kind projects, but they also have to ability to have access to quality embroidery designs that are only available to the elite of the fashion industry. Zundt Designs is one of those high-end embroidery designers, which also has a long legacy with the historic embroideries of St. Gallen, Switzerland.

Zundt Designs is known for their exquisite lace. They have every kind of lace your can think of such as motifs, corners, jewelry, ornaments, 3-dimensional, and of course, the traditional galloon.

The typical machine embroidery design is always realistic and highly detailed. They range from animals to children designs, but their precision flourishes in their vast flower collection.

Zundt has a unique project section entitled “Adorations.” It showcases their gorgeous designs in projects. Each project has designs and design workbooks that fully explain the projects and demonstrate how to use lace like the professionals. These projects encompass a vast breadth of areas from garments and quilts to window treatments and tablecloths.

As to be expected, the alphabets designed by Zundt are impeccable and follow the lines of elaborate historical fonts. Any one of them would make a monogram that would impress even the hardest to please.

To allow machine embroiders to test their superb designs, they currently offer three designs for free – a beautiful rose bud, a lace bow, and a free-standing lace ornament.  All three are just wonderful and are a delicious taste of their other elegant designs.  Hope you have fun trying them. 

Wednesday Website Crush – Embroidery Library

What is the one thing you would want on a deserted island?

Ask ten people that question and you will get ten answers. 

"Desert Island" Image courtesy of Wikipedia.

"Desert Island" Image courtesy of Wikipedia.

Honestly, how can you ever answer that question. Just thinking about it can boggle your mind.

Well, in my fantasy world, my deserted island has running water, electricity, and of course, an embroidery machine under a palm tree. (Did you see it all in the photo?) What more could I ask for? Unlimited blanks and designs!

Embroidery Library, Inc. would be one design supplier that would be able to keep me happy on my deserted island. With over 100,000 quality embroidery designs, how could I ever run out? Can you imagine how many designs that is! In a hundred year period, I would have to embroider over 2 designs a day just to use them all.  Now granted, not all of those are unique designs.  Some are just size differences, but even if you take that margin off, it still leaves you with a lot of designs.

These designs seem to fill most of my needs when I am thinking of a project.  They seem to have every style imaginable: filled, watercolor, red work, black work, sashiko, trapunto, embossed, free-standing lace, applique, in-the-hoop, etc. Personally, I cannot think of a category in which they do not have an embroidery design.

While their designs are of the highest quality and they offer so many, you would think that would be the end of it. However, they far exceed our expectations as they are also an educational website.  Do you need to know how to embroider on velvet, paper, or that ever so popular toilet paper? They have it all explained in their “Projects” section. 

The “Projects” section has a wealth of information.  Think of a project and it is there with a complete description of how to complete the project with the appropriate types of fabric that work well with the specific designs, the best stabilizer, threads and needles.

The “Fabric 101” section is my favorite.  I have never needed to buy expensive embroidery books or take classes because this website was right at my fingertips.  It is books and classes on machine embroidery all wrapped up in one nice spot.

As to be expected of their professionalism, they have a weekly newsletter that highlights their latest additions to the library and includes the wonderful weekly sales.

The best part is that every month they offer free designs, which is from their normal library of designs.  They are not simple or watered-down designs, but actual designs that are normally for sale.

Now the question almost as hard as the deserted island question, “What is your favorite design from Embroidery Library, Inc.?”

Wednesday Website Crush

Welcome to Website Crush Wednesday – a new series for machine embroiderers.  This week is just an introduction to the future series because the first website is a biggie.  It has such a wealth of information that it will take a very long blog post to cover.

Each week (hopefully) a new machine embroidery website will be featured. There are so many great websites out there and so many that need to be discovered.  Probably in the beginning you will be quite familiar with the websites, but for those of you who are new, maybe not.

To be honest, I will only review a website that I have personally tested one of their designs. This is to make sure that the designs themselves are high quality, which is a topic for another blog post. The website must have a good reputation and sell original designs.  Initially, I will focus on freestanding shops that produce their own designs in house.

Is there a website that you go to regularly or on special occasions, please let me know about it. I would love your recommendations. Maybe you are a shop owner and would like to be featured.  I am open to your recommendations also, but I will make a disclaimer that I was contacted for review.

All the commentary will be my own and there is no compensation involved. I would love to know your comments as well.  

The best part is that eventually I will publish a list of all the websites reviewed and you can use it to click on or to remind yourself when you are looking for a particular design.

So until next week, happy embroidering!


How to Sew a Pillowcase Dress

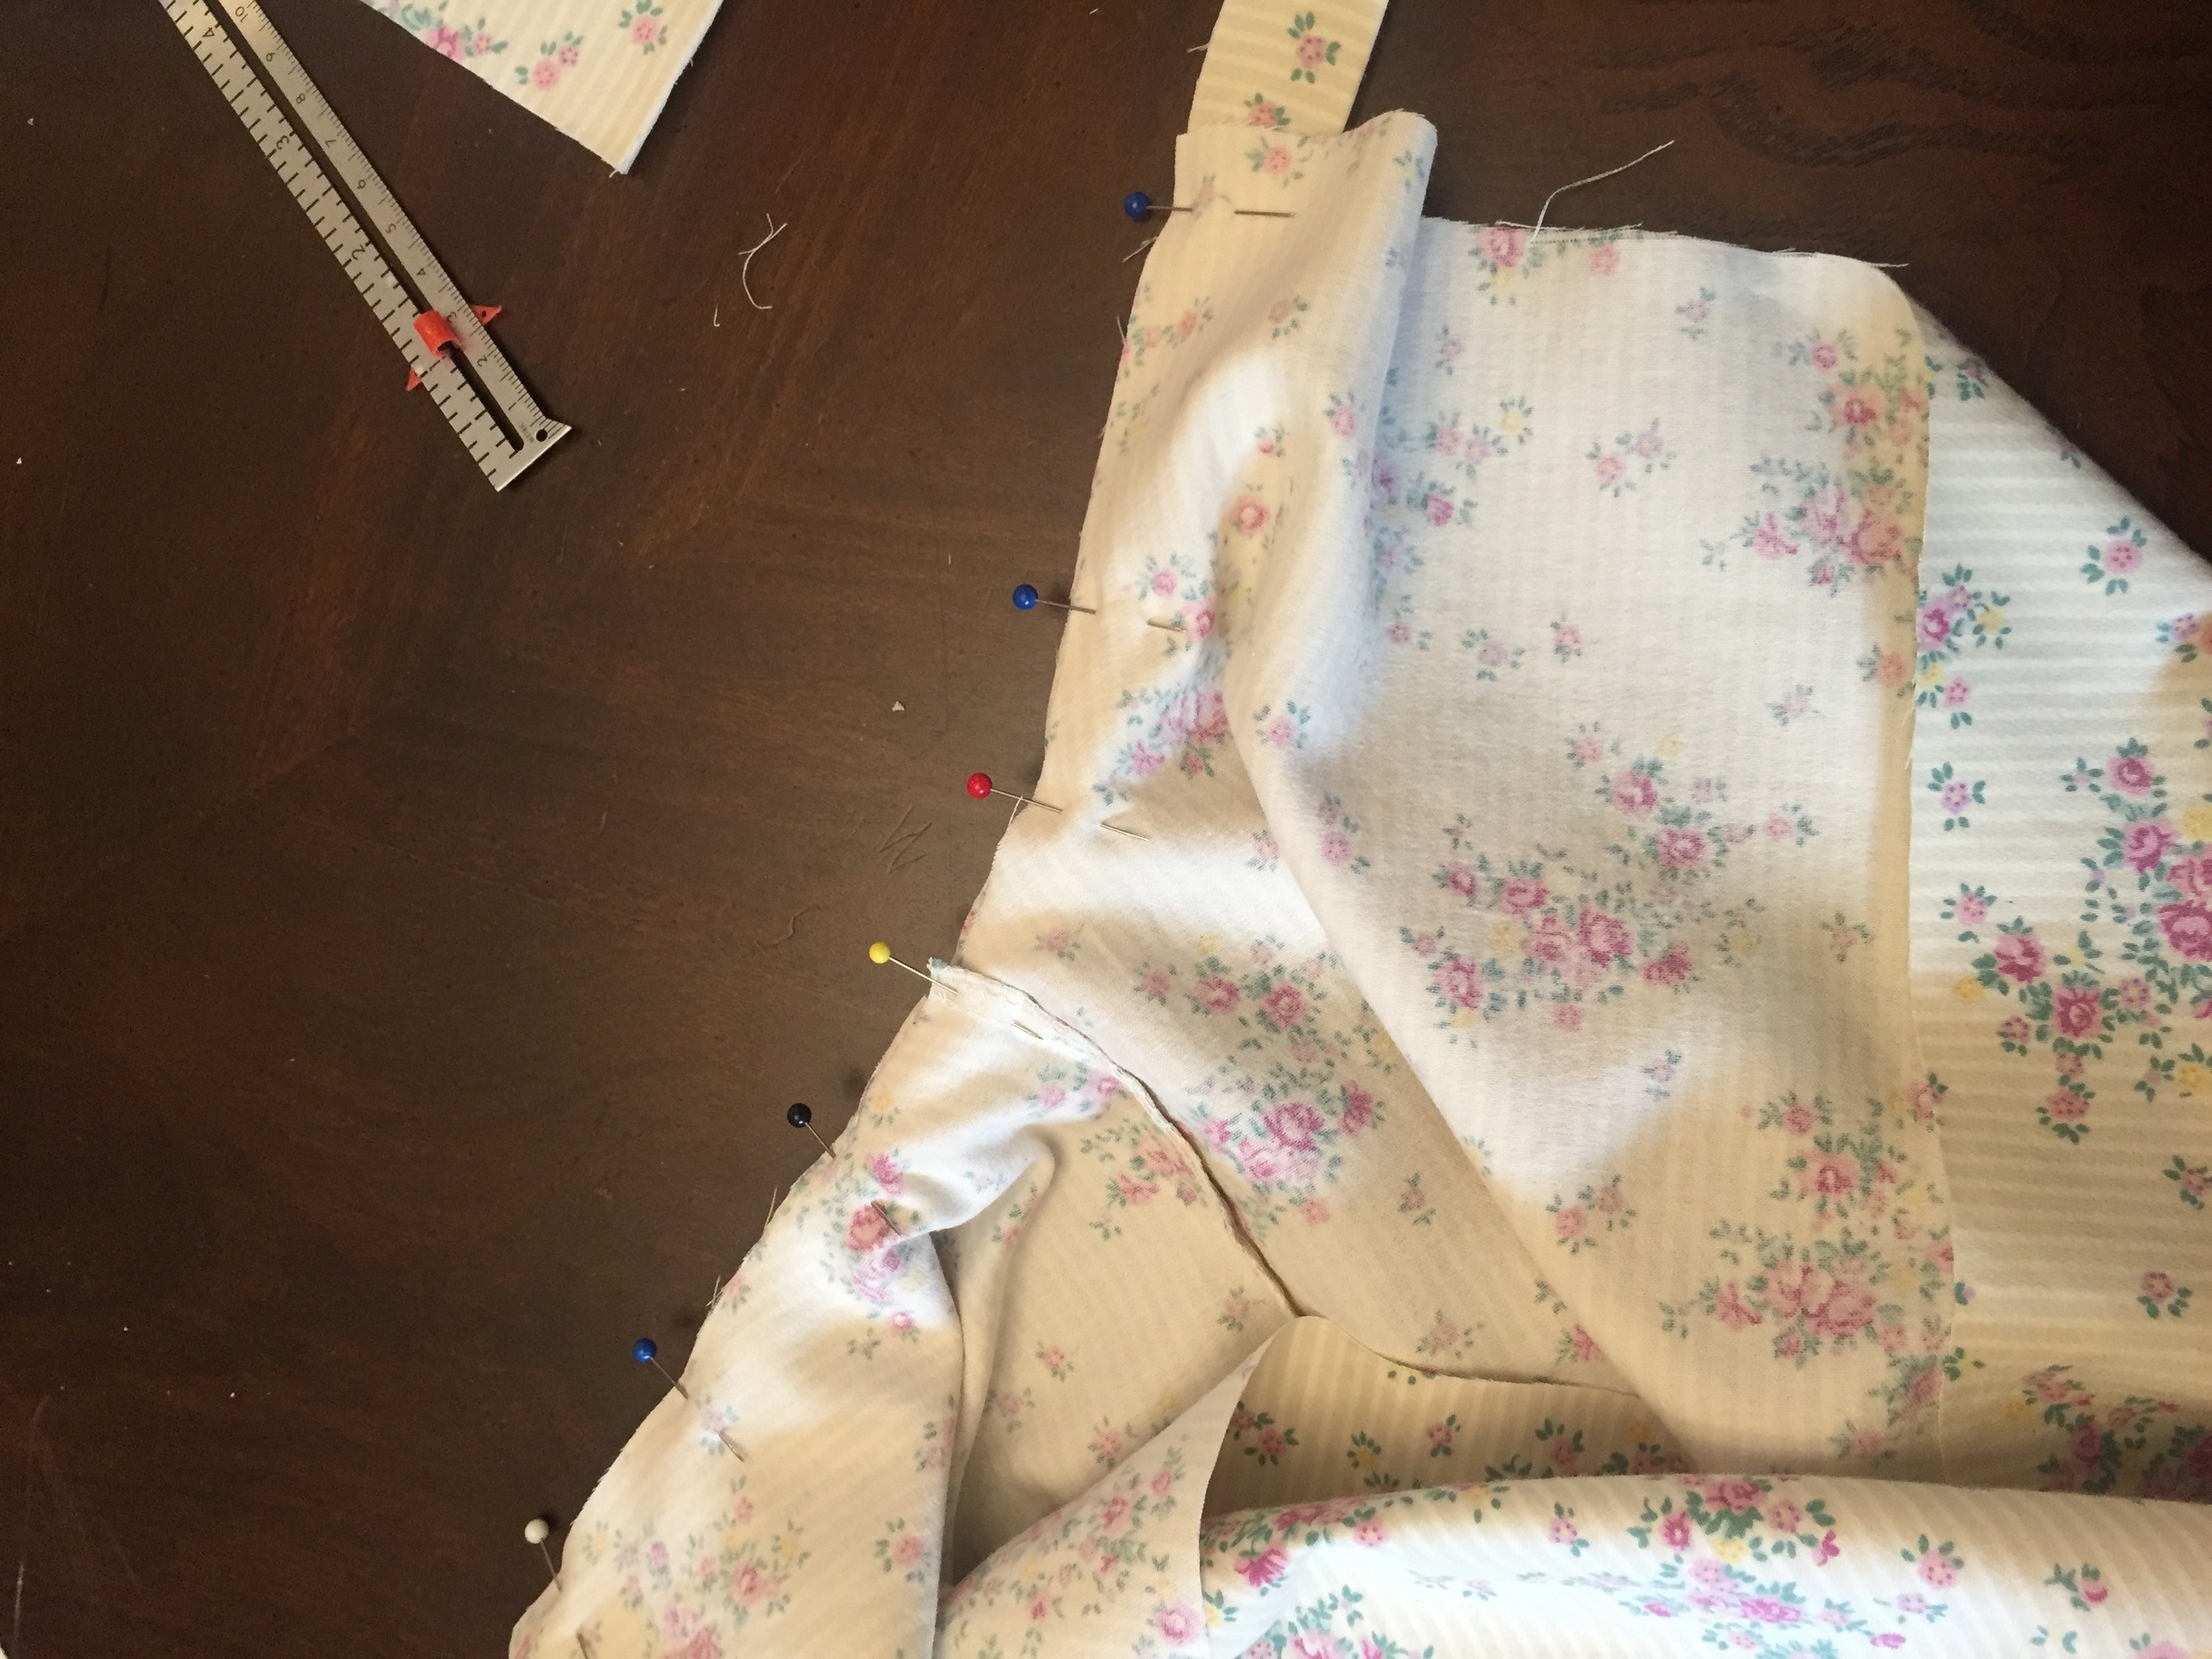
The best sewing projects are when they are done together with a friend. A friend of mine texted me, and asked if I would help her reestablish her sewing skills by making pillowcase dresses for her daughters. Oh, I loved the idea – fellowship and sewing – it does not get any better than that.

Pillowcase dress on the sweetest girl with a matching purse and rosettes made by her mom.

Pillowcase dress on the sweetest girl with a matching purse and rosettes made by her mom.

Simplicity has a pattern designed just for pillowcase dresses. Pattern 2391 sounded like it was just perfect for her first project in several years.  We started out by perusing the pillowcases, the pattern, and finally finding dresses that were a good fit and length for the girls, so we could use them as a guide, since the girls were in school and we could not measure them.

After scanning the pattern and the instructions, I decided that view A and C were best, as they did not have the bottom band and I cut it out the front piece quickly. We measured the front piece with the girls’ dresses and then with the pillowcases to make sure that it all fit. The pattern uniquely has two instructions – one for fabric dresses – one for true pillowcase dresses. We opted for the dress made from a pillowcase.  My friend had purchased them so inexpensively and that was her goal with a pillowcase dress - inexpensive repurposed dress.

My big mistake, which turned out to be a good modification to the pattern, was that I did not see where it called for bias binding on the envelope.  It is usually in the “Notions” section, but it only said, “Thread. Look for Simplicity notions and Wrights trims.” That did not help as the pattern instructions clearly set out steps for using bias tape.  I did not know how wide or how much. That was fine with me, I love making my own bias, so I did not look any further on the pattern envelope and just proceeded to instruct my friend on making her own. So here are our instructions on how to make a pillowcase dress. (By the way, the pattern envelope does tell how much and how wide, but it is in the middle of the envelope after the fabric yardage for each view.)

How to Sew a Pillowcase Dress

(with bias made from the pillowcase)

STEP 1 - Gather supplies

Pillowcase (do not cut any seams)

Coordinating thread

2 3/8 yard of ribbon

Measurements or one garment such as a dress that can be used for measurements

A pattern or a garment that can be used for drafting an arm opening (aka armscye)

STEP 2 – Fold the pillowcase lengthwise. Layout the dress on the pillowcase to determine the placement, width and length of the dress. Mark or otherwise indicate the top of the dress. 

STEP 3 – Place the armscye )sleeve opening) pattern or dress on the seams of the pillowcase, lining up the top with that of the top line that you measured in Step 2.

STEP 4 – Cut the armscye and the top of the pillowcase straight to the edge of the fold.

Notice that we had extra width compared to the pattern, but that was good and could be taken in when gathered by the ribbon.

Notice that we had extra width compared to the pattern, but that was good and could be taken in when gathered by the ribbon.

STEP 5 – With the leftover pillowcase fabric cut four 2 inch strips that are the width of the pillowcase (not the diameter – you can cut the seams so there are two widths when you cut).  Two will be used for the bias binding on the sleeve openings (armscye). Two will be used for the casing on the neck for the ribbon.

STEP 6 – Press two bias strips in half lengthwise.

STEP 7 – Press the other two bias strips with a fold ¼” from the bottom.

STEP 8 – Pin the bias strip that has been pressed in half to the sleeve opening on the right side. 

2016-04-15 11.10.24.jpg

Cut any extra bias fabric at the end to match with the armscye. Do it for both armscyes.

STEP 9 – Sew the bias strip to each armscyce using a ½” seam allowance.

STEP 10 – Press the bias strip flat.

STEP 11 – Trim the seam allowance to 3/8”.

STEP 12 – Fold the bias strip down and sew it close to the edge. 

STEP 13 – Press the armscyes.

STEP 14 – To make the ribbon casing, pin the other bias strip with the ¼” fold to the neckline and fold the ends in about ½” from the end. Cut any extra bias fabric at the end to match with the neckline. Do it for the front and back.

STEP 15 – Press the bias strip flat – being careful not to loose the ¼” fold.

STEP 16 - Fold the bias strip down and sew it close to the edge of the ¼” fold.

STEP 17 – Press the neckline.

STEP 18 – Cut the ribbon in half and thread each through the casing made at the neckline. Do this for the front and the back, then tie the ribbons together at the shoulders to finish the dress.

My friend and I had a fun and productive morning together, but it was too short, so we decided that we needed to do it again soon. She would love to continue repurposing. What sewing projects have you sewn that are repurposed?


How to Prep Fabric for Neckline Embroidery

Machine embroidering a garment is so much fun.  You get the pleasure of both embroidering it and wearing it.  Many of us just embroider to enhance premade garments, but on those special garments, we even break down and create the whole garment. We do not get to do as much embroidering, but for some of us, garment construction is as much fun (well…almost).

Personally, I get extra enjoyment when I am embroidering for my family. My college daughter asked me to embroider her a Mexican flower peasant blouse, but after purchasing several patterns and fabrics, we settled on a tunic design.

She chose Simplicity 4149 with the cap sleeves from Simplicity 1461.  The fabric is a handkerchief weight cotton from Spechler-Vogel. Choosing the embroidery design was the easiest part.  I just loved Embroidery Online's Flores de Mexico. It looks and sounds so authentic. Their color combination that they chose to stitch out is just beautiful with a rich turquoise. My daughter chose a bright and neon combination from Floriani that just pops and screams, "Young."

It took me a little while before I had to courage to tackle this project as my daughter is a great machine embroider and I knew she would not be happy if the placement was not just right, but I also knew that if anyone would appreciate it, it would be her. 

The best strategy that I decided was to prep the fabric with all the necessary markings. When I purchased the fabric I did not have the foresight to buy extra since I knew it did not have a nap or a design. Next time I would definitely buy an extra half yard so I could put it in the hoop comfortably. Since I was right up to the edge on everything, I decided that I did not have any room for mistakes and would embroider with that mind set.

All the other pieces were cut out and I left the front of the pattern uncut. I traced the front pattern with a blue chalk onto the fabric. I knew that after multiple hoping that the chalk lines would not remain and I was not sure if they would be visible to the sewing machine's camera, so I decided to baste the chalk lines with a red cotton thread.

The seam allowance on the neckline was very important, as well as, the center front line and the placement for the front placket.  

In hindsight I needed the sleeve seam allowance also, so I wound up drawing them in when I was at that point.

For me the biggest decision was what stabilizer to use.  My daughter kept insisting that she wanted a wash away, but my I did not feel comfortable doing that with such a lightweight fabric combined with a heavy design.  That was not a good mix in the first place. I practiced with a wash away and was not happy with it. She loves the convenience of the tear away, but I went against all her wishes and used the "No Show Mesh Nylon Cutaway Fusible Stabilizer" by Floriani. Of course, I was a smart mom and did not tell her what I used until she said she loved it. 

The stabilizer was applied to cover the entire area that was going to be embroidered, including the area where it would need to be hooped, but the fabric would not be in the hoop. Here is where I would have loved to have had those extra inches of fabric, but since the fabric was so thin, it would hoop so evenly and tightly that it would not even make a difference.

My daughter loved the placement of the Embroidery Online tunic, so I tried to duplicate it as much as possible. After close examination, we determined that the main bottom center design was actually two designs stitched on top of each other. 

The camera and snowman feature of my Babylock Ellisimo Gold were lifesavers. Even in the placement of the first design I used the snowman first, then the camera, to make sure the placement was exactly matched up with all my stitching lines.  Thankfully, it was right where I wanted it. I stitched the first design and then used the camera to find the placement of the second design. Presto! Right on the mark again. I cannot imagine having embroidered this project without that scanning feature. 

Most everything fit exactly as I had imagined it, with the exception of the sleeve area.  The very end of the scroll goes into the seam allowance, but that was adjusted when I sewed by taking it just right to the edge of the scroll and right there is the best part about constructing your own garments instead of purchasing them to embellish. 

Which do you prefer to embroider on - ready-made garments or constructing your own garments?