Having Fun with OlyFun Ornaments

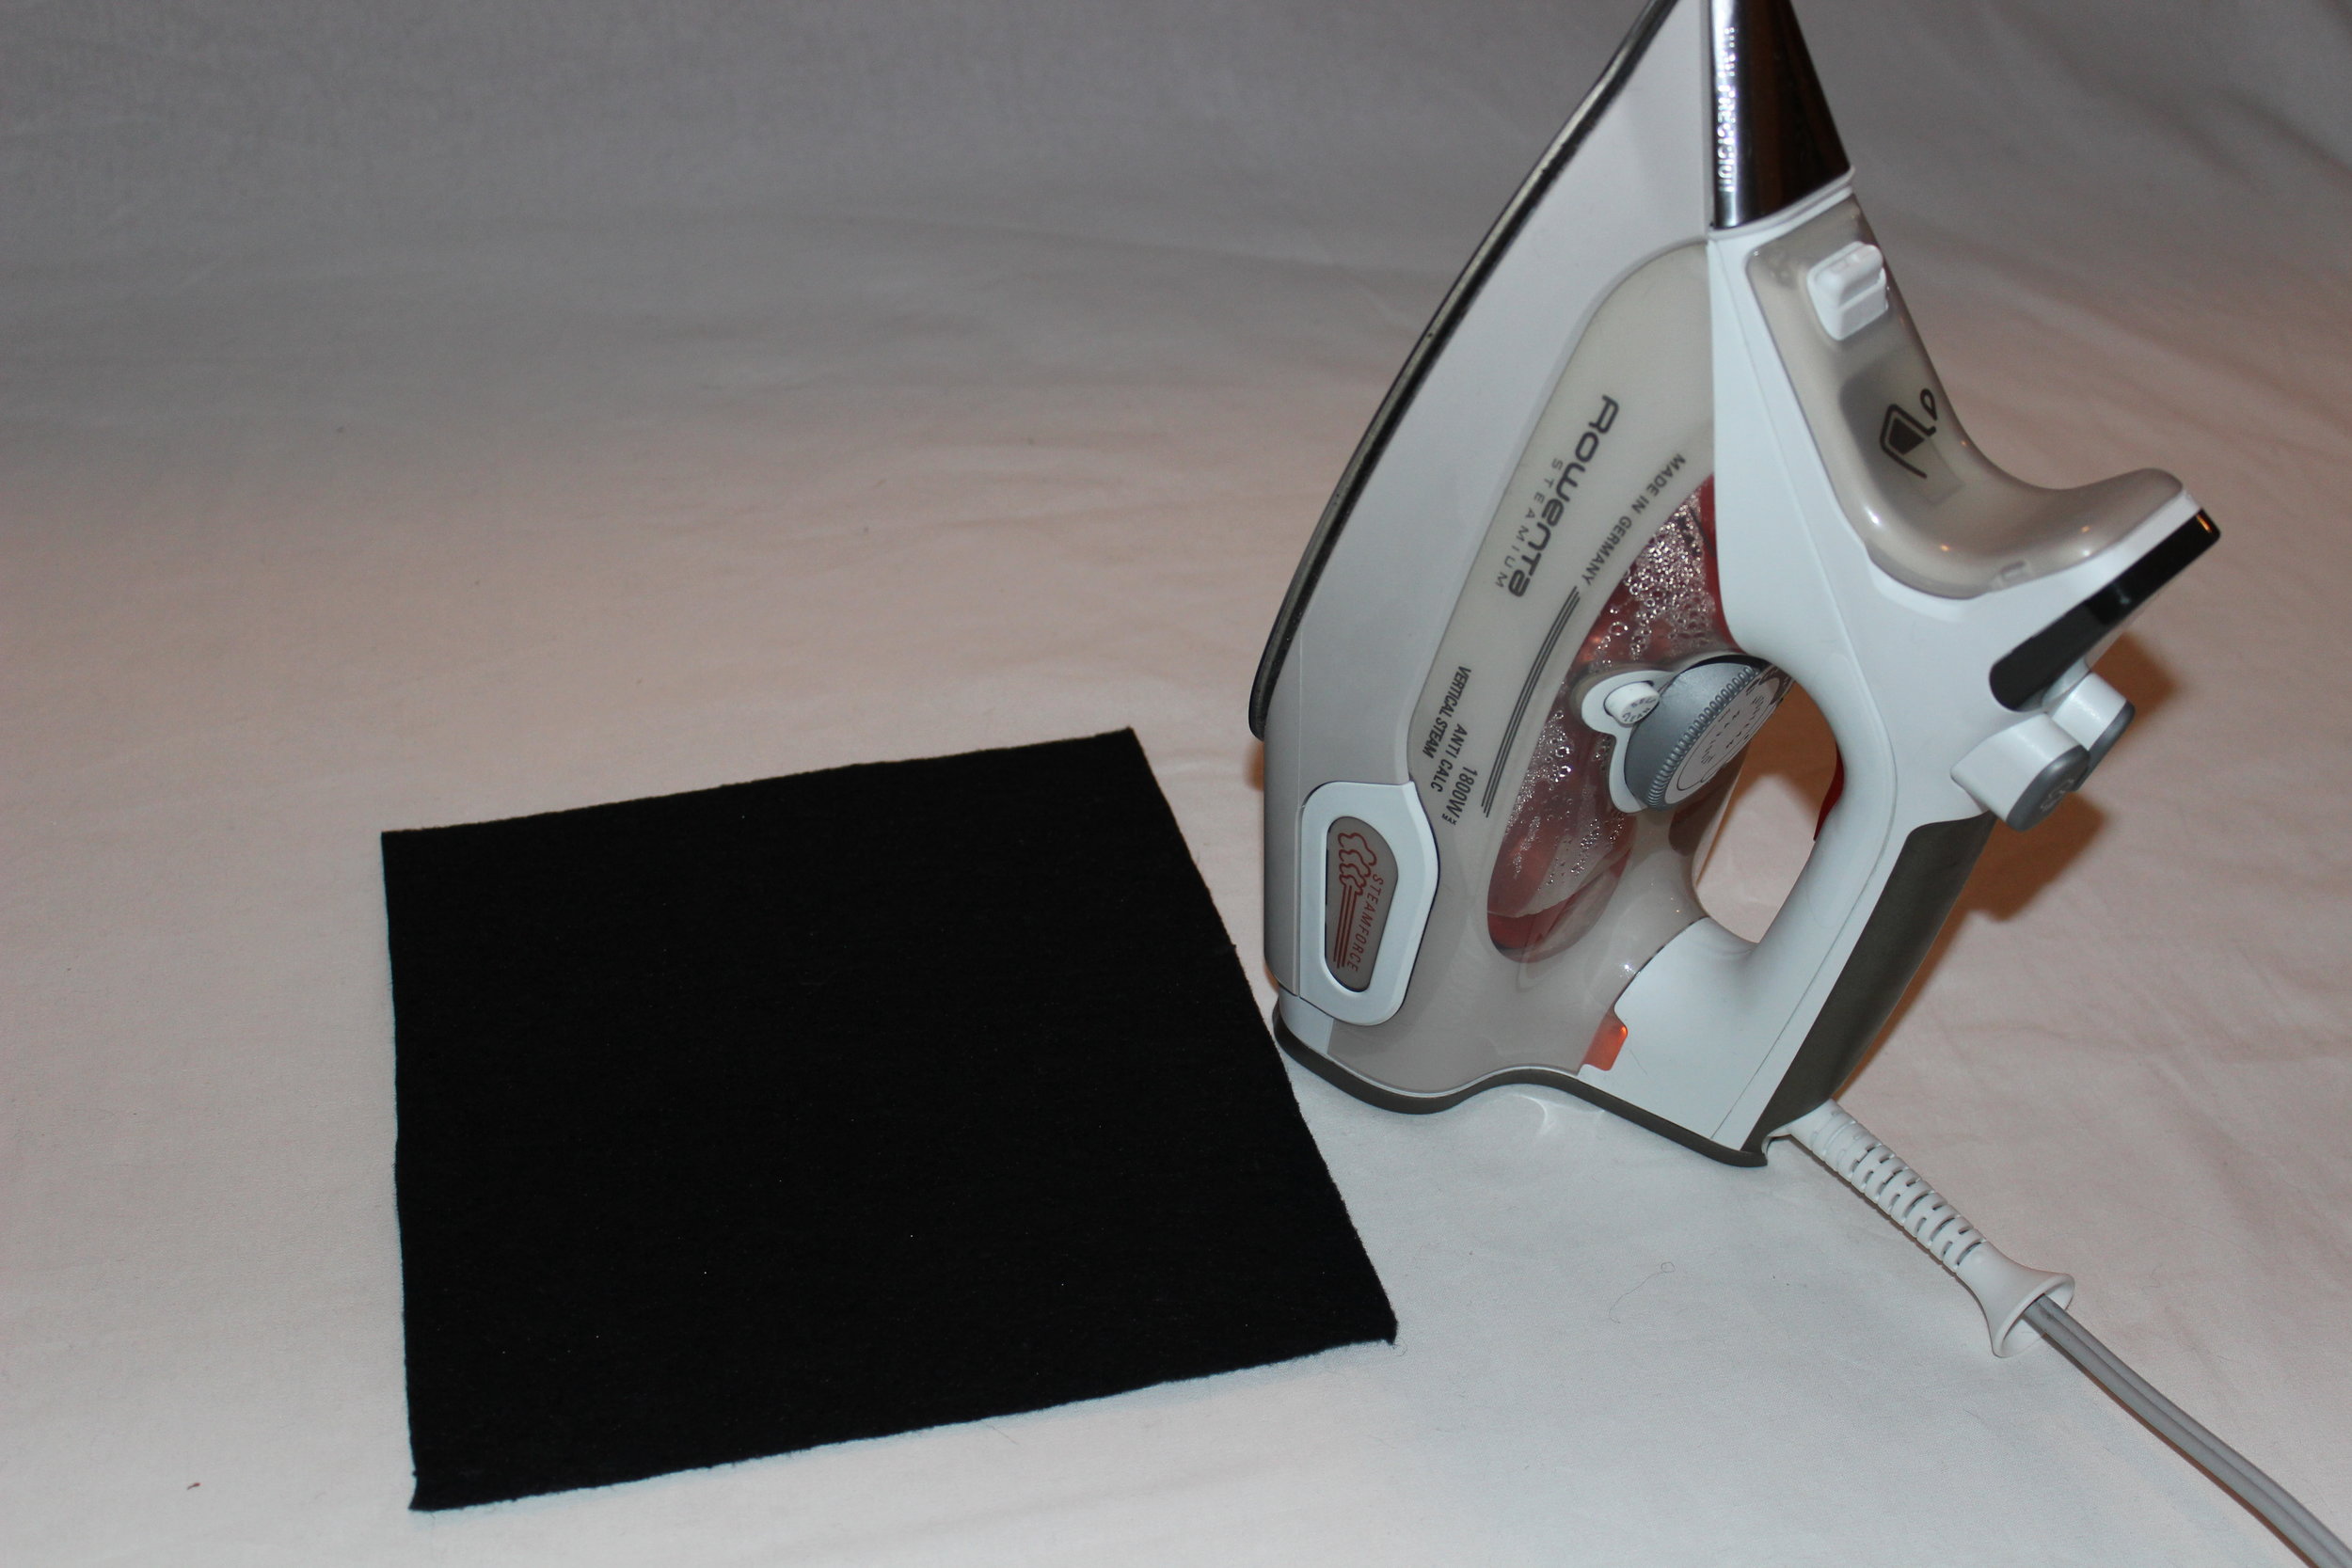
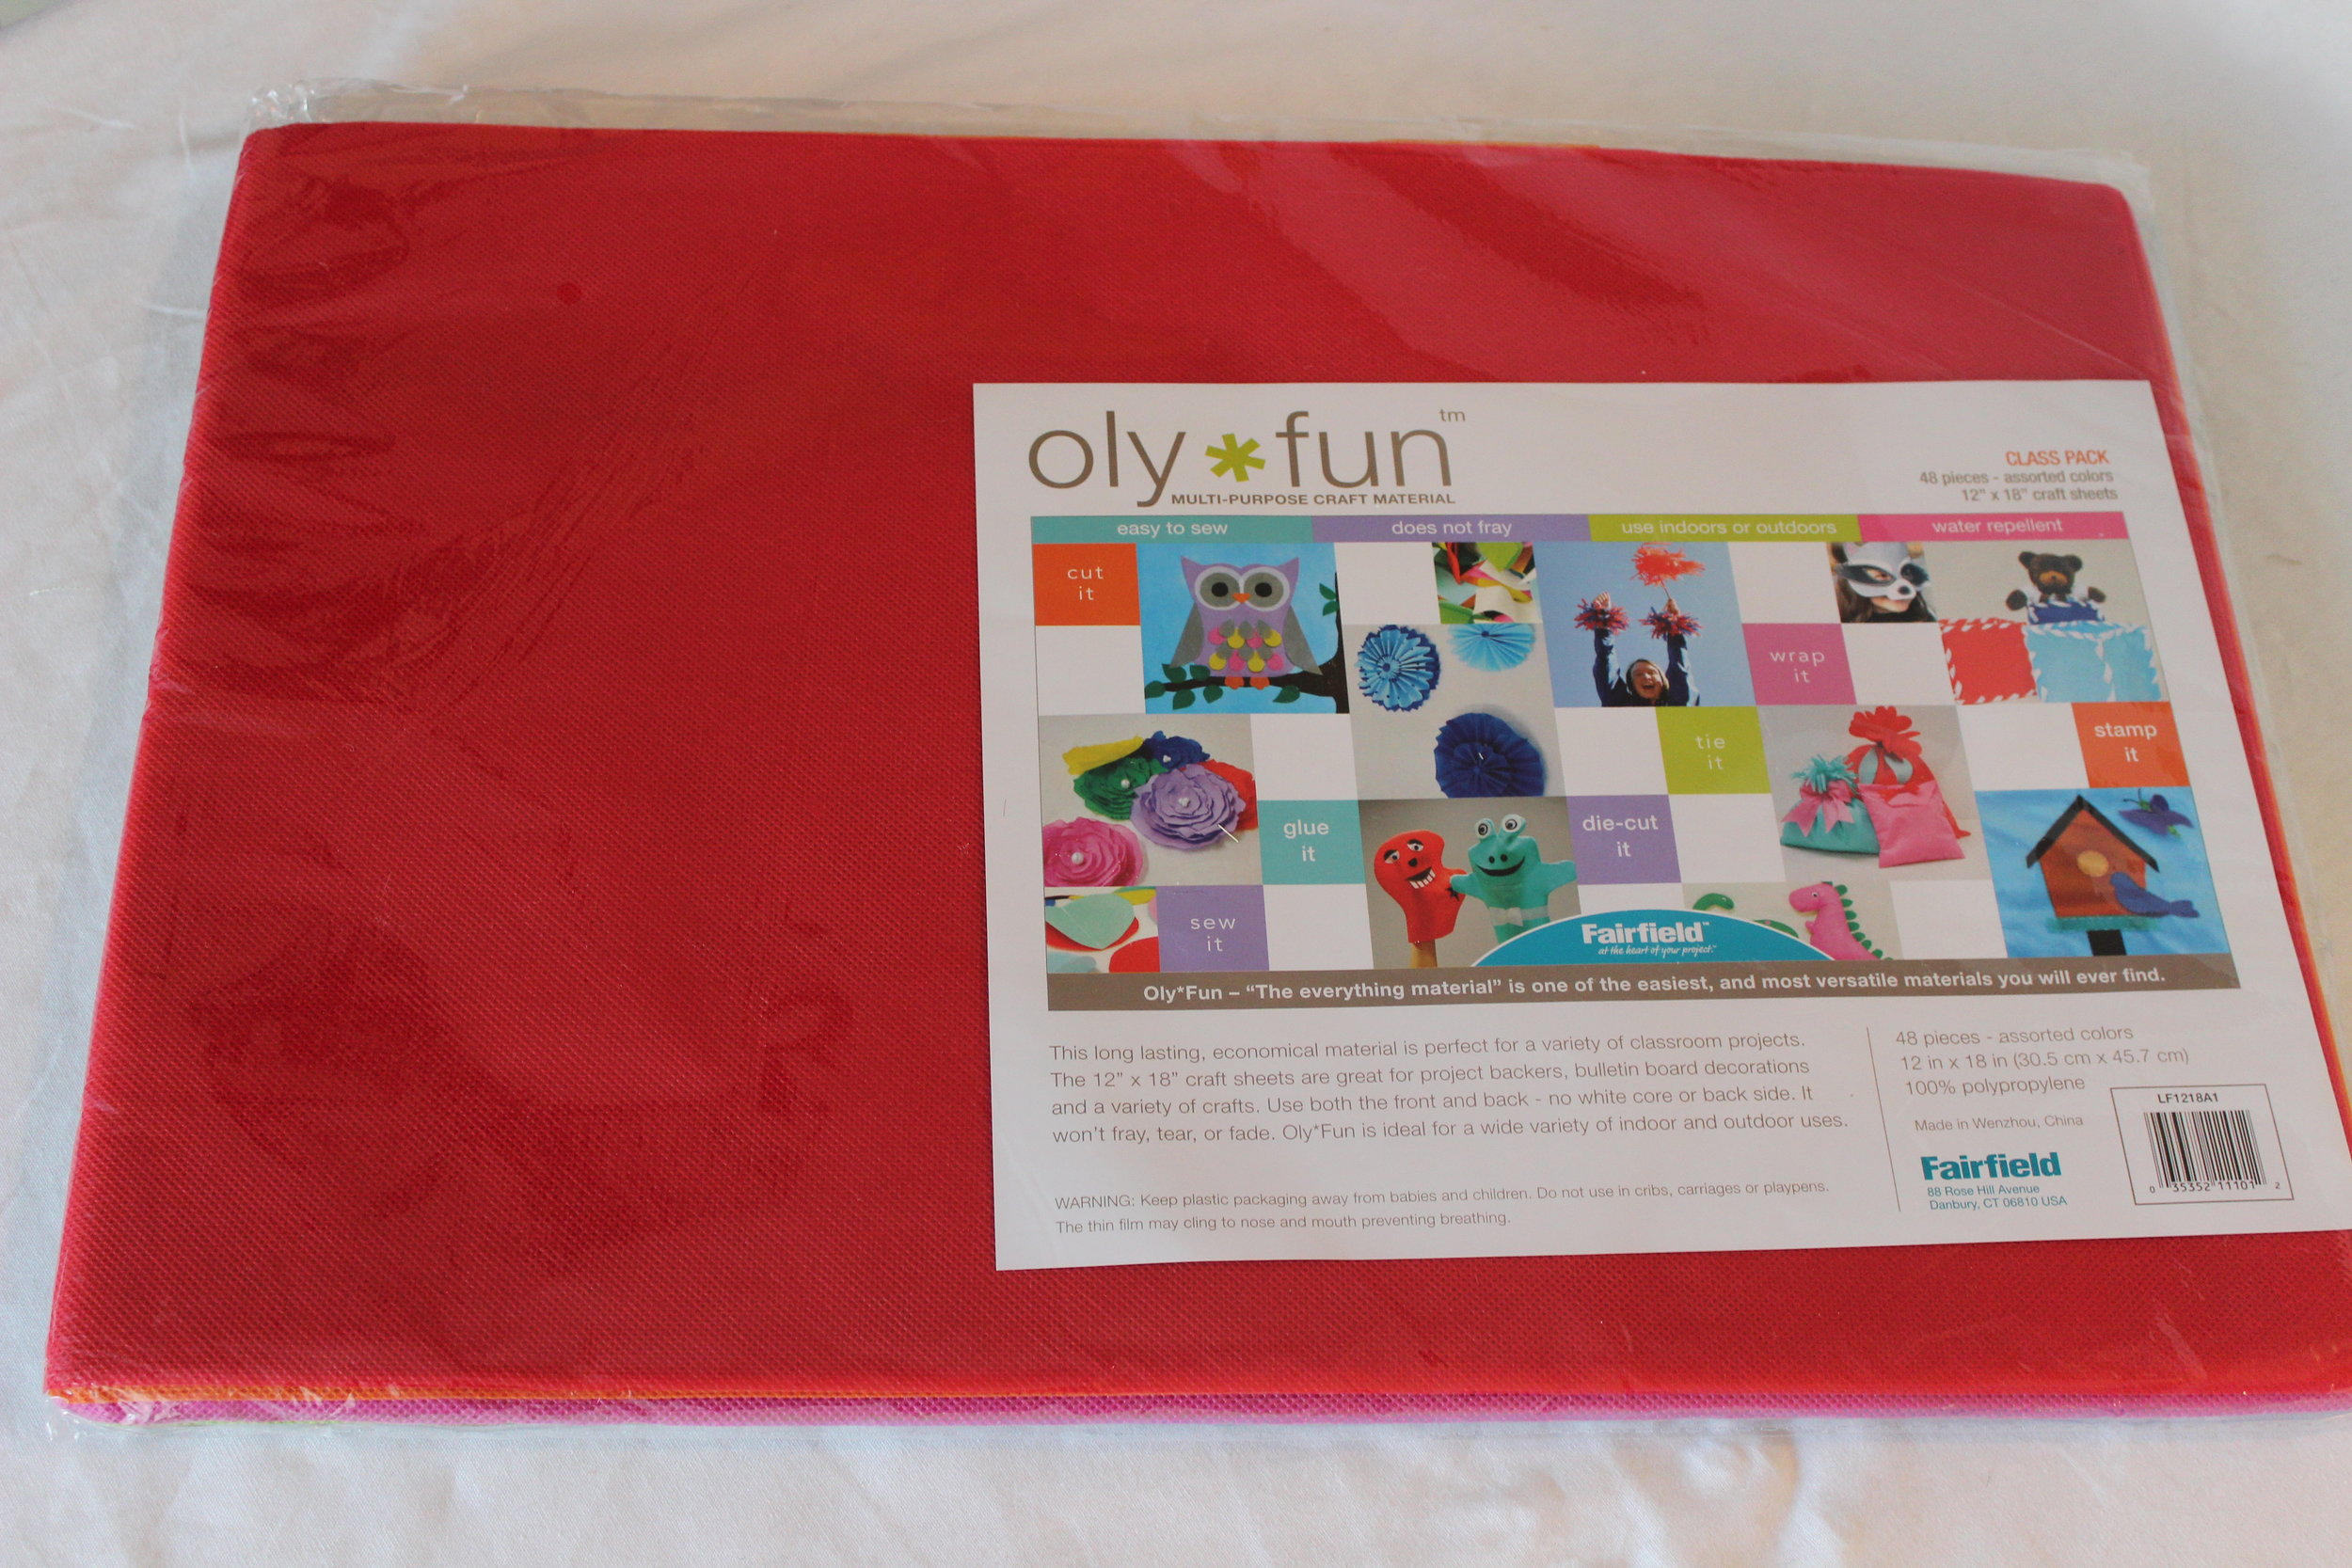
OlyFun is a techy fabric that is so cool to work with. It does not fray, has no grain, and is water-repellent. It comes in 18 different colors so it is a perfect match for making in-the-hoop machine embroidered ornaments. I had so much fun playing with it, but I decided to step it up a notch and  I did three ornaments as a test using "Support Soft Foam Stabilizer" with the OlyFun. 

Machine Embroidery Designs by "Embroidery Library" -Gingerbread Cookies in-the-hoop

Machine Embroidery Designs by "Embroidery Library" -Gingerbread Cookies in-the-hoop

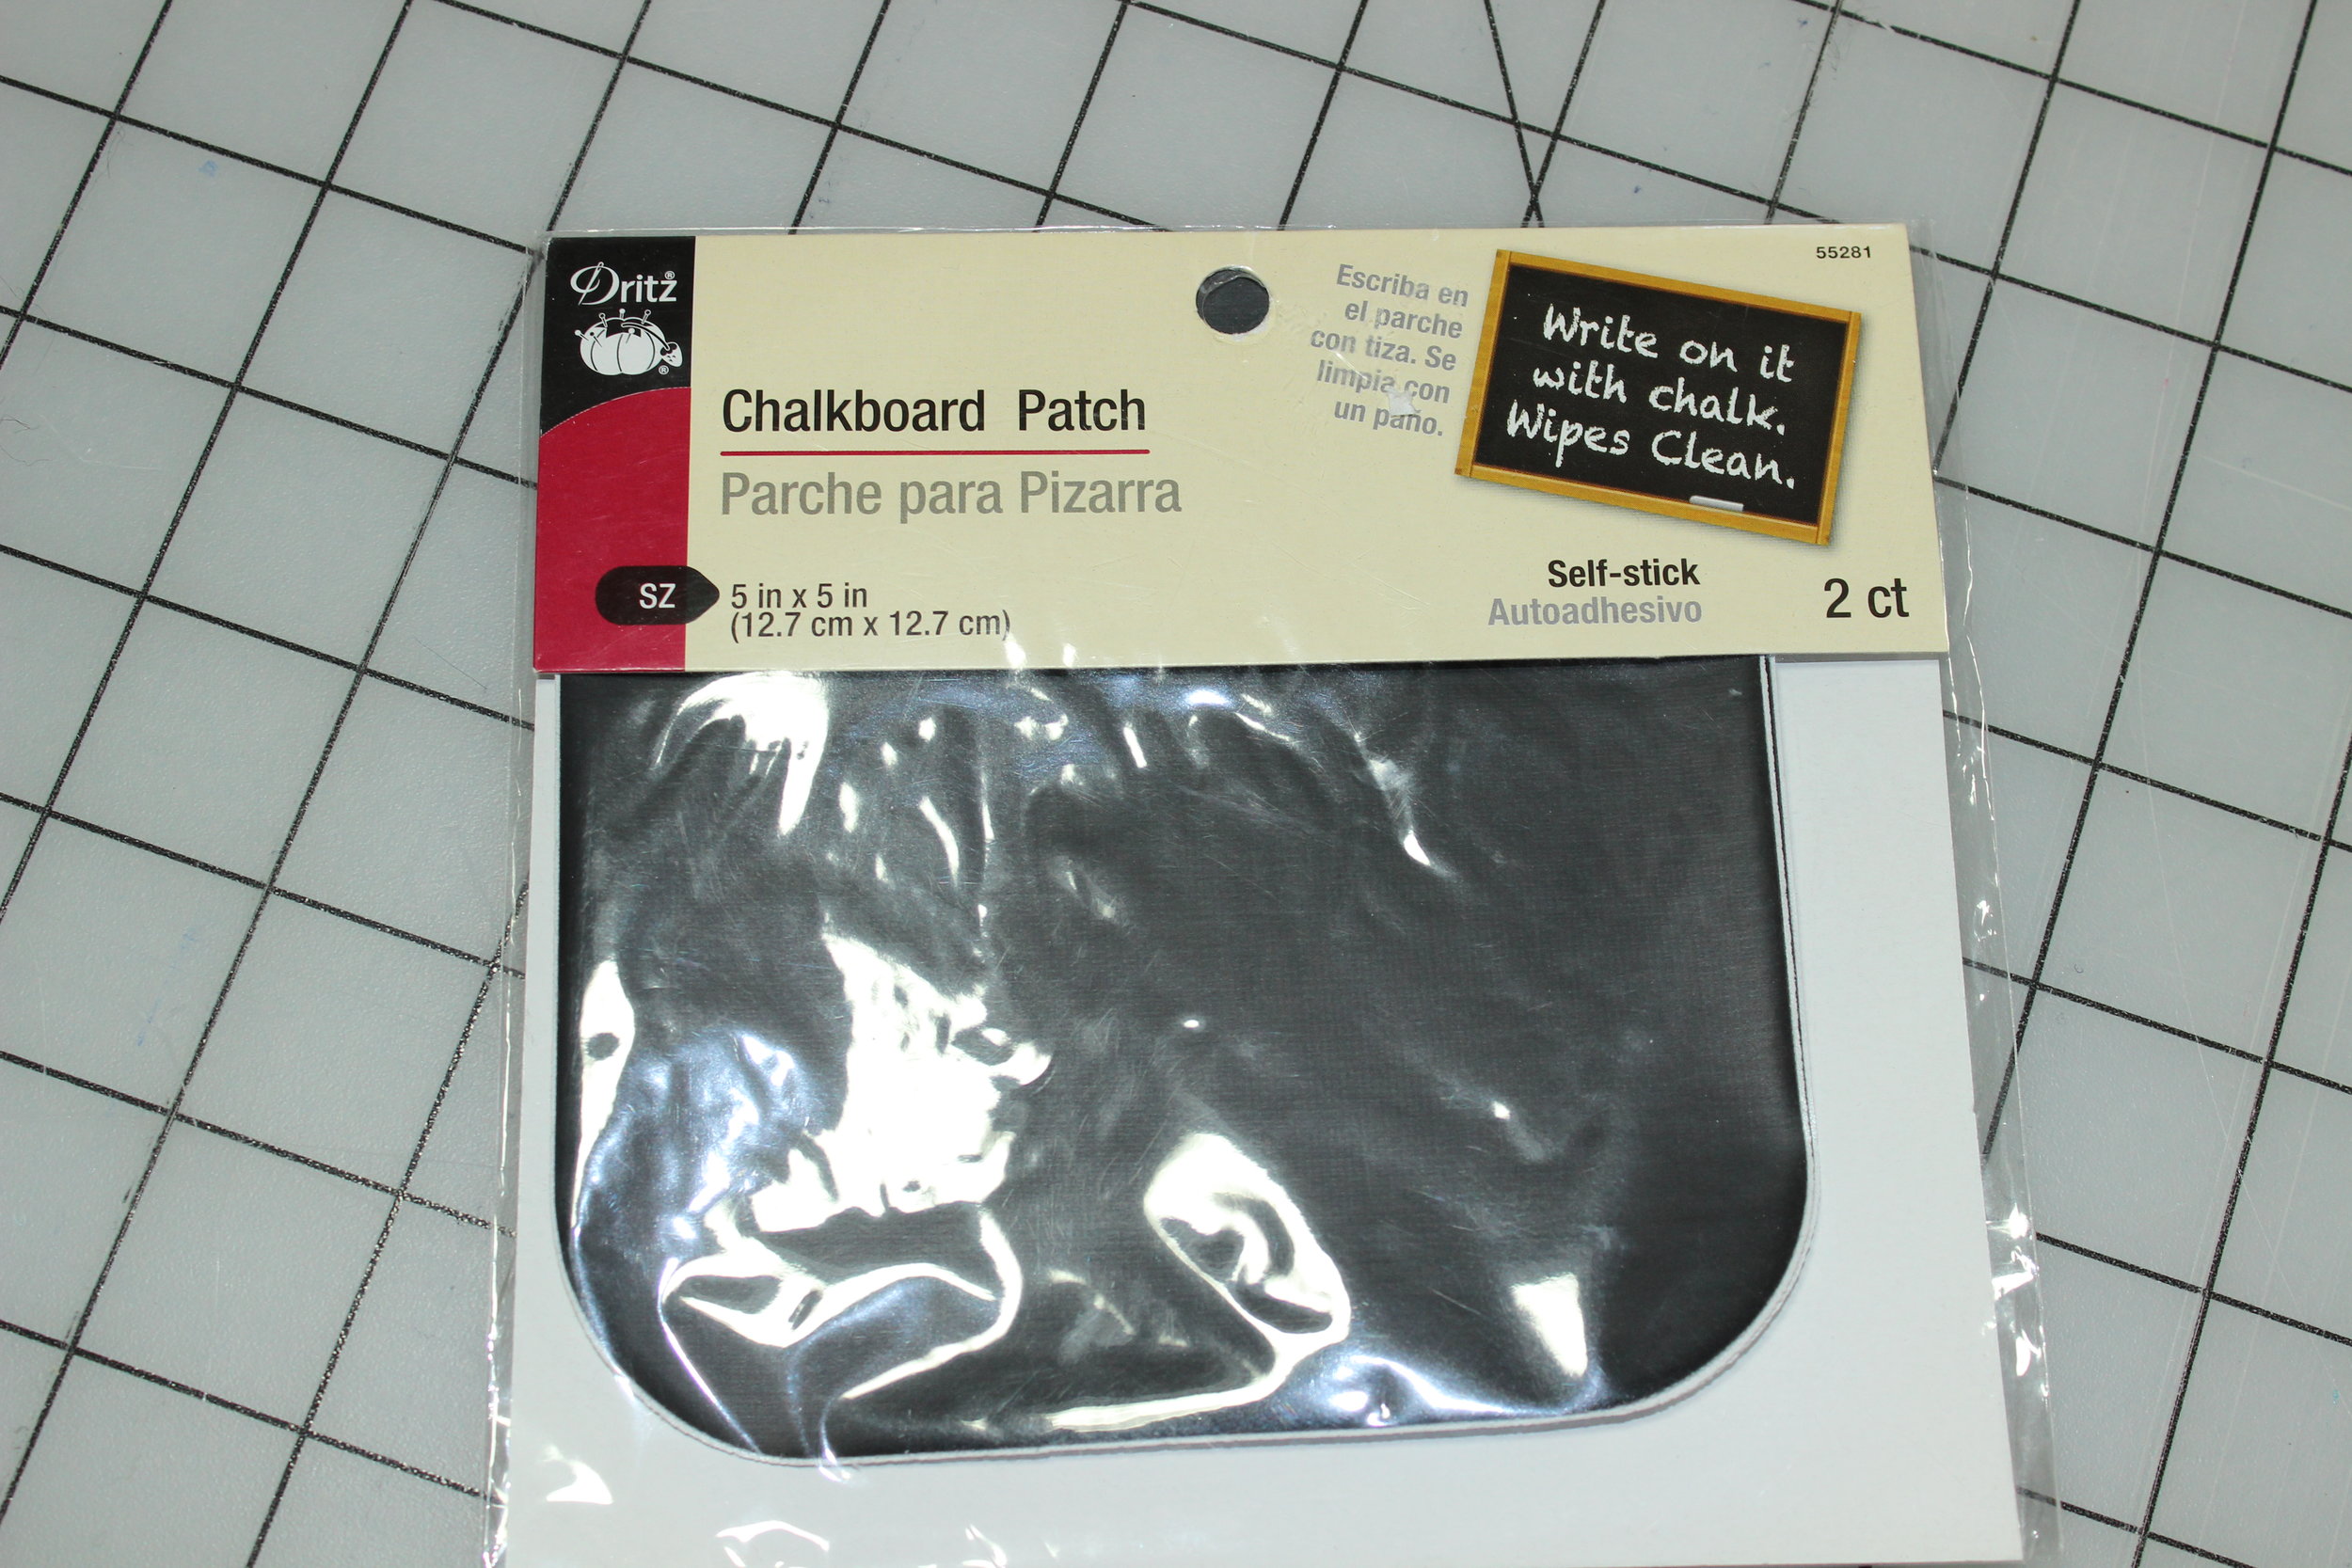
Thank you to Fairfield World for supplying the OlyFun, the "Support Soft Foam Stabilizer"  used for these ornaments, and the inspiration. 

OlyFun is readily available at many of the big chain stores. In my area in the Connecticut shoreline, the best place is Hobby Lobby. There is a whole display at the end of an aisle where the home decorating fabrics are. I have seen the "Support Soft Foam Stabilizer" at Joann's. 

IMG_3764.JPG

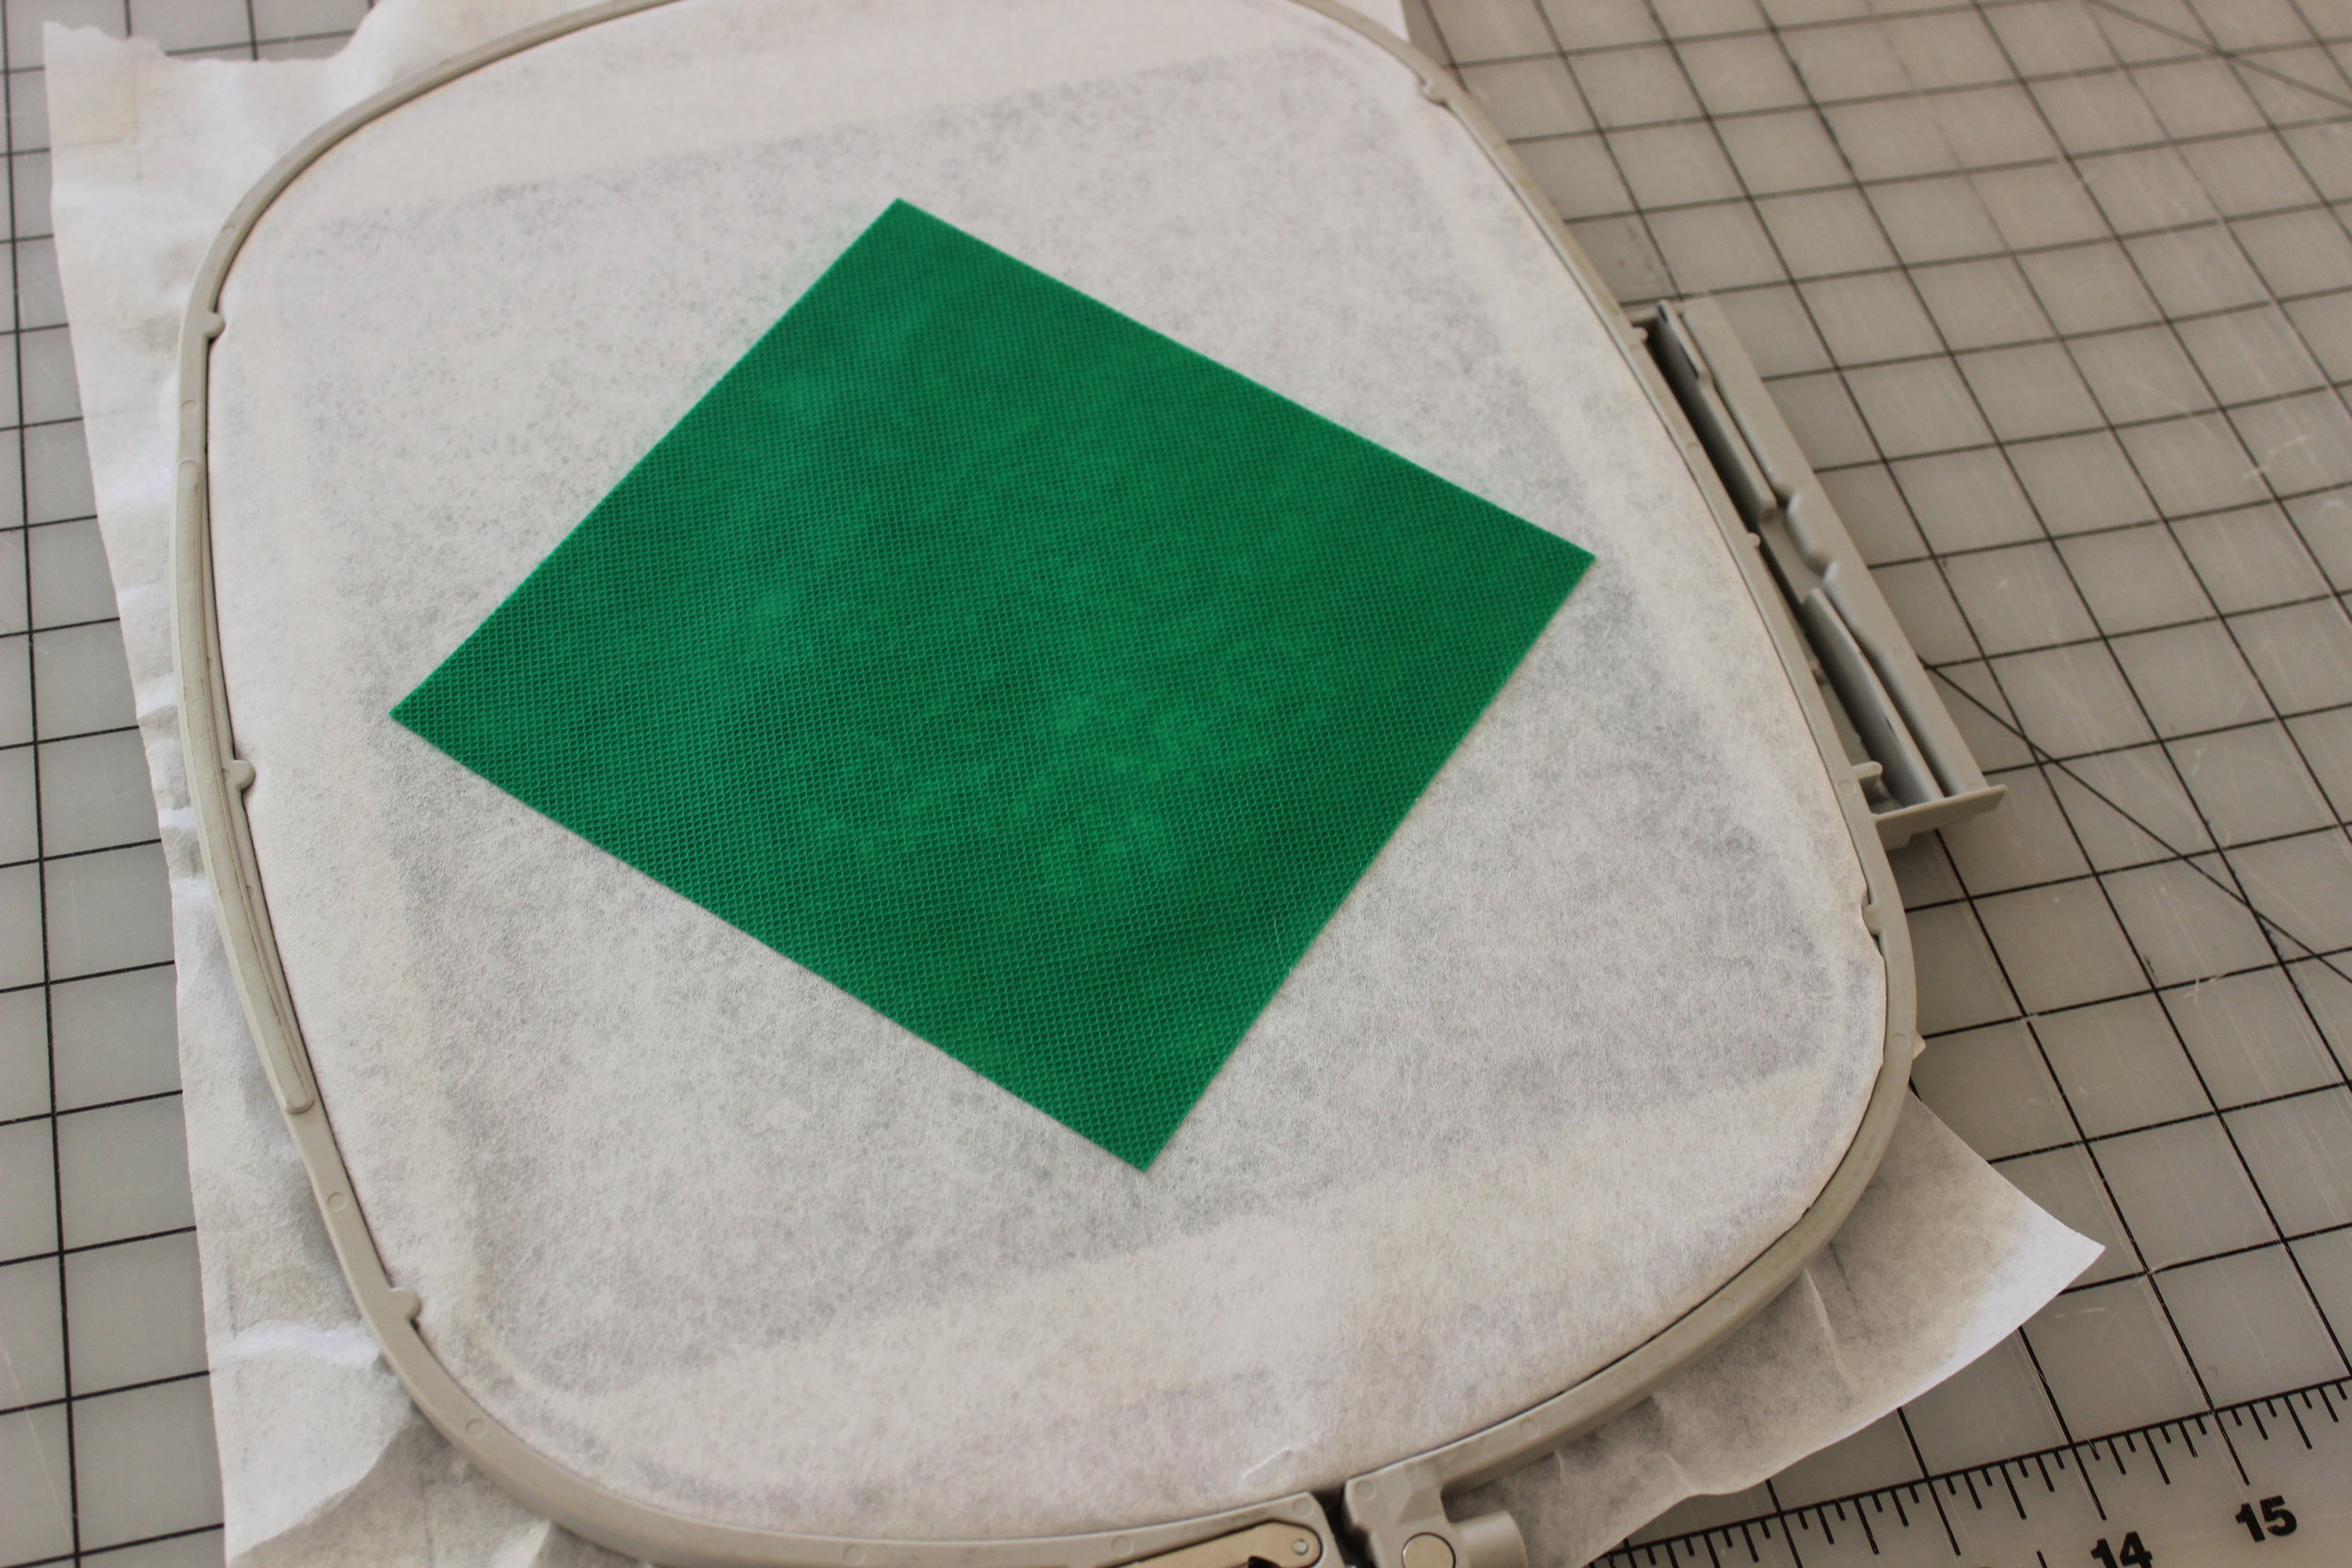
OlyFun did not require anything special and it stitched like a dream.  Because it does not fray I could use it in the designs that left the edges raw. It is thinner, so I did not need to worry that it would catch in the feed-dogs or in the foot. I wanted to see what the different colors looked like in these gingerbread cookie designs so I tested with green, red, and sand. 

The first design was the Christmas tree in green. The project instructions call for leaving it open and stuffing it with a poly-fil then closing it by hand.

IMG_3769.JPG

 I had done many ornaments that way and to be honest, I wanted to see what an ornament looked like that was flat. So here it is...the flat Christmas tree. It turned out pretty well if you ask me. I know that if I am ever in a pinch, I will feel comfortable leaving out the poly-fil.

IMG_3771.JPG

On to test two - OlyFun with Support Soft Foam Stabilizer" (I'm just going to call it Support herein) in the gingerbread man in sand. Support is a foam stabilizer that I found out about this summer. It takes a bag from looking sewn to looking store-bought.  It helps anything keep its shape, which Is why I thought I would use it here. One layer of Support on the back just before the back was tacked down made it a wonderful ornament with depth.  

IMG_3775.JPG

It was so quick and easy that I plan on using this from now on to fill my ornaments. It gave the ornament just the right amount of loft and texture. 

IMG_7282.JPG

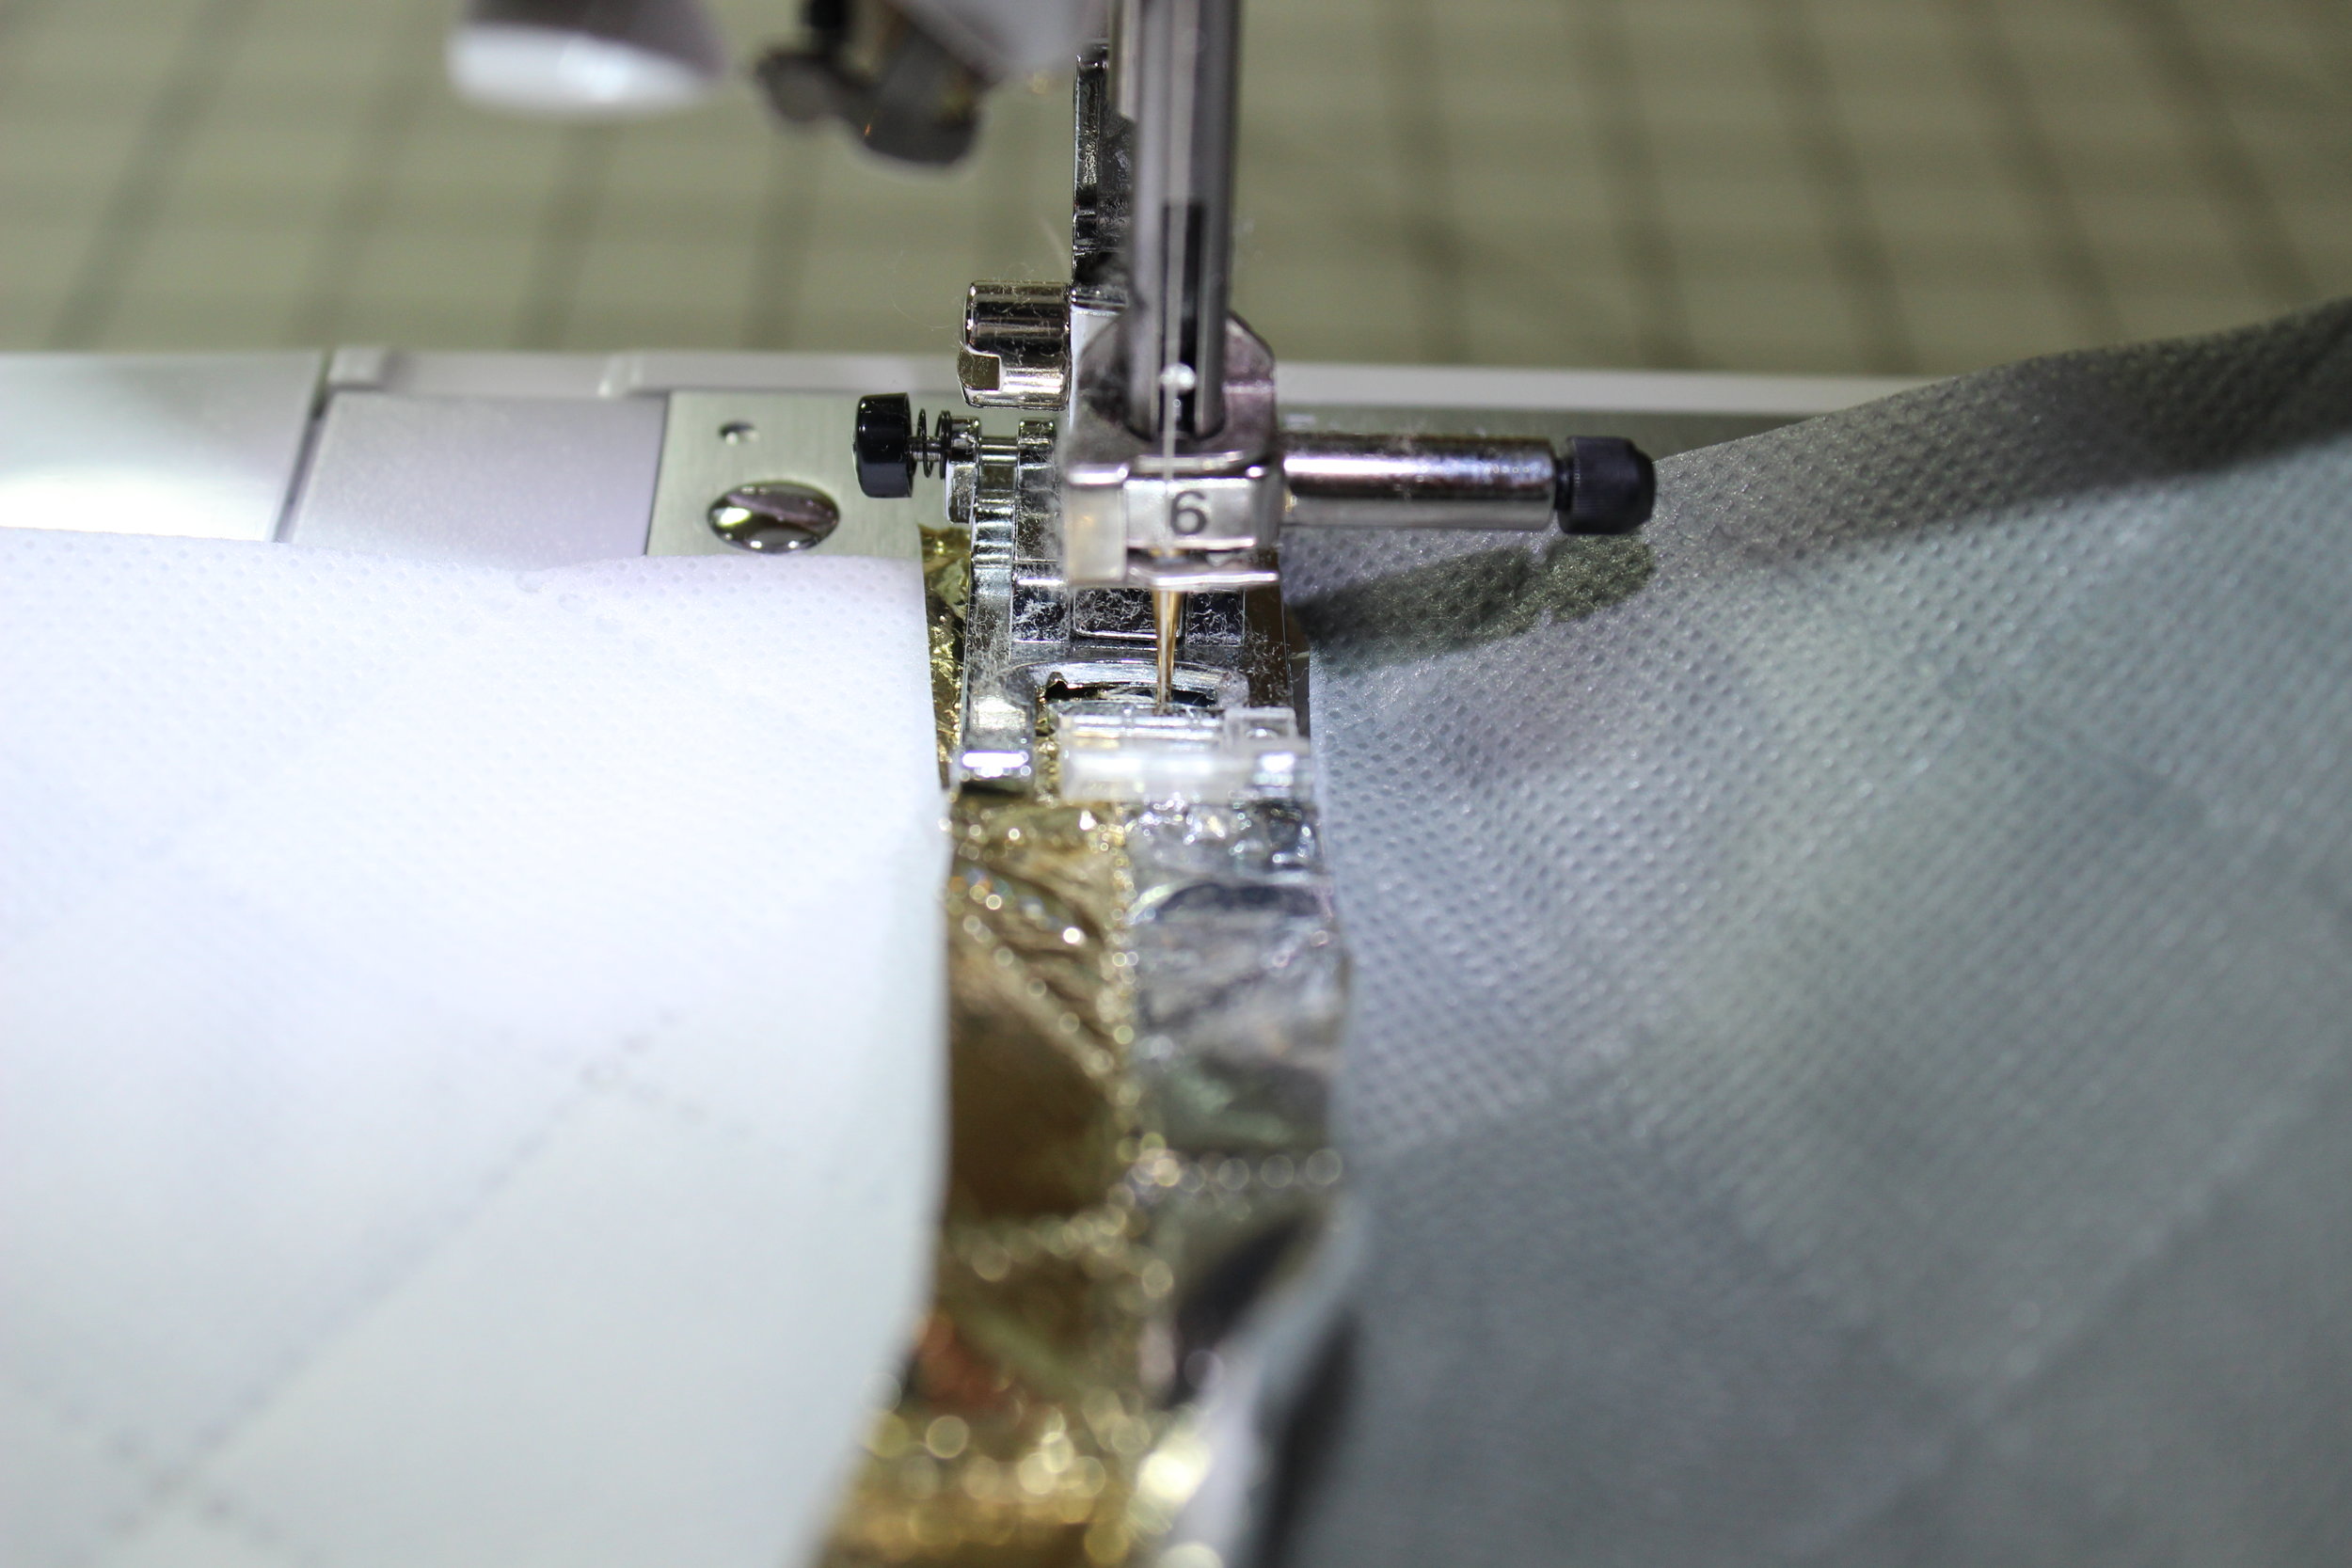
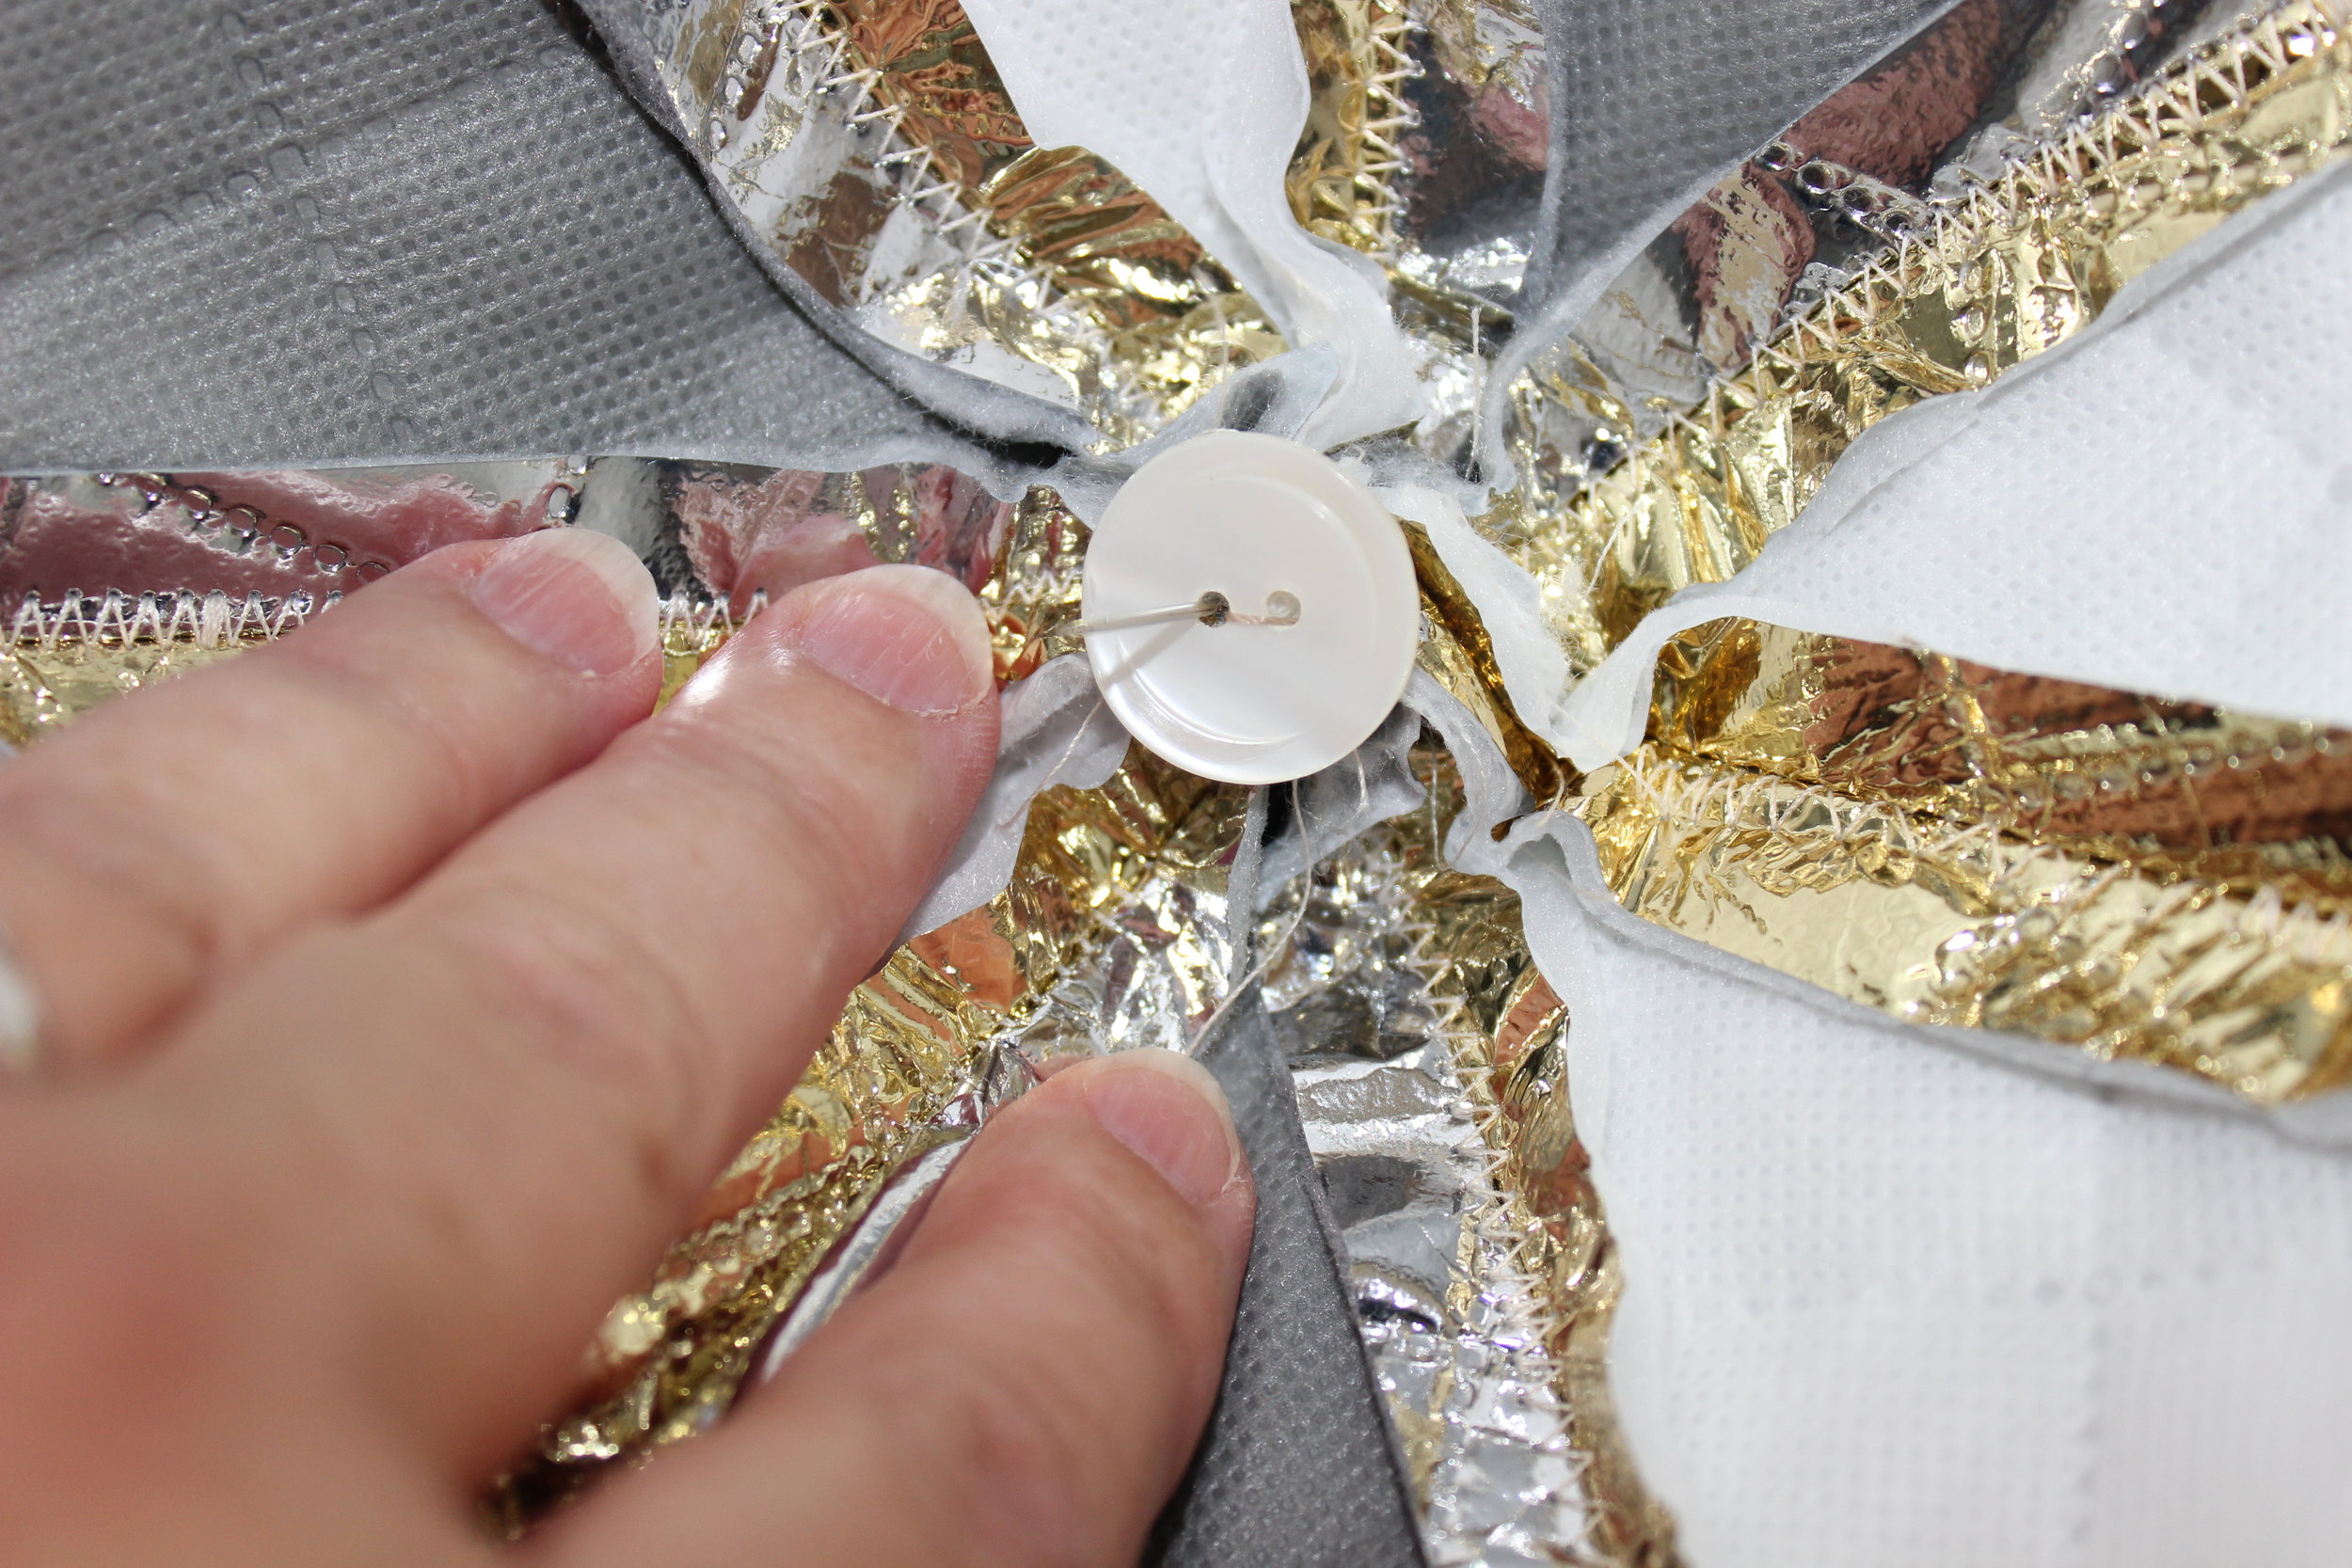
Last but not least, I used two pieces of Support in the bell ornament in red. The first piece was added just before I put the red OlyFun on the top. This allowed the design to stitch through both the OlyFun and the Support.  The second was at the same place as the one above.

IMG_7284.JPG

I was not sure if my machine would think it was too thick, but it did not have any problems. The only issue I found was that when I cut away the ornament, the foam could be seen on the edges because the OlyFun was popping up. This could be rectified with trimming it before or after the final stitching.

The testing was so much fun and helped me to venture into new fillings for Christmas ornaments in the future. I think you will be seeing more of that Support in this blog as my overall favorite was the gingerbread man in sand with one layer of Support. It seemed to have all the chemistry for these designs.  

They will be cute as a whole set of gingerbread cookies in sand with Support. 

IMG_7281.JPG

Hope you have time to stitch out a few for yourself. Happy Holidays!

Leftover Batting Tags

Over the holidays we get so many leftovers from food to fabric scraps. If you are a quilter or use batting for other projects, you probably have a lot of leftover batting. We cut off those wide portions and save them for just the right project.  Well, the right project is here.  It is so quick and so easy to use leftover batting for tags. 

Machine Embroidery Design X3580 by "Embroidery Library"

Machine Embroidery Design X3580 by "Embroidery Library"

Thank you to Fairfield World for supplying the black batting used for these tags and the inspiration. 

IMG_3747.JPG

Gift tags are the perfect way to make a gift extra special and with leftover batting, there is no added expense involved. It only took 30 minutes to stitch three gift tags - super easy. 

These tags are machine embroidered in-the-hoop tags from Embroidery Libraryyou could use this same concept with a sewing design for gift tags. 

Some tips for machine embroidering with batting:

  • You do not need to cut each piece of batting and line it up before the stitch down, merely cut a piece of batting larger than the area and place it on top before the normal placement step.
  • Press the batting before placing it over or under the hoop. 
IMG_3749.JPG


  • Use a black "No Show Mesh Nylon Cutaway Stabilizer." 
  • Use a water-soluble topper on the top as well as the bottom of the batting.  Batting has loose fibers and they can get caught in the feed dogs especially.
  • Do not use a heat activated topper as I did. The loose fibers of the batting will stretch and make permanent rolls of the topper that must be cut loose. 
  • Remember to use the same colored thread in the bobbin as in the top thread.
IMG_3750.JPG


  • Do not use a spray adhesive to keep the parts together as it will leave a sticky residue on the batting.
  • Use a basting stitch to keep the top pieces together.
IMG_3751.JPG


  • Use painter's tape to keep the bottom pieces together. First apply it to the batting and then apply it to the topper. 
IMG_3753.JPG
IMG_3754.JPG


  • Remove as much topper as possible by hand. 
  • Cut the tags with a rotary cutter or scissors after it has been removed from the hoop.  This step alone makes using batting so much easier than other fabrics. 
IMG_3757.JPG


These gift tags are so easy that you can make lots of them for those last minute gifts. Happy Holidays!

Domed Dish Cover with Thermal Protection

Summer time is such a wonderful time to entertain.  It starts off with Memorial Day and Labor Day with July 4th tucked in the middle.  Of course, those winter months are pretty awesome for entertaining. They start with Thanksgiving and end with New Years with that big Christmas Day in between. Wow! We do love our holidays.

Thank you to Fairfield Processing for graciously donating the Aluminor Fabric used in this project and sponsoring this blog post. While they provided the impetus, all the opinions, comments and designs are mine.  They did not influence me.

This project is great no matter when you entertain, or if you are just serving everyday food for your family.  It is sure to bring a little festivity to the table. This project is perfect for keeping food warm or cold.  It uses this glitzy fabric from Fairfield called “Aluminor.”

It can cover a 12” round dish that is heaped full of food or even a bowl. I plan on using it for those high domed pies this summer. Here are two blueberry recipes from our favorite cookbook “Spices of the World Cookbook” by McCormick.

Spices of the World Cookbook by McCormick

Spices of the World Cookbook by McCormick

Blueberry Cobbler and Blueberry Crumble Recipes from Spices of the World Cookbook by McCormick

Blueberry Cobbler and Blueberry Crumble Recipes from Spices of the World Cookbook by McCormick

While this project is domed and looks difficult to make, it actually was amazingly easy.  I designed it, sewed it, took pictures of it, and wrote the instructions all in one afternoon.  But I must confess that it would not have been that easy if I had not found an awesome website on the Internet.  It calculated the exact dimensions of the gores and how many gores.  All I had to do was put in the diameter that I wanted and push the enter button.  I have been going around for the past few days feeling like a mathematical genius, when all I really did was find a great website with Google. If you want to make yours a different size just use this awesome site to calculate the size of your gores and add ½” seam allowance and I promise you, you will feel like an Einstein. http://www.domerama.com/calculators/cover-pattern/ But don’t feel intimidated.  I copied my gore, so is all you have to do is download it and cut it out. 

You might want to note that there are seven gores – an odd number, so when I made my alternating silver and gold Aluminor I had 2 colors next to each other.  To offset this I decided to highlight it by putting a label on it.  This will eliminate everyone lifting the lid to see what is underneath since they cannot see through it.  So it accomplished more than I anticipated. Of course, this label is optional and you are welcome to make yours all one color.

For this project, I decided not to use machine embroidery since it is not lined and the Aluminor is on the outside.  I did not want it to lose any of it thermal properties through the needle holes. It is not lined, but there is no worry if it touches food because of it also being food-safe.

My family is starting to think that Fairfield paid me to test these fabrics, but they did not. I just decided to conduct my own unscientific experiment to see how well Aluminor really worked. Here is how I conducted this experiment:

·      3:22 PM - At the same time, I placed 10 ice cubes in a glass container and put them on the table with another 10 ice cubes in the same style glass container, but this one I put under the domed Aluminor dish cover.
·      4:29 PM - After 37 minutes the ice cubes without the cover were already melting and the ice cubes under the cover were starting to melt.
·      5:16 PM – It has been almost two hours since I started the experiment and the ice cubes without the cover are completely melted. The ice cubes under the cover are more than halfway melted.

Conclusion: The Aluminor definitely showed that it was able to keep the ice cubes cold longer when it was used.

DISCLAIMER: While this test showed that the ice cubes stayed frozen longer with Aluminor, it does not mean that all foods would be safe for extended periods of time, so please always be food-safe and follow the USDA Basics for Handling Food Safely.

INSTRUCTIONS

TEMPLATE:

Click here to download circle template

MATERIALS:

12”  piece of gold Aluminor

12” piece of silver Aluminor

Neutral color of good quality thread

Large shank button

Medium sized 2-hole button (strength underneath the shank button)

Coordinating upholstery thread (for the buttons since it is used as a handle)

OPTIONAL: Self-adhesive chalkboard label

SUPPLIES:

Sewing machine and related supplies

Rotary cutter and mat are helpful, but not necessary

Shears & Trimming Scissors

Ruler

Wonder Clips® are preferred, but pins are acceptable

Point turner or some other blunt, but pointed object

Pen or pencil


STEP ONE

NOTE:

This project uses ½” seam allowances.

Do not press this fabric.  Finger pressing is sufficient.  Please see Fairfield’s website for tips on using this fabric. (Please note that there is no longer a sale on the fabric.)

Please read the instructions below before beginning. Gather the materials and supplies. Pre-wash the main fabric, press, and starch. Do not wash the Aluminor.

STEP TWO

Download the template and cut it out.

STEP THREE

Cut the fabrics as follows:

·      Using the template cut four (4) pieces of gold Aluminor

·      Using the template cut three (3) pieces of silver Aluminor

STEP FOUR

With a pen or pencil mark a ½” line at the top of each gore where it comes to a point.

STEP FIVE

With right sides together, sew one gold gore to one silver gore. Start sewing at the bottom of the gore and stop sewing about 2 stitches after the ½” mark at the top of the gore.

Stop sewing about 2 stitches after the ½” mark at the top of the gore

Stop sewing about 2 stitches after the ½” mark at the top of the gore

STEP SIX

Continue sewing the gores together, alternating between silver and gold, until all the gores are connected.

STEP SEVEN

Finger press the seams open. With the wrong side up, zig zag each each seam along the stitched seam. This will keep the seams open.

STEP EIGHT

Place the first and the last gore right sides together and sew in the same manner as above. Zig zag as before.

STEP NINE

Fold the bottom of the dish cover up ½” and edge stitch.

STEP TEN

Sew the button on by hand using upholstery thread so it is stronger since it will be used as a handle. Reinforce the button by simultaneously sewing a 2-holed button on the inside.

STEP ELEVEN

Follow the manufacturer's guidelines and place the chalkboard label in the center of the two gold gores.

Please do not put Aluminor in the washing machine. Please wash by hand and do not crinkle, keep flat while washing and storing.

(Have fun wearing your new hat. LOL! This will definitely need a Clorox wipe as all my children keep wearing it.)

Enjoy your holidays and travel safe!


Dish Cover with Thermal Protection

It is so much fun to entertain during the summer.  Maybe because you can be outside and barbeque. One of my favorite summer dishes is “Deviled Eggs.”  I have this scrumptious recipe for which everyone asks. It is so good that I serve them all year round.

Thank you to Fairfield Processing for graciously donating the Solarize Liner Fabric and Stiffen 2 used in this project and sponsoring this blog post. While they provided the impetus, all the opinions, comments and designs are mine.  They did not influence me.

Deviled Eggs are the type of food that you can prepare the day before, so when it comes time to set the table, I like to put them out early and inevitably there is one or two that do not get eaten, so they wind up sitting on the table for longer than they probably should.  This project is just the solution to solve that problem.

Machine Embroidery Design by Embroidery Library: Delft Blue Floral Medallion I (F8541)

Machine Embroidery Design by Embroidery LibraryDelft Blue Floral Medallion I (F8541)

My deviled egg dish is quite large – 14” diameter, so it is not easy to cover and if I use aluminum foil or plastic wrap, it has a tendency to flatten my nicely piped centers, so I thought a self-standing dish cover was just the trick. The best part is that this project uses Solarize Liner Fabric from Fairfield Processing.  Not only do I now have a dish cover that will not touch my deviled eggs, but they will also be kept cool while they sit on the table.

While I created this dish cover for my deviled eggs, it is extremely versatile.  The Solarize Liner Fabric maintains both cold and hot temperatures and is food-safe.  When my children are home, I make 3-5 pounds of bacon each morning (there are 11 of us and their spouses) and this cover will be great to keep that platter warm while I am serving up the other dishes.

Here is the deviled egg recipe from our family’s absolute favorite cookbook, Spices of the World Cookbook by McCormick. I have not found a recipe in that book that I did not love.

Spices of the World Cookbook by McCormick

Spices of the World Cookbook by McCormick

Deviled Egg Recipe from Spices of the World Cookbook by McCormick

Deviled Egg Recipe from Spices of the World Cookbook by McCormick

Here is my own unscientific experiment to see how well Solarize Liner Fabric actually works. This is how I conducted the experiment:

·      11:123 AM - At the same time, I placed 10 ice cubes in a glass container and put them on the table with another 10 ice cubes in the same style glass container, but this one I put under the Solarize Liner Fabric dish cover.
·      11:53 AM - After 30 minutes the ice cubes without the cover were already starting to melt and the ice cubes under the cover were still whole. (I took off the cover just for the picture.)
·      1:29 AM – It has been two hours and 6 minutes since I started the experiment, and the ice cubes without the cover are completely melted. The ice cubes under the cover are more than halfway melted.
IMG_2567.JPG

Conclusion: The Solarize Liner Fabric definitely showed that it was able to keep the ice cubes cold longer when it was used.

DISCLAIMER: While this test showed that the ice cubes stayed frozen longer using Solarize Liner Fabric, it does not mean that all foods would be safe for extended periods of time, so please always be food-safe and follow the USDA Basics for Handling Food Safely.

INSTRUCTIONS

TEMPLATE:

Click here to download circle template

MATERIALS:

15”  piece of Solarize Liner Fabric

14”  piece of Stiffen 2 by Fairfield (a double-sided fusible, rigid material that is similar to cardboard)

½ to 1  yard of main fabric (I used 100% linen. Amount varies depending on if you want to piece your bias strip or have one continuous piece.)

Coordinating good quality thread

OPTIONAL: 2 Dritz 1” Rectangle Rings in Copper

SUPPLIES:

Sewing machine and related supplies

Rotary cutter and mat are helpful, but not necessary

Shears & Trimming Scissors

Ruler

Wonder Clips® are preferred, but pins are acceptable

Point turner or some other blunt, but pointed object

Iron & ironing board

Pressing cloth

Teflon or Applique Pressing Sheet

Painter’s tape

OPTIONAL: Tailor’s ham


STEP ONE

NOTE:

This project uses ½” seam allowances.

Use a pressing cloth and test all fabrics before pressing.

Please read the instructions below before beginning. Gather the materials and supplies. Pre-wash the main fabric, press, and starch. Do not wash the Solarize Liner Fabric. Also, please read the manufacturer's guidelines on how to use their products.

STEP TWO

Download the template. Print it twice. Cut one for a 15” circle.  For the second circle, fold ½” under on both the straight edges. Now cut. This will be a 14” circle template.

STEP THREE

Cut the fabrics as follows:

·      Using the template, cut one 15” circle from the main fabric (this is the top)

·      Using the template, cut one 15” circle from the Solarize Liner Fabric (this is the lining)

·      Using the second template, cut one 14” circle from the Stiffen 2 (this is the center support)

·      Cut 1 band from the main fabric measuring 4” by 47”

·      Cut 1 band from the Solarize Liner Fabric measuring 4” by 47”

·      Cut 1 band from the Stiffen 2 measuring 3” by 46”

      OR to be cost effective ... use 1 strip measuring 3" by 20" and 2 strips measuring 3" by 13"

·      Cut a strip of the main fabric on the bias measuring 48” (or join several pieces to form this length)

·      Cut 2 pieces of the main fabric to measure 2” by 7”

STEP FOUR

If you are hand or machine embroidering the main fabric of this cover, please do it now; otherwise, any other type of embellishment can be done at the end. I used a machine embroidery design by Embroidery LibraryDelft Blue Floral Medallion I (F8541)

STEP FIVE

Adhere both pieces of the Stiffen 2 to both pieces of the Solarize Liner Fabric in the following manner. Place a Teflon mat on a flat ironing surface. Place the Stiffen 2 on the mat (either side, as both sides are fusible). Now place the Solarize Liner Fabric right side up on top of the Stiffen 2, making sure that it is centered. NOTE: the two pieces stick nicely together, so you can align them facing up and then turn them upside down to verify correct placement.

Place a pressing cloth on top of the Solarize Liner Fabric press to adhere the two fabrics together, following the manufacturer’s guidelines. Do this for the circle and the band. Set both pieces aside.

Please note that if you are using the three strips instead of one continuous piece of Stiffen 2 for the band that you should center the larger in the middle and put the two on each side.  Also, I zig zagged mine twice on the seams to stiffen the seams.

STEP SIX

With right sides together, sew the seam of the band of the main fabric.  It will now form a circle. Press seam open. Do this for the lining as well. Finger press the lining.

STEP SEVEN

To create the two handles, use the two short pieces of the main fabric (2” by 7”) and with right sides together sew each long side, then turn right side out and press.

STEP EIGHT

Fold each strip in half and slip the copper rectangle into the center. Pin each handle on each side of the circle with the raw edges matching raw edges and on the right side of the circle. Tape the handles in place with painters tape to keep them from getting sewn into a seam.

STEP NINE

With right sides together pin the band and the main fabric circle together along the edge.

STEP TEN

Stitch in place, easing for a smooth seam. Using a tailor’s ham, press the seam down towards the band.

STEP ELEVEN

With right sides together pin the Solarize Liner Fabric band and the Solarize Liner Fabric circle together along the edge.

(It looks like a birthday cake.)

(It looks like a birthday cake.)

STEP TWELVE

Stitch in place, easing for a smooth seam. Do not press seams

STEP THIRTEEN

Slip the main fabric over the Solarize Liner Fabric and pin in place.

Turn inside out. Press the main fabric to adhere it to the Stiffen 2, being careful to smooth out any wrinkles. Turn right side out.

STEP FOURTEEN

Fold the bias strip in half. With the raw edge of the bias strip against the raw of the bottom of the band, pin in place leaving three inches of each side. Sew in place, but do not sew the last three inches on each side.

STEP FIFTEEN

Fold the edge of one bias end a ½”. Place the other end of the bias inside this fold piece. Cut it on an angle if necessary. 

Now stitch in place

STEP SIXTEEN

Fold the bias completely to the inside. Press.

Edge stitch and topstitch on each edge. Press.

Please do not put Solarize Fabric Liner or Stiffen 2, in the washing machine, please wash by hand and do not crinkle, keep flat while washing and storing.

IMG_2561.JPG

Enjoy your summer holidays and travel safe!


Behind the Scenes – Fairfield™ Processing Corporation

As sewists, we cannot take anything for granted.  When we sew those projects we know completely how they are constructed, but for most people, those projects are a complete unknown to them. Take a simple stuffed animal. People may know that it is filled with a poly-fil since on some occasion they have probably seen one fall apart, but they do not know all the choices that it could have been filled with and if any stiffener was used to keep its shape.  So much goes into the construction of a sewn project and these fillers truly are “at the heart of your project.”

Fairfield Processing Corporation www.FairfieldWorld.com is “at the heart of your project” as a leader in manufacturing quality fillers.  Fairfield is located in Danbury, CT, and being a resident of CT, I had the privilege to have a behind the scenes tour with them.

The company is 77 years old and began as a manufacturer of natural fillers for hats and clothing. It is no wonder that they would be located in Danbury as at one time Danbury, CT, was the “Hat City of the World,” with 56 hat shops in Danbury by 1809. [https://connecticuthistory.org/the-danbury-hatters/ ]

I would surmise that the company name was derived from the name of the county which they resided, Fairfield. 

One could spend a whole day just reading the captions of the historical pictures that line the halls of Fairfield™ . It looks like a museum with its pictures of hat manufacturing and hat memorabilia. What an inspiring place to work with such a rich history.

History is not the only thing that lines the halls.  Gorgeous quilts and fiber art are everywhere.  Each office is a showcase. I wanted to know about the creator and history of each one, but there was not time – business must go on, and I did not want to impose.

IMG_4938-1.JPG
IMG_4931-1.JPG

Down at the end of the hall, is where all the magic happens. All those wonderful fillers are magically turned into creative, fun-filled projects. The door opens to the spectacular showroom that showcases most of their products. There are completed projects everywhere and there were even a few that they allowed me a sneak-peek.  They did not say, but I think they will be revealed this week at Quilt Market. I have been searching my Instagram account for them. 

Robin Dann and Tricia Santamaria, are the driving forces behind this creative “Design Team,” which is also comprised of sewists and crafters nationwide that create using Fairfield products. [I apologize that none of my pictures came out well of these ladies.  Next time I will have to check for blinking before I leave.]

As you would imagine they have a sewing room tucked in the midst of all this. Adilia Duarte has the wonderful privilege to be the sewist for Fairfield.

She has been with them for the past 29 years.  She started out in manufacturing and knew her first day on the job that she was not meant to be in manufacturing.  She told her supervisor and husband that she was not returning, but she did return, and I know she is glad she did, because just a few months later she found her way into a lifetime career of a sewist at Fairfield. When someone has an idea, she is the person that brings it to life. She creates simple stuffed friends, as well as beautiful ball gowns. Her closet is her inspiration. She knows what it has and what it can become. This Juki sewing machine has been her life-long friend.

She was so gracious to tell me all about her sewing adventure at Fairfield™, and as you would expect, she also provided me with tips along the way.

Here is one tip... be careful with your foam.  Do not take it out of its packaging too soon, as the oxygen turns the foam a different color.  It does not affect the integrity of the foam, but it can be an eye-sore.

Each one of the projects sitting out, she knows who made them and why they were made.  She is the Fairfield historian as well.

A sincere thank you to everyone at Fairfield who allowed me this wonderful behind the scenes tour and who have asked me to join the Fairfield “Design Team.” Followers will benefit from this relationship, as you can expect to be seeing many free sewing projects posted on this blog. A special thank you also to Abby Glassenberg at www.whileshenaps.com.  It was the article in her newsletter that lead me to Fairfield™.

Behind the truck in front, are several eighteen wheelers that are being loaded for a store near you.