
Summer time is such a wonderful time to entertain. It starts off with Memorial Day and Labor Day with July 4th tucked in the middle. Of course, those winter months are pretty awesome for entertaining. They start with Thanksgiving and end with New Years with that big Christmas Day in between. Wow! We do love our holidays.

Thank you to Fairfield Processing for graciously donating the Aluminor Fabric used in this project and sponsoring this blog post. While they provided the impetus, all the opinions, comments and designs are mine. They did not influence me.

This project is great no matter when you entertain, or if you are just serving everyday food for your family. It is sure to bring a little festivity to the table. This project is perfect for keeping food warm or cold. It uses this glitzy fabric from Fairfield called “Aluminor.”
It can cover a 12” round dish that is heaped full of food or even a bowl. I plan on using it for those high domed pies this summer. Here are two blueberry recipes from our favorite cookbook “Spices of the World Cookbook” by McCormick.

Spices of the World Cookbook by McCormick

Blueberry Cobbler and Blueberry Crumble Recipes from Spices of the World Cookbook by McCormick
While this project is domed and looks difficult to make, it actually was amazingly easy. I designed it, sewed it, took pictures of it, and wrote the instructions all in one afternoon. But I must confess that it would not have been that easy if I had not found an awesome website on the Internet. It calculated the exact dimensions of the gores and how many gores. All I had to do was put in the diameter that I wanted and push the enter button. I have been going around for the past few days feeling like a mathematical genius, when all I really did was find a great website with Google. If you want to make yours a different size just use this awesome site to calculate the size of your gores and add ½” seam allowance and I promise you, you will feel like an Einstein. http://www.domerama.com/calculators/cover-pattern/ But don’t feel intimidated. I copied my gore, so is all you have to do is download it and cut it out.
You might want to note that there are seven gores – an odd number, so when I made my alternating silver and gold Aluminor I had 2 colors next to each other. To offset this I decided to highlight it by putting a label on it. This will eliminate everyone lifting the lid to see what is underneath since they cannot see through it. So it accomplished more than I anticipated. Of course, this label is optional and you are welcome to make yours all one color.
For this project, I decided not to use machine embroidery since it is not lined and the Aluminor is on the outside. I did not want it to lose any of it thermal properties through the needle holes. It is not lined, but there is no worry if it touches food because of it also being food-safe.
My family is starting to think that Fairfield paid me to test these fabrics, but they did not. I just decided to conduct my own unscientific experiment to see how well Aluminor really worked. Here is how I conducted this experiment:
· 3:22 PM - At the same time, I placed 10 ice cubes in a glass container and put them on the table with another 10 ice cubes in the same style glass container, but this one I put under the domed Aluminor dish cover.

· 4:29 PM - After 37 minutes the ice cubes without the cover were already melting and the ice cubes under the cover were starting to melt.

· 5:16 PM – It has been almost two hours since I started the experiment and the ice cubes without the cover are completely melted. The ice cubes under the cover are more than halfway melted.

Conclusion: The Aluminor definitely showed that it was able to keep the ice cubes cold longer when it was used.
DISCLAIMER: While this test showed that the ice cubes stayed frozen longer with Aluminor, it does not mean that all foods would be safe for extended periods of time, so please always be food-safe and follow the USDA Basics for Handling Food Safely.
INSTRUCTIONS
TEMPLATE:
Click here to download circle template
MATERIALS:
12” piece of gold Aluminor
12” piece of silver Aluminor
Neutral color of good quality thread
Large shank button
Medium sized 2-hole button (strength underneath the shank button)
Coordinating upholstery thread (for the buttons since it is used as a handle)
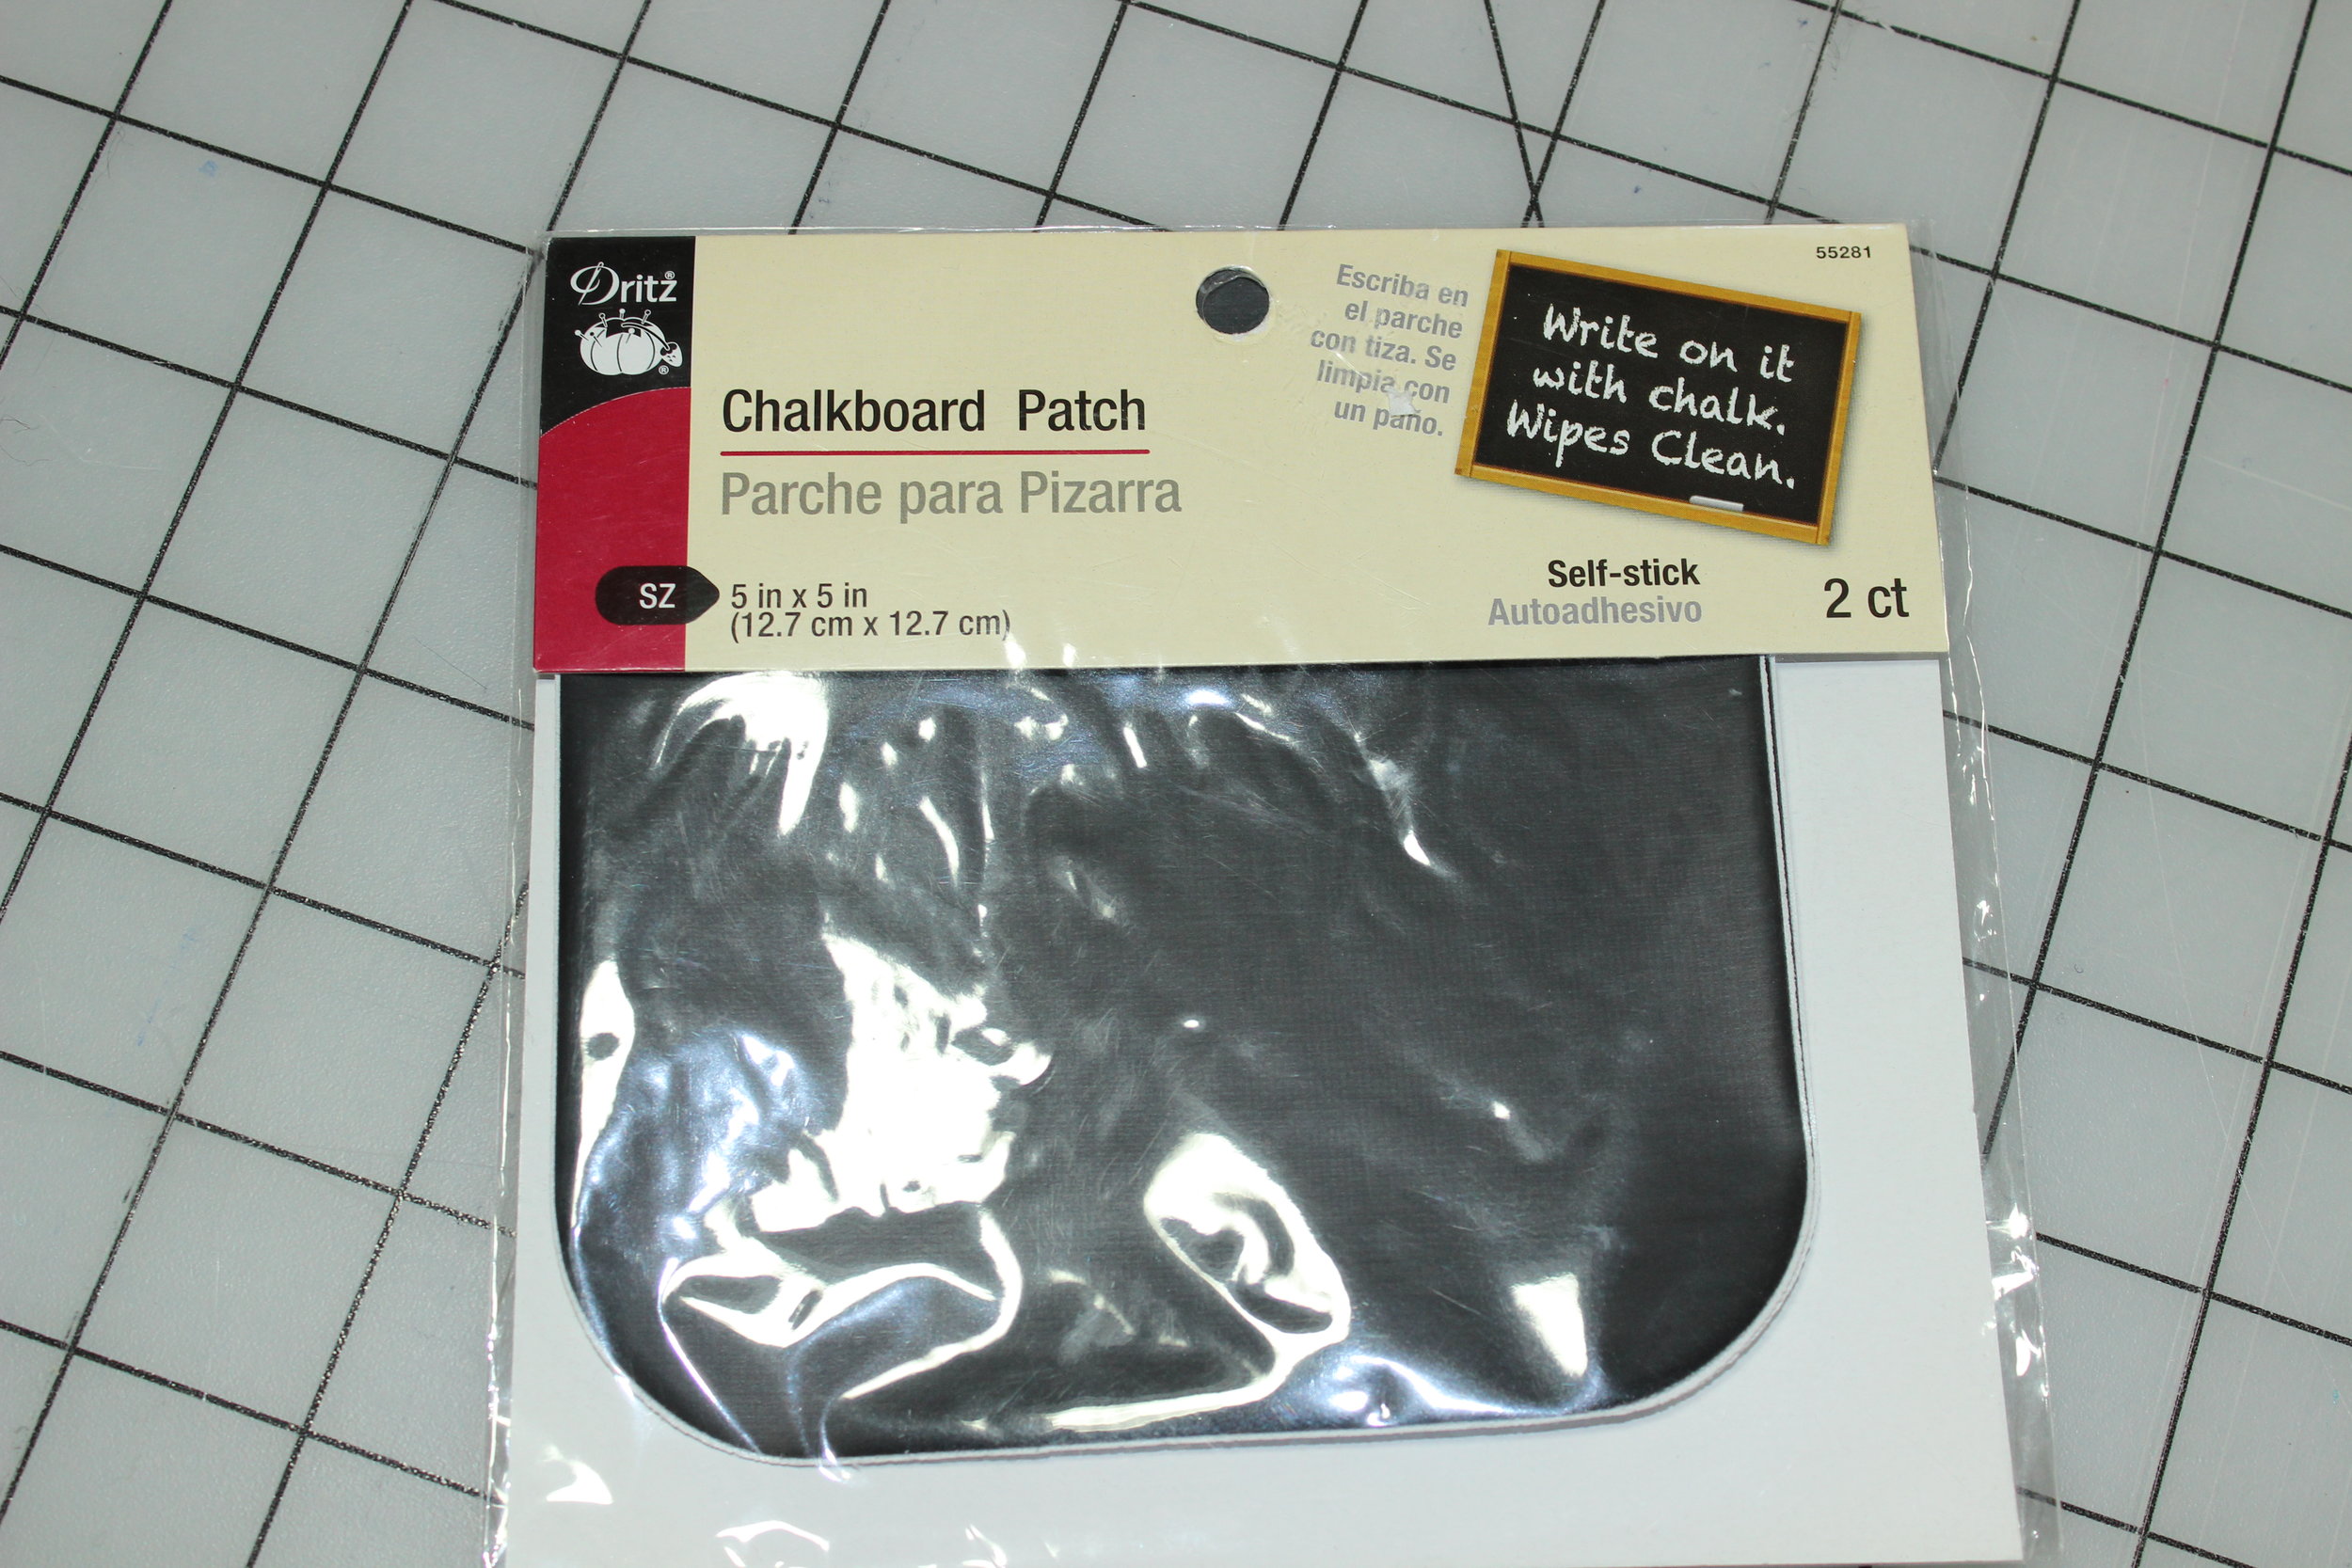
OPTIONAL: Self-adhesive chalkboard label
SUPPLIES:
Sewing machine and related supplies
Rotary cutter and mat are helpful, but not necessary
Shears & Trimming Scissors
Ruler
Wonder Clips® are preferred, but pins are acceptable
Point turner or some other blunt, but pointed object
Pen or pencil
STEP ONE
NOTE:
This project uses ½” seam allowances.
Do not press this fabric. Finger pressing is sufficient. Please see Fairfield’s website for tips on using this fabric. (Please note that there is no longer a sale on the fabric.)
Please read the instructions below before beginning. Gather the materials and supplies. Pre-wash the main fabric, press, and starch. Do not wash the Aluminor.
STEP TWO
Download the template and cut it out.
STEP THREE
Cut the fabrics as follows:
· Using the template cut four (4) pieces of gold Aluminor
· Using the template cut three (3) pieces of silver Aluminor
STEP FOUR
With a pen or pencil mark a ½” line at the top of each gore where it comes to a point.

STEP FIVE
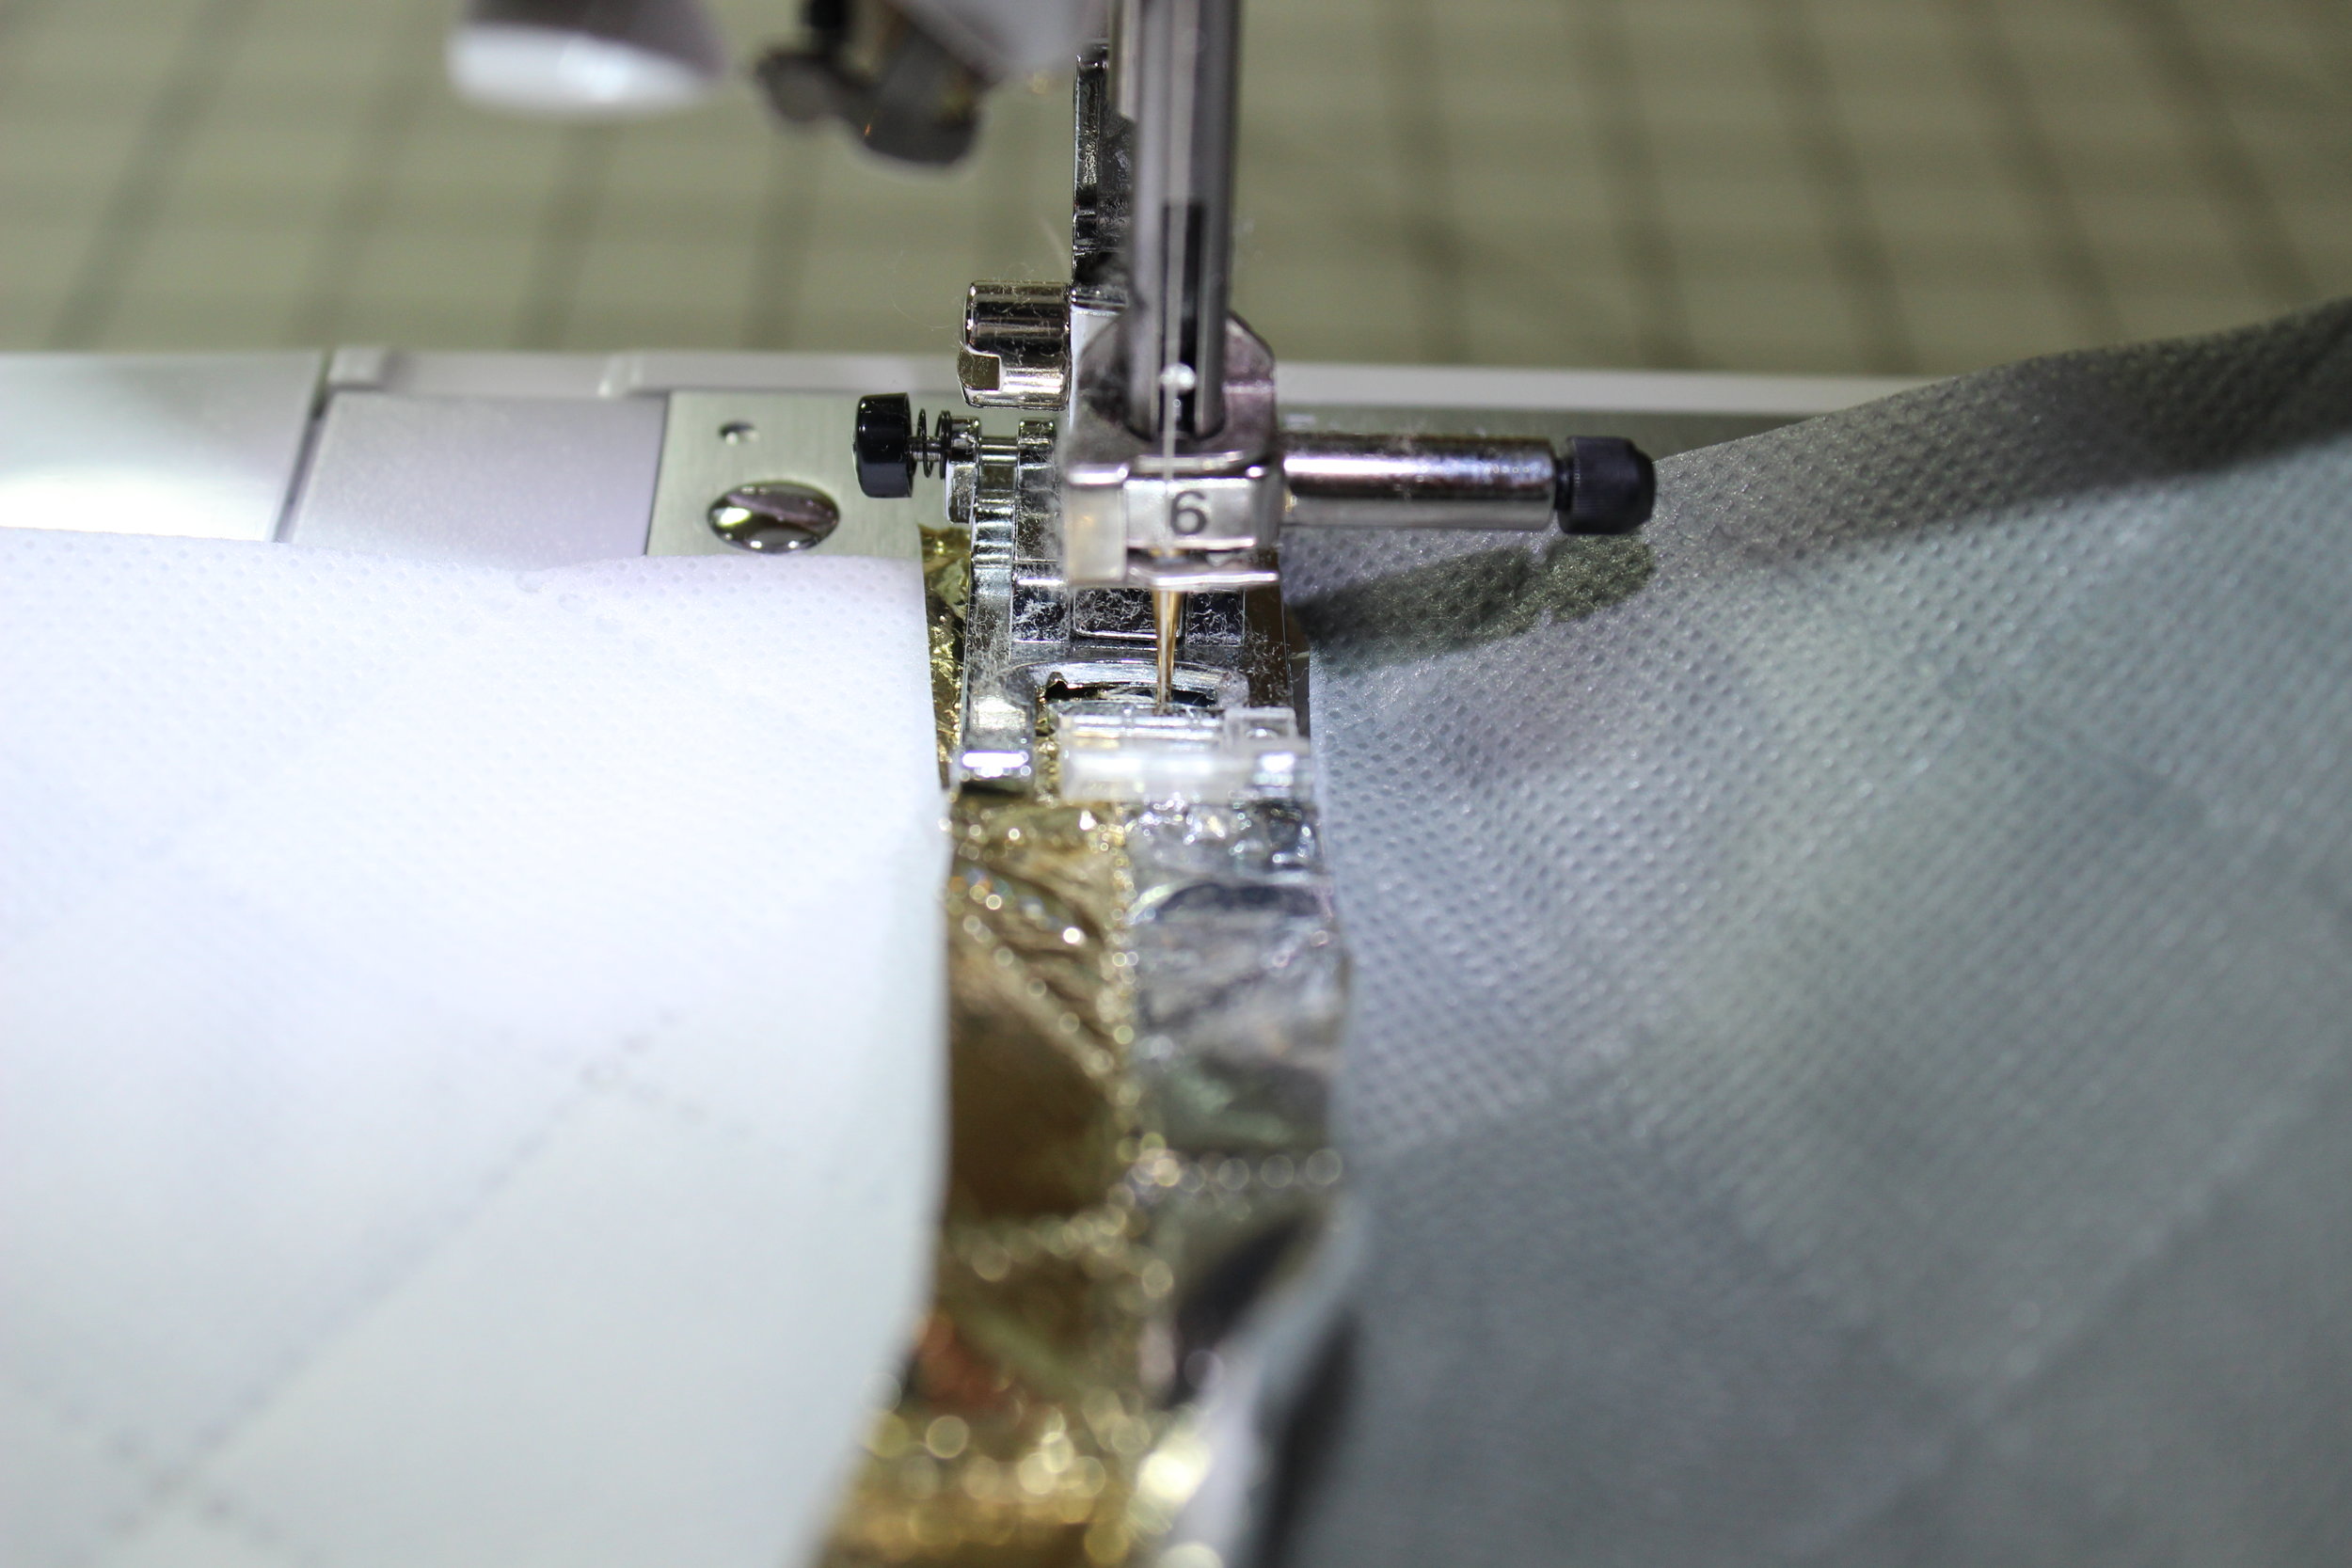
With right sides together, sew one gold gore to one silver gore. Start sewing at the bottom of the gore and stop sewing about 2 stitches after the ½” mark at the top of the gore.

Stop sewing about 2 stitches after the ½” mark at the top of the gore
STEP SIX
Continue sewing the gores together, alternating between silver and gold, until all the gores are connected.
STEP SEVEN
Finger press the seams open. With the wrong side up, zig zag each each seam along the stitched seam. This will keep the seams open.
STEP EIGHT
Place the first and the last gore right sides together and sew in the same manner as above. Zig zag as before.
STEP NINE
Fold the bottom of the dish cover up ½” and edge stitch.

STEP TEN
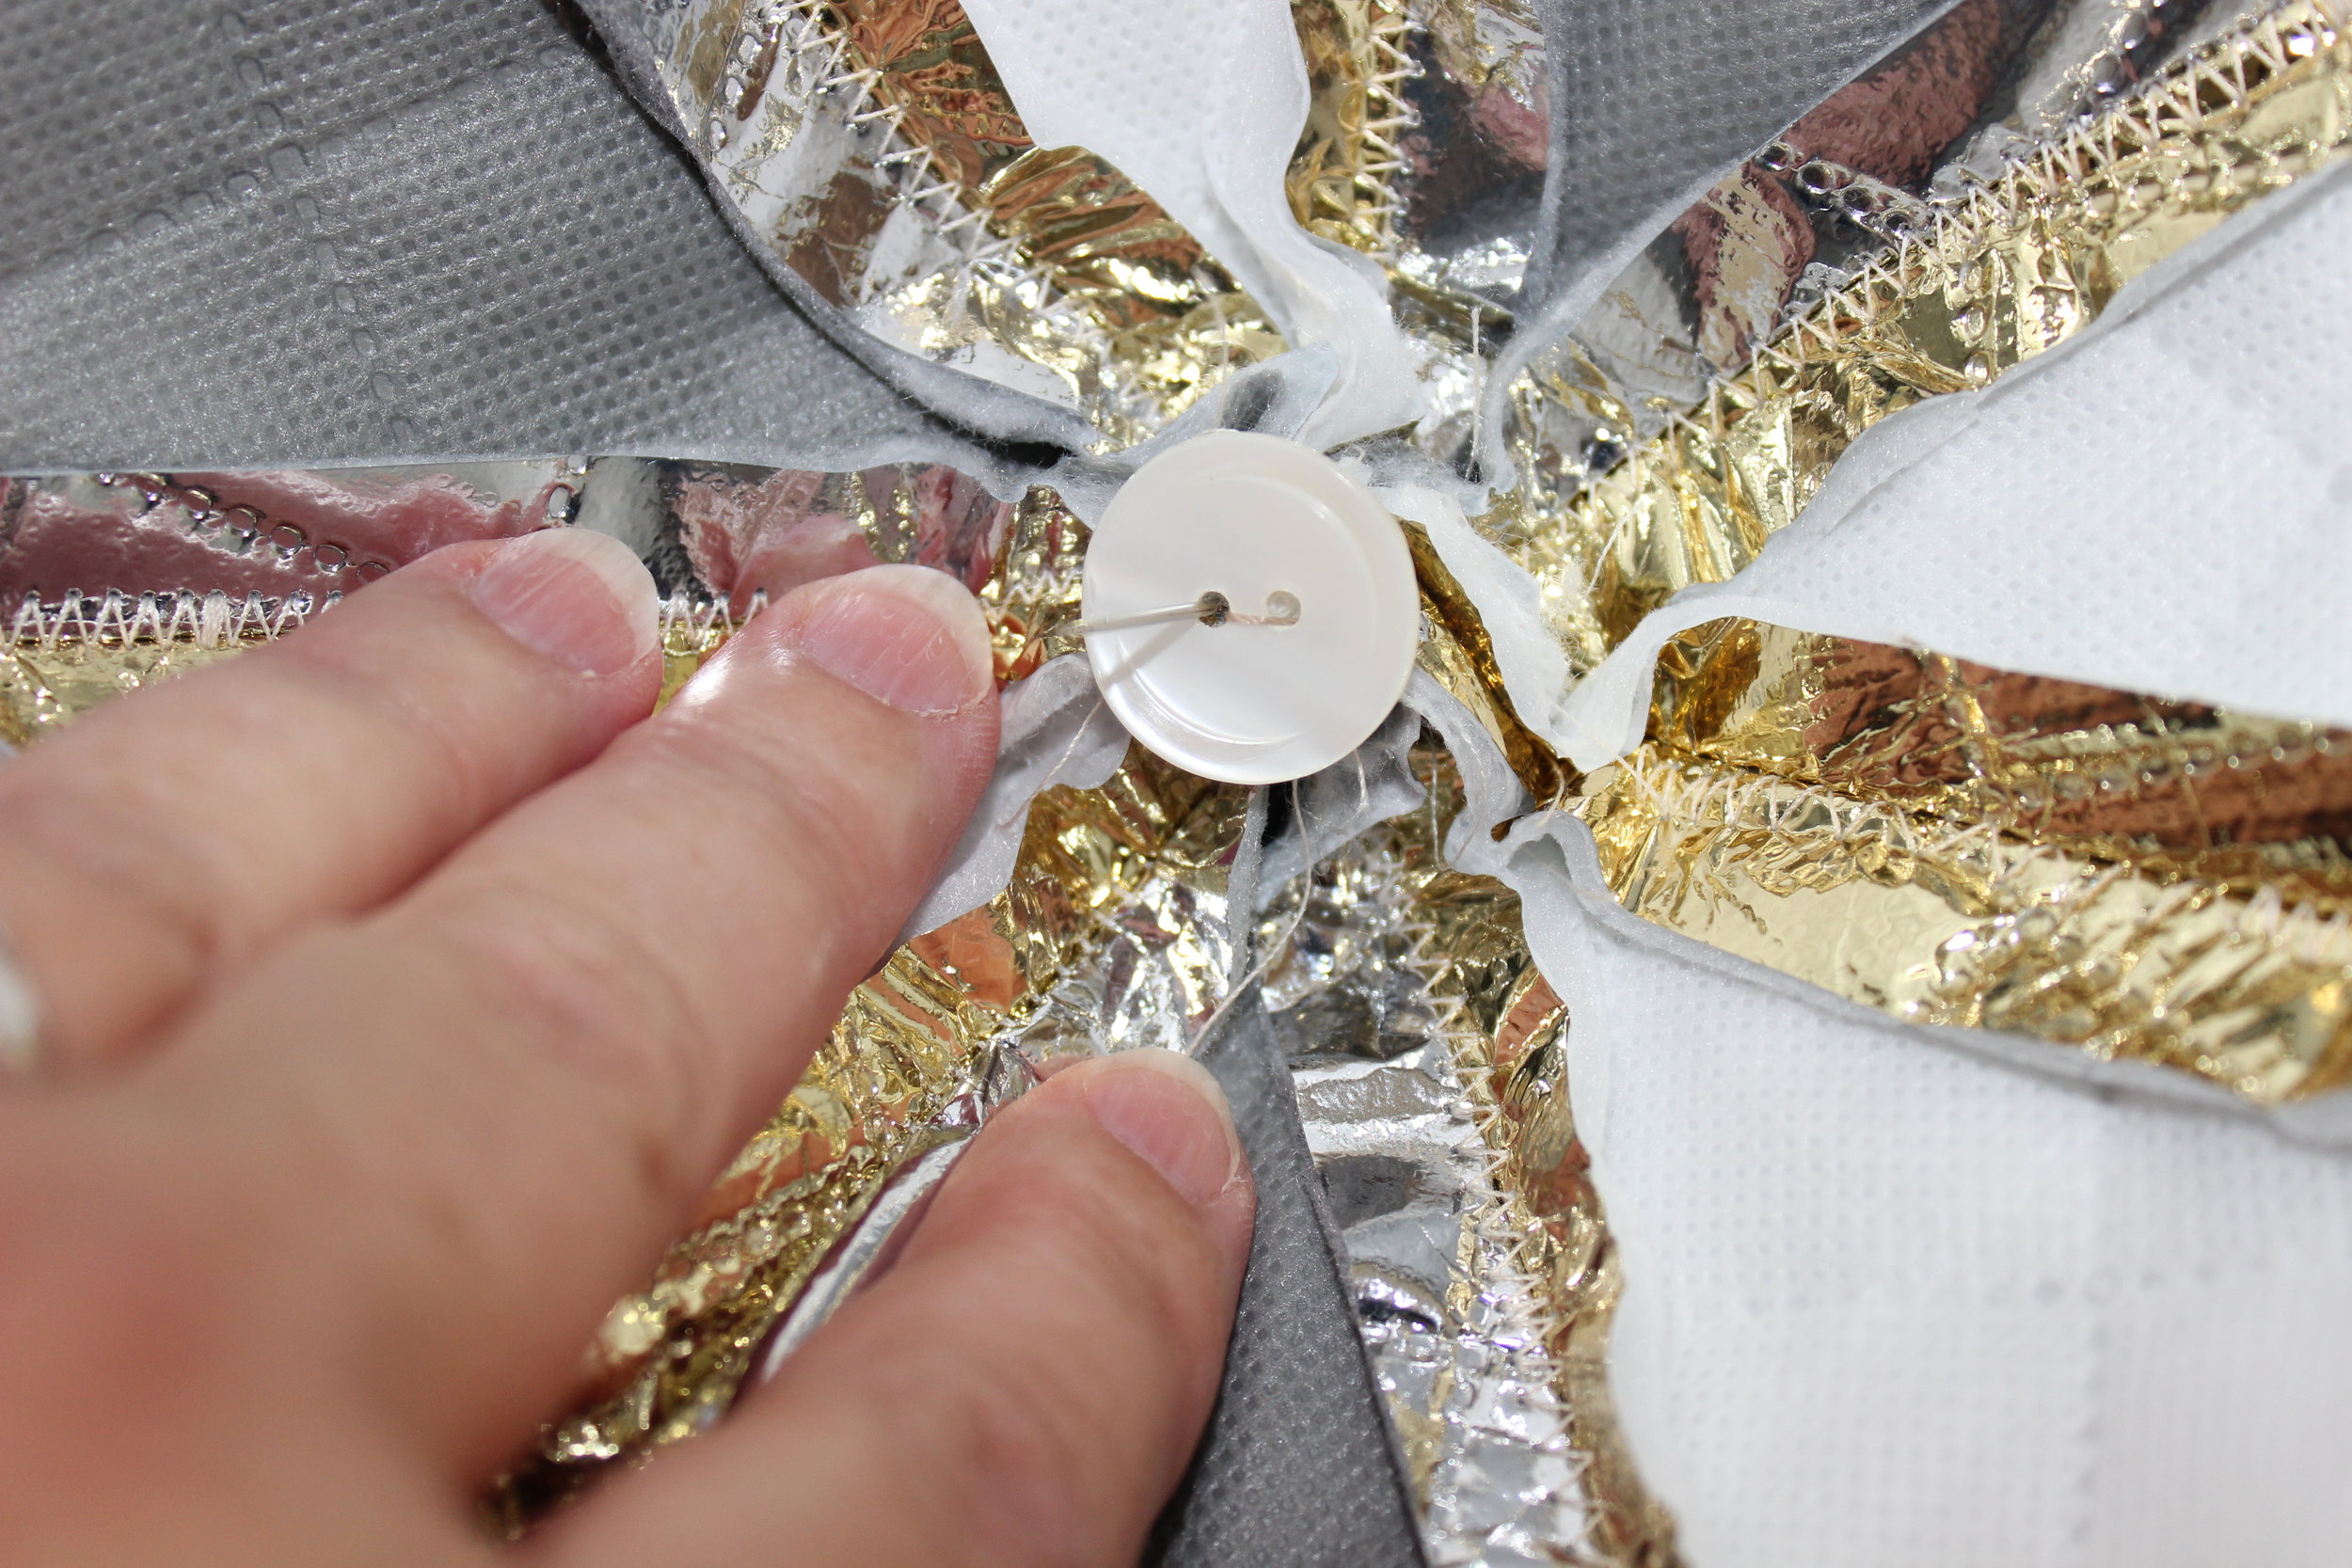
Sew the button on by hand using upholstery thread so it is stronger since it will be used as a handle. Reinforce the button by simultaneously sewing a 2-holed button on the inside.
STEP ELEVEN
Follow the manufacturer's guidelines and place the chalkboard label in the center of the two gold gores.
Please do not put Aluminor in the washing machine. Please wash by hand and do not crinkle, keep flat while washing and storing.
(Have fun wearing your new hat. LOL! This will definitely need a Clorox wipe as all my children keep wearing it.)

Enjoy your holidays and travel safe!