
Thank you to "Fairfield Processing" for providing the Oly-Fun™ Metallic for this blog post. I am so grateful that you donated some, as I have now fallen in love with it.
Oly-Fun™ Metallic is an innovative craft material that in every way resembles fabric. It even comes on a bolt. If you love bling, you will love this. It is ideal in a cutting machine or in crafts that you do not want to sew. It is easy to sew and does not fray. It can be spot cleaned. It is available at local craft/sewing stores. The place I see it the most is at the end of an aisle at Hobby Lobby. They have all the wonderful array of the basic colors as well as the four metallics in gold, silver, red, and a gorgeous rose gold.

Oly-Fun™ Metallic in luscious colors of gold, rose gold, silver, and red
Since Oly-Fun™ Metallic is so similar to fabric I wanted to put it to the test and see how well it would do under pressure. I made piping out of Oly-Fun™ Metallic for a project that is upcoming. It worked beautifully and because it does not fray, I decided to try making a longer piece without a seam. It was great! Instead of sewing the two ends together like traditional fabric, you pick up one end and slide the other end underneath, pull it tight under the binding foot and continue sewing. It was a breeze to sew and saved some time by not having to seam it first. I have instructions below on how to makes piping with Oly-Fun™ Metallic with both methods – traditional method of sewing the seams and the Oly-Fun™ way that does not need sewing.

Traditional piping with a sewn seam

Easy piping with Oly-Fun™ Metallic does not need a seam

No seam on the left and with a seam on the right
Some things to keep in mind when using Oly-Fun™ Metallic in general:
· Use “Wonder Clips” instead of pins so that marks are not left in the material
· Be careful sewing as marks will be left if a seam must be ripped out
· Be careful that the feed dogs do not leave a mark when the right side will be down against the feed dogs
· If using it with a stretch fabric, consider placing the piping under the fabric when attaching to avoid puckers
· While Oly-Fun™ Metallic does not have a grain, it does have a slight texture that should be kept in mind when planning your project

Texture of Oly-Fun™ Metallic
· Do not bend or fold the material as it will leave permanent creases

Oly-Fun™ Metallic with permanent creases
· Use a sharp needle that is as small as possible so that marks are not seen from the needle
· Do not use it on a project that will require washing
INSTRUCTIONS
MATERIALS
· Cording for piping the width and length necessary for your project (pictures are 3/8” cording and 12” long)

3/8" cording used for this tutorial
· Oly-Fun™ Metallic - cut the width to be the circumference of the cording plus 2” if you are using a ½” seam allowance and the length the perimeter of your project
· A Piping/Cording foot for your machine is very helpful, but a zipper foot can also be used

A piping foot has a groove to hold the piping

The piping foot holds the piping/cord in place while you stitch
· Rotary Cutter
· Self-healing Cutting Mat
· A “Piping Magic Tool” is a great help in trimming the piping (www.NancyNotions.com)
STEP 1
Cut your cording and Oly-Fun™ Metallic to the desired length and width. The width of the Oly-Fun™ Metallic should be the circumference of the cording plus 2” if you are using a ½” seam allowance, otherwise, adjust accordingly. This allows for the material to go around the cording and create a margin of fabric on both sides that accommodates a ½” seam allowance. For example, I used 3/8” cording and cut the width to be 2” (the pictures show 3”, but my actual project used 2”).
STEP 2
If you would like to connect your pieces of Oly-Fun™ Metallic the traditional method before piping then, sew the two ends right sides together with ¼” seam allowance (it does not need the bulk and will not fray so a small seam allowance can be used).

Only a 1/4" seam is necessary with Oly-Fun™ Metallic
STEP 3
Replace your standard foot with a piping/cording foot. This foot has a groove that allows the cord to stay in place while you are sewing close to the cord. It is important to adjust the placement of the needle so that the needle lands just to the right of the cord, but does not catch the material wrapped around the cord.

Adjust the needle placement so that it is just to the right of the cord
STEP 4
Wrap the width of the Oly-Fun™ Metallic tightly around the cord and match the raw edges with wrong sides together.
STEP 5
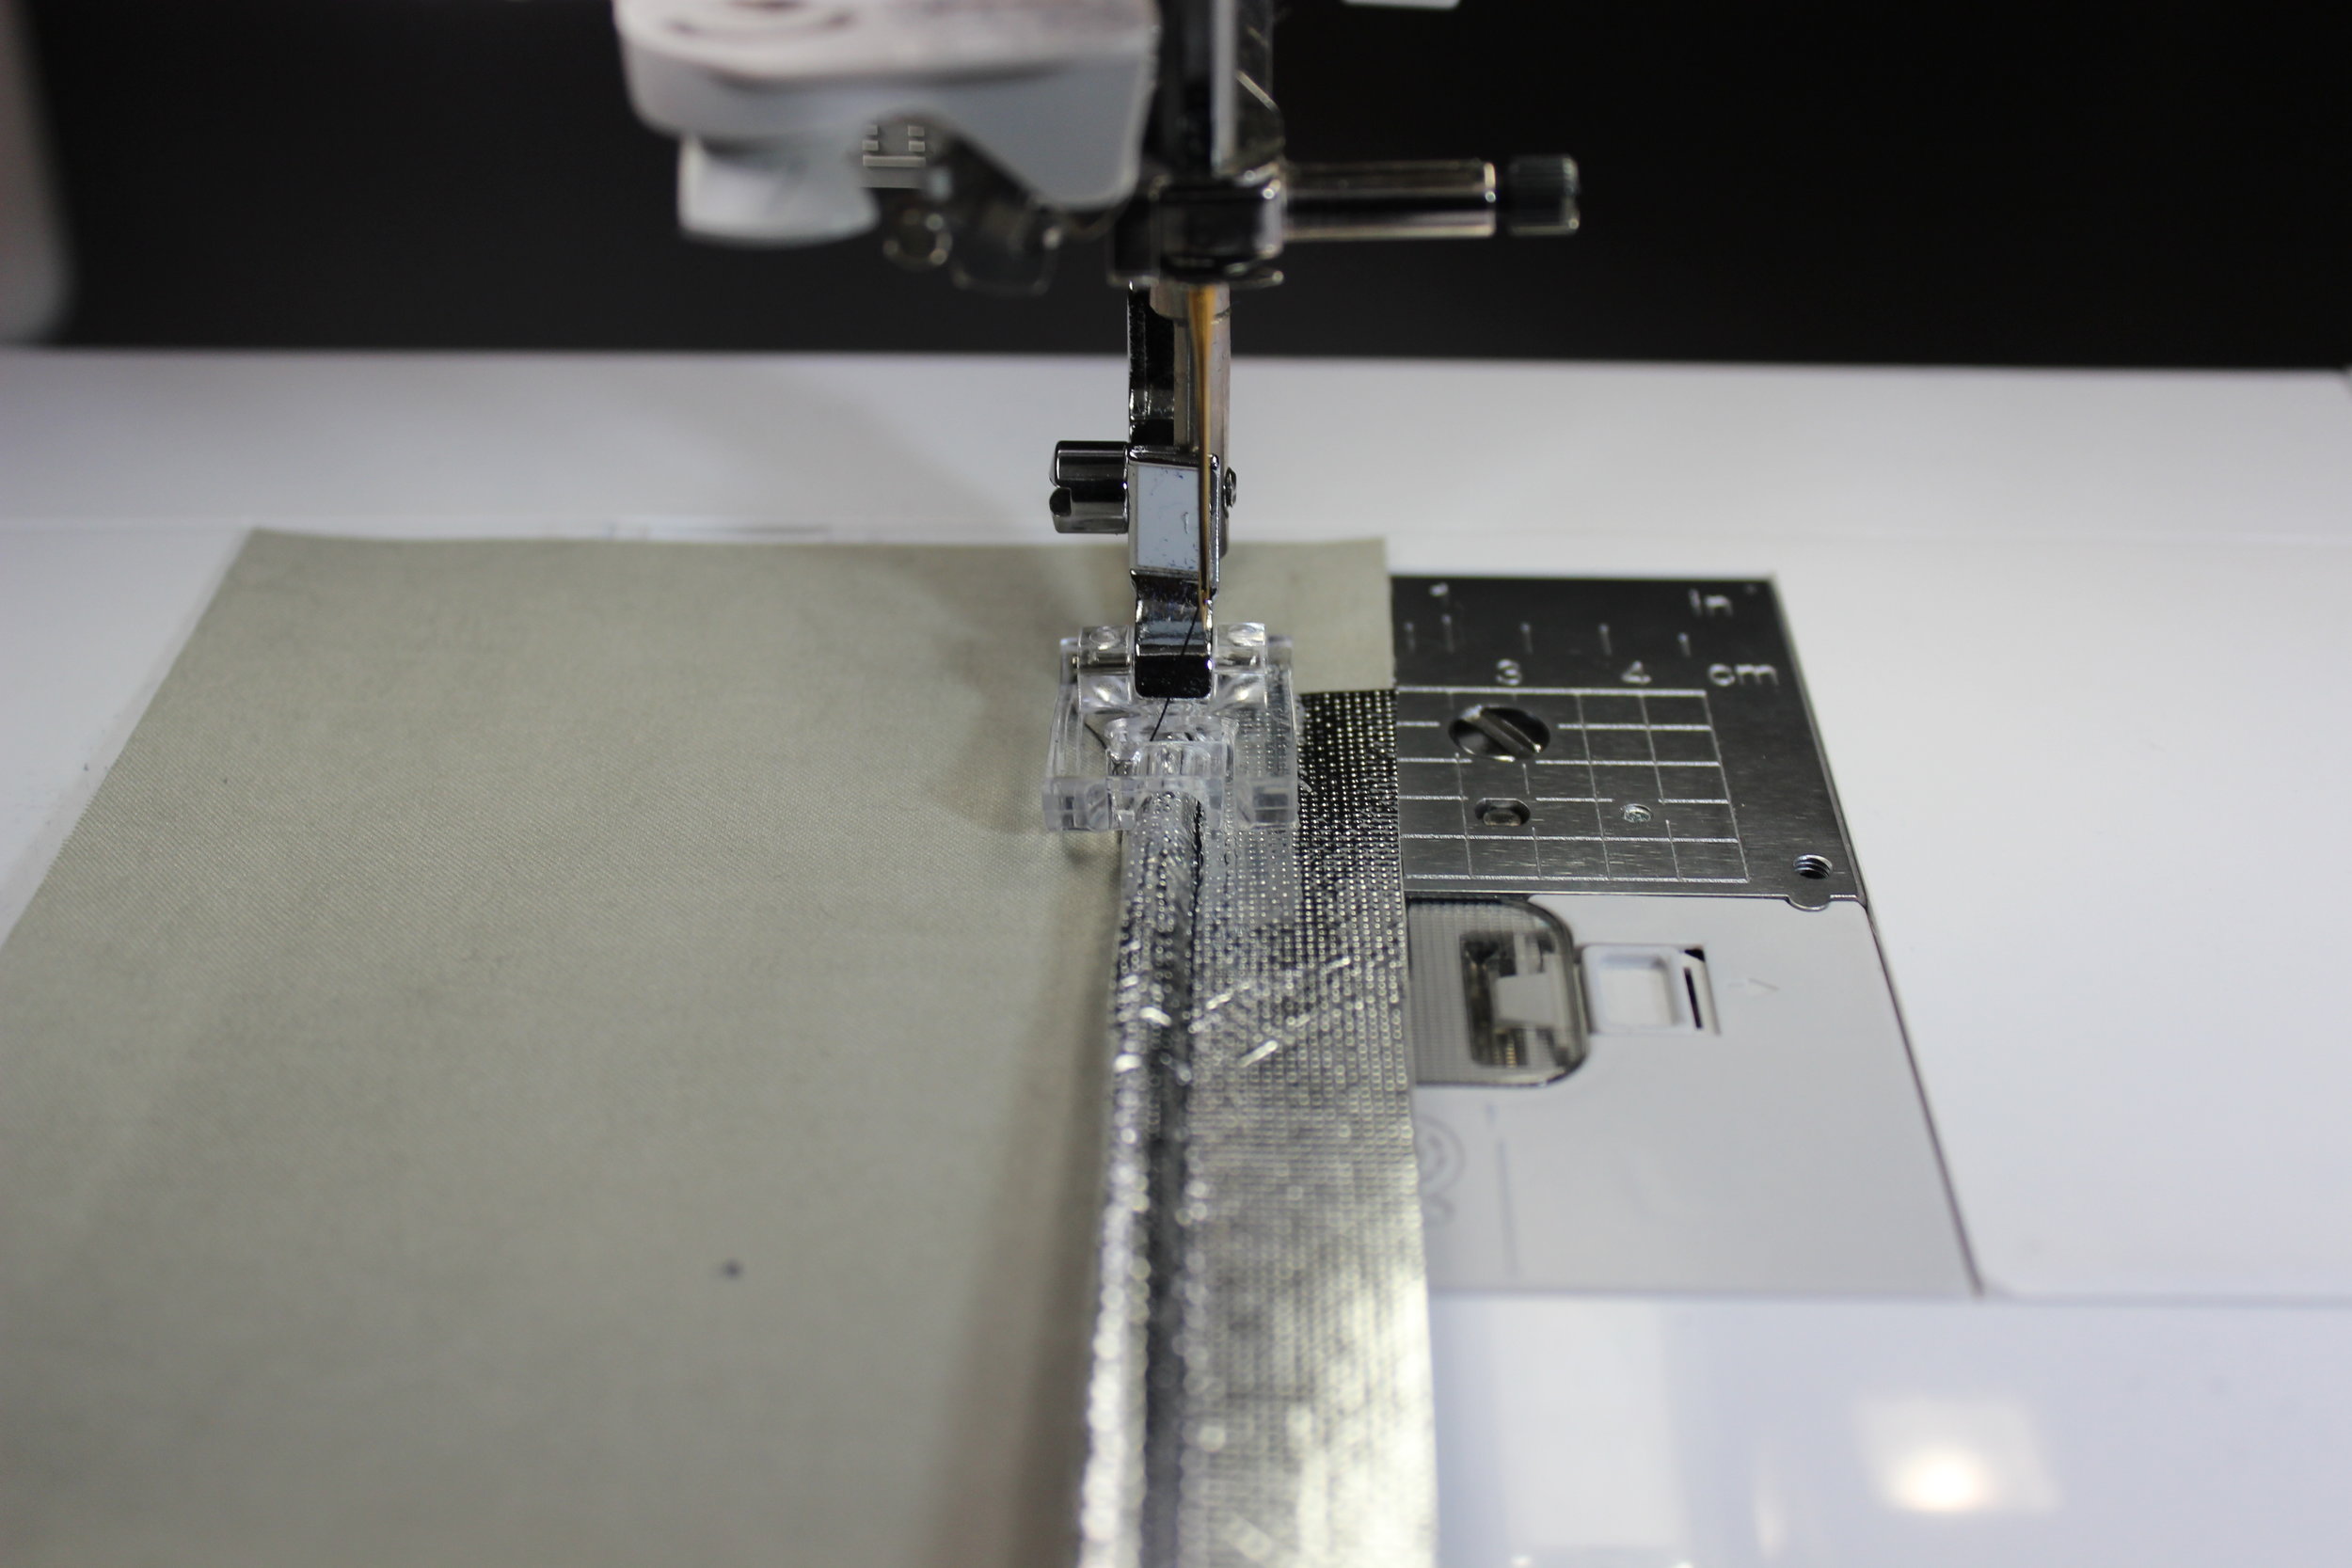
Slip the cording with the Oly-Fun™ Metallic under the piping foot, pulling the material tight around the cord. Sew with a regular stitch length.

Place the piping foot over the cord and the needle to the right of the cord
STEP 6
Stop 2” before you reach the end of the material. Lift the material up and slide the next piece under the first piece about ½”. Place the sewn piece on top and pull tight. Align the raw edges.

Stop sewing 2" before the end of the material and slide the next piece inside
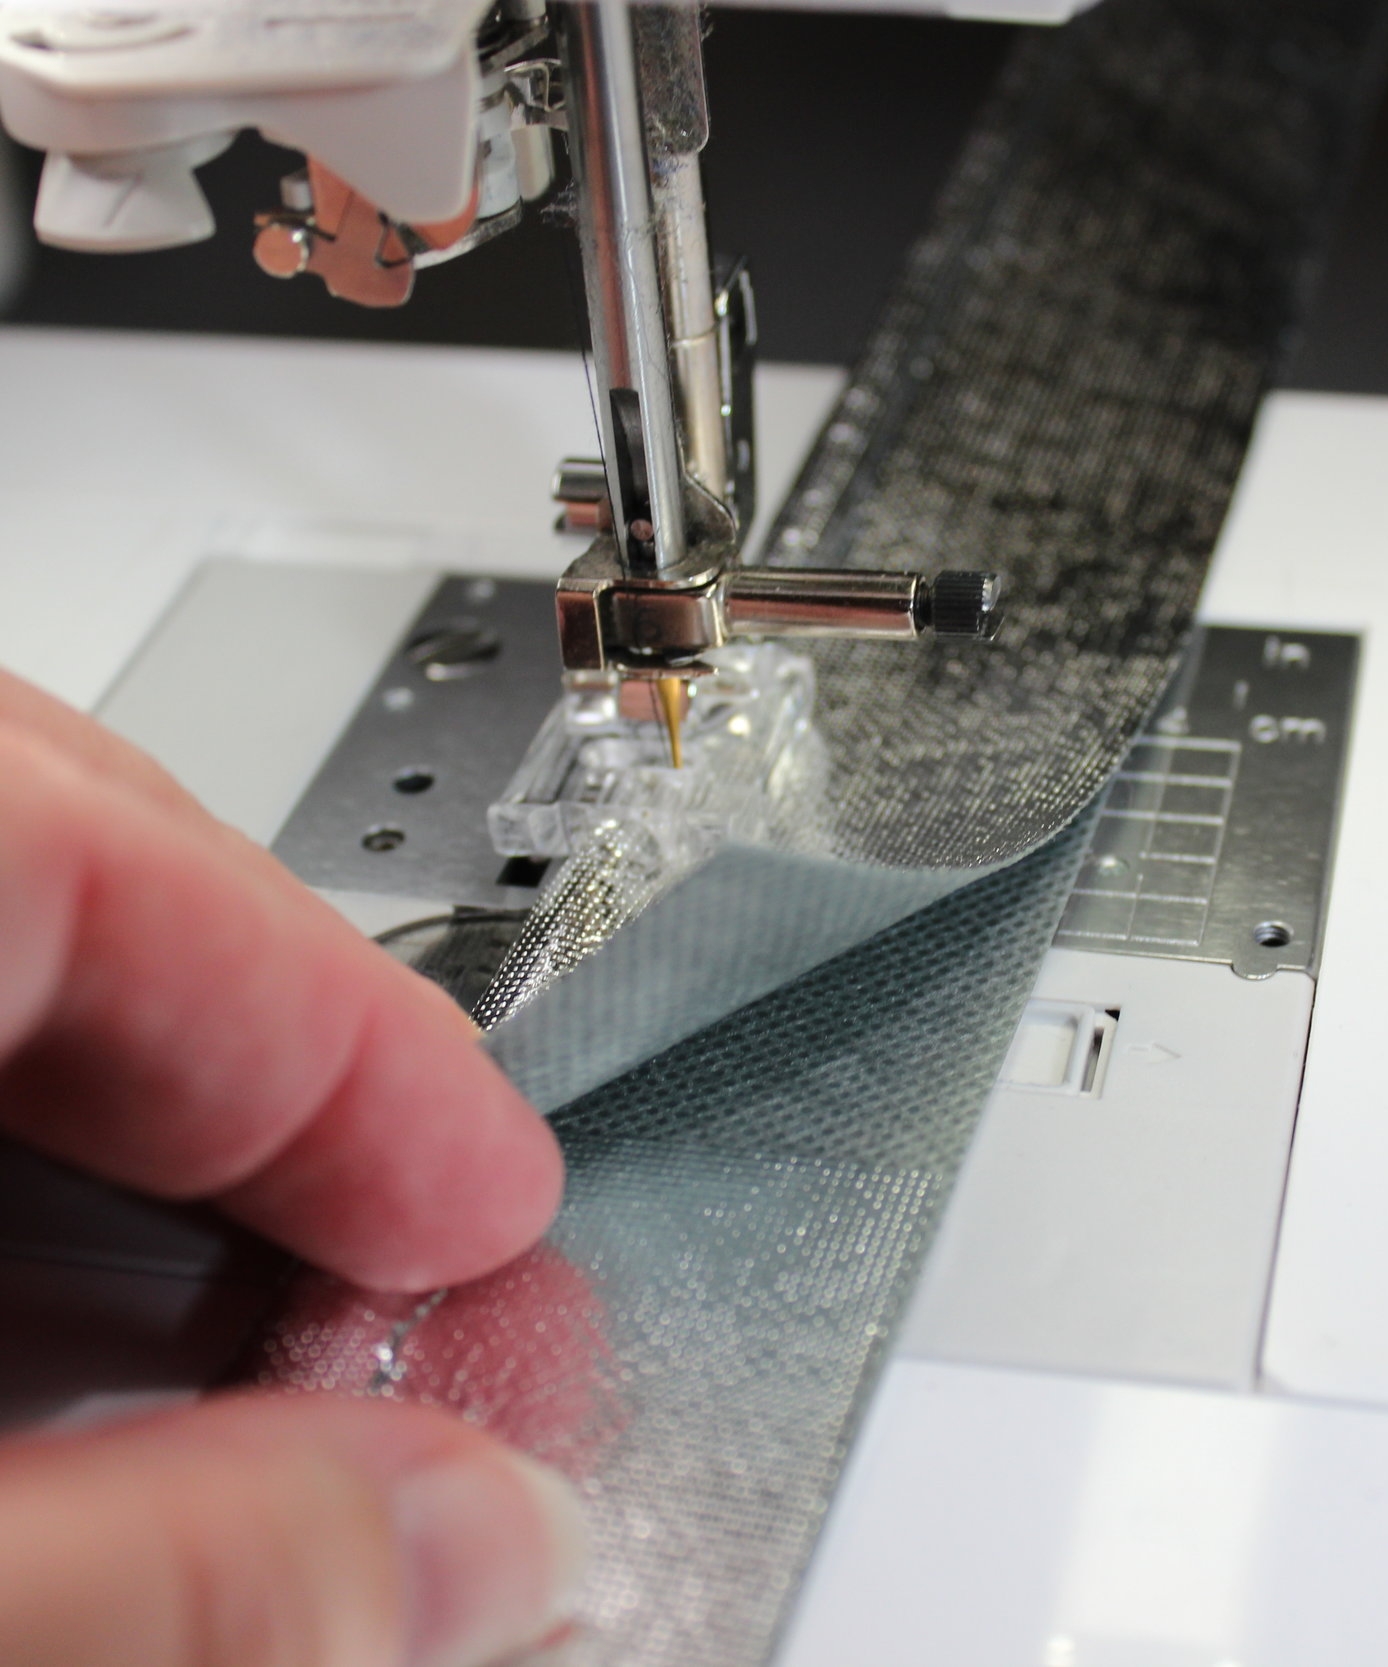
The material should overlap 1/2" and be tight
STEP 7
Continue sewing the piping until you reach the end.
STEP 8
At the cutting mat, trim the raw edges of the piping to ½” (or wider if needed for your project). A “Piping Magic Tool” slips over the cording and gives you an automatic ½” seam allowance to allow for easy straight cutting.

Trim easily with a special grooved acrylic ruler

Trim to 1/2"
STEP 9
Now you are ready to add it to your project. Follow the pattern guidelines. In general, you place the raw edge of the piping on the edge of the right side of the fabric and using the piping foot, you place the piping under the foot and sew in exactly the same place as before.
Place the piping on the raw edge and stitch with the piping foot
Then you add the second piece of fabric on top with right sides together. You place the piping under the foot and sew in exactly the same place as before. Fold the fabric back and the piping will be on the edge sandwiched between two pieces of fabric. If your project uses it in a different method, please refer to those instructions.

Add the second piece to the top and stitch again with the piping foot

Finished piping inserted into two pieces of fabric

5 yards of gold piping ready for a great project
Fairfield Processing has many projects on their website using Oly-Fun™ Metallic. A tray to keep food warm or cold while serving will be posted on their website that includes using Oly-Fun™ Metallic piping. Hope you enjoy it!