The Best Machine Embroidery Tightening Tool

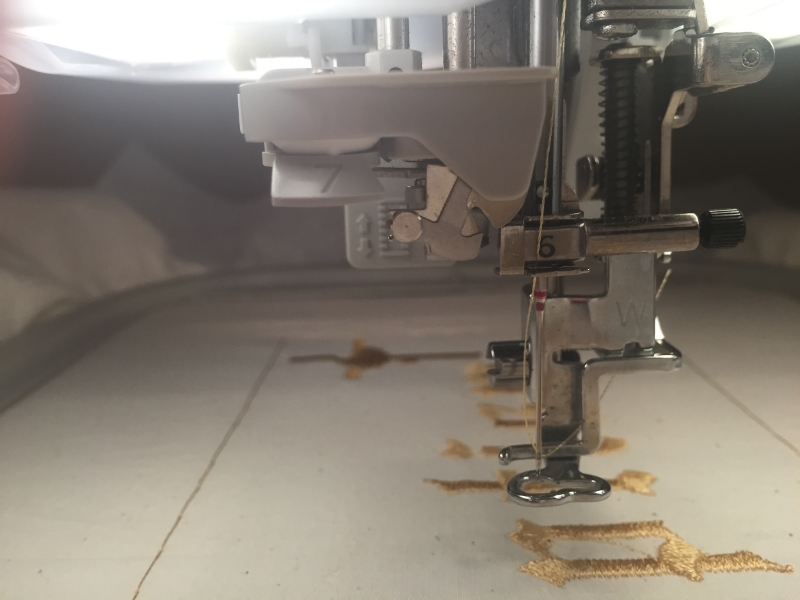
Every occupation has it tools and machine embroiderists are no different. Just like hand embroiderers, machine embroiderers use hoops to keep the fabric taut. As hand embroiderers know, sometimes it can be quite difficult to tighten the screw to make the fabric as tight as a drumhead. This precision can make all the difference in whether the embroidery design is a high quality or just fair.

The embroidery machine manufacturers know how critical this is and want their superior machines to always shine even when the embroiderist may be lacking the strength to tighten that hoop, thus they have been providing hoop screwdrivers for years.  However, this last upgrade produced a new device that was quite innovative. They now provide new embroidery machine owners with a multi position screwdriver. 

IMG_1083.JPG

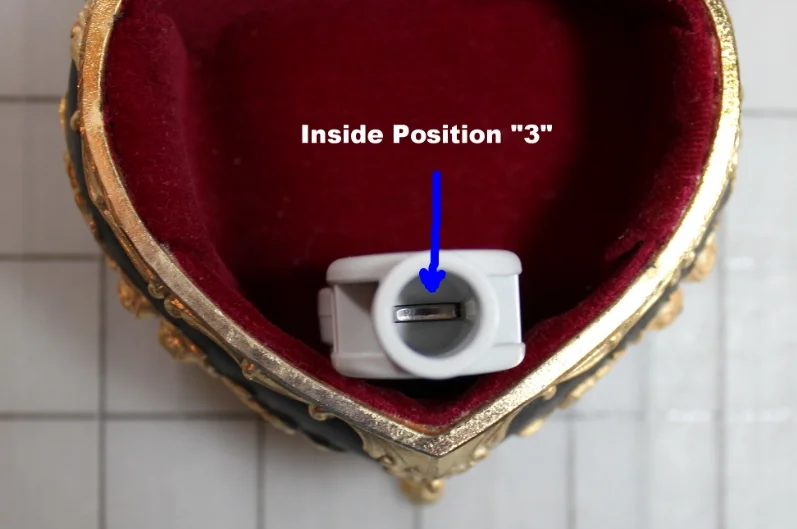
The screwdriver technically has three positions, and all three positions can be used to tighten the the hoop, but only position “3” grips the screw and does not allow it to slip, so this is the best option for tightening the hoop.

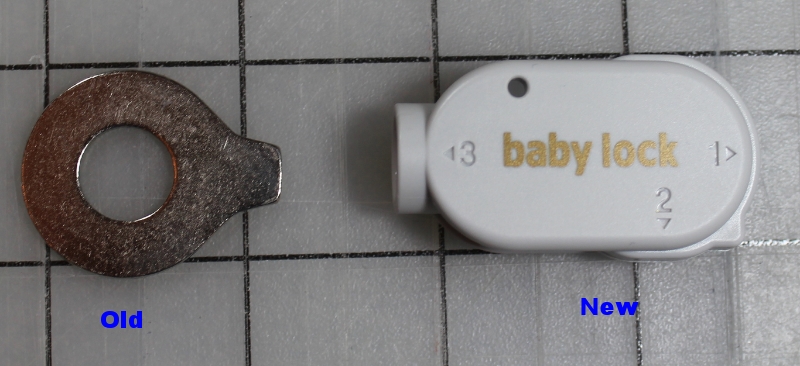
Position "1" is designed primarily for tightening the needle or the feet.

Whereas, position "2" ideally was made for the screws in the metal plate around the feed dogs. 

The previous screwdriver looked like a flat piece of metal. Inevitably it would slip while tightening and was difficult to get a grip. However, the old screwdriver is still great for all the other functions, because it gets into the small spaces so nicely.

You can own the multi position screwdriver without having to own the newest embroidery machine. They are fantastic. No more sore fingers! 

This new screwdriver is a bit pricey to buy at the retailer, but it is worth every penny. 

What do you think of the multi position screwdriver for embroidery machines?

How to Find a Machine Embroidery Thread using an iPhone

Sewing Machines are so sophisticated today.  Back in the dark ages – well at least when my husband bought my first sewing machine as a wedding gift almost forty years ago (He was so loving and thoughtful. How could have he have known it would lead to this.), sewing machines were much simpler to repair. Everything opened up and came apart. Even the manual told you how to repair it.  You were just expected to repair it yourself.

Today, the sewing machines are so complicated.  They are computerized just like our modern cars. The sewing manual is a tome and it does not even address repairing it. I have asked my beloved sewing machine salesman/owner/repairman if he would tell me how to open it up so that I could make sure that I did not have an illusive thread floating around when it breaks, but he assures me that I would forfeit my warranty and that I should just bring it in any time I have an issue.  Who wants to forfeit that incredible warranty and yet I do not want to drive an hour and fifteen minutes to his shop (yes, his price was well worth the savings, service and training).

Embroidery Design by Sonia Showalter

Embroidery Design by Sonia Showalter

As I was embroidering the muslin bags to keep our church’s baptism towels from getting dirty while they are stored, that upper thread broke for no apparent reason.  It sprang up into the upper thread tension area and balled all up.  I could see its gold little head peeping through the little crack. I searched for my tweezers. UGH! One of the boys took them.  I hid my eyebrow tweezers and did not think they knew to look for my sewing tweezers, but at least they know not to take those scissors! Of course, after realizing that the boys uses them, I decided to just buy new ones and never ask what they were used for because I really do not want to know.

Thread Ball Discovered!

Thread Ball Discovered!

Thankfully the edge of the thread was barely peeking out of the crack and I could pull it ever so gently by hand. Oh, so tenderly. I knew it could break inside. I pulled. It slowly began to unwind. Not what I wanted.  I wanted it all to just lift up and stay together. Gentle! Gentle! It was coming. It broke! I could see there was some still in there. Nothing would fit inside the crack that had the ability to grab. I did not, under any circumstance, want to break the plastic casing. It was not worth it. 

Using the iPhone to look up the in the upper tension area to see the thread ball.

Using the iPhone to look up the in the upper tension area to see the thread ball.

Modern technology could help me out, but how? I had to think like a surgeon.  I wanted to look inside and magnify it. If I used my iPhone to look under the plastic casing and it would show me where the thread was and then I could use it to look inside the crack to see if it was still there by magnifying it. It worked. I finally got it out and now it is running just fine. 

How has your iPhone gotten you into places you never thought you could see?

Built-in Camera Features in Embroidery Machines

Machine embroiderers have sophisticated computerized sewing machines.  That is just the nature of machine embroidery.  In order for the machine to embroider, it needs that assistance of a computer to direct all those minute little stitches to the perfect place on the fabric to make the intricate designs. Many of these machines can function as a standard sewing machine and some are dedicated embroidery machines. Just as sewing machines have different levels of technology, so do embroidery machines.

The higher-end embroidery machines have built-in cameras. These cameras can take a picture of your hooped fabric and place the needle just where you want it to begin.  Maybe it is on the edge of a princess seam on a garment or inside the design on the fabric. 

The machines also have the ability to center the design so that the embroidery begins exactly where you placed the centering sticker. This is great when you are placing a logo or design on a shirt pocket. You know exactly where you want the design to be centered. In my machine the sticker is called a snowman. The smaller top allows the computer to know the top from the bottom – ingenious!

Even though I have been using both of these features for years, it still never ceases to amaze me when I use them. I love watching the camera scan the fabric and then show me a picture. The process is really something that you need to see to believe and yet Youtube does not seem to do it justice. If you are curious to see how it works, here is a link to a YouTube done many years ago for the Baby Lock Ellisimo (no I am not endorsing this product).  It is a seven-minute video.  After two minutes it starts with the positioning of the snowman and a little after four minutes it shows the camera-scanning feature.

https://www.youtube.com/watch?v=y21X6MTvqPs

Even with both of these features, believe it or not, many times I still try and center my design in the hoop, not using the camera features.  When the storeowner that sold me my embroidery machine heard that fact he just shook his head.  He could not imagine why anyone would not use that feature. Well, let me give you my two main reasons for my insanity.

1.    Most times it is because my design is so large that the design is right next to the edge of the embroidery hoop.  If my positioning sticker (aka as my snowman) was miss-centered by just an eighth of an inch, the computer would tell me that it cannot be sewn and that I would have to re-hoop my design.  This would be so time consuming. It is better to start with it in the middle – completely aligned.

2.    Sometimes (okay, many times) I am just being frugal.  I want to use the smallest hoop possible so that I do not have to use too much stabilizer. However, my machine thinks that the design cannot be moved within the hoop just like in the first scenario and I get the same error message.

Hooping is the most time consuming part of machine embroidery and probably the least appreciated step. Yet this step is so vital to a beautiful piece of embroidery.  It can make or break the final outcome. Sometimes an item needs to be hooped several times before it is just right, but all the time spent in this process is well worth it. The camera really is an excellent resource that saves lots of time in this step, if we use it. Maybe I will rethink being so frugal as my time is as important as the cost of stabilizer and save my hooping stress for just the large designs.