2019 Stitch Along Tour and a Giveaway

This Contest is now closed.

Woohoo! We have a winner!!

Congratulations to C. Bennett. Please check your email.


Woohoo! February is National Embroidery Month! I am sure this month of dedication to embroidery was signed into action well before embroidery machines were invented. Well maybe not, I just saw that it may have been signed in the 90’s, but I could not find a reliable source to confirm the actual date, so we will believe that it was. Anyhow, I am sure the intention of this event was to commemorate all those painstaking hours of gorgeous hand embroidery. Many hand embroiders will not like to hear this, but technically machine embroidery falls into the category of embroidery.

The Oxford Dictionary defines “embroider” as a verb: “Decorate (cloth) by sewing on it with thread.” There you go!! Machine embroidery is just as official as hand embroidery!

Eileen Roche of Designs in Machine Embroidery at www.dzgns.comand Baby Lock at www.babylock.com have teamed up together to celebrate the month with a 2019 Stitch Along Tour. They asked eleven others to participate in the event. You can find a list of all the participants at Eileen’s blog post on January 31, 2019,  http://dzgns.com/blog/2019/01/2019-stitch-along-tour-participants-list/ that introduced everyone. 

SliderBlogBanner-Sew-Along-v3.jpg

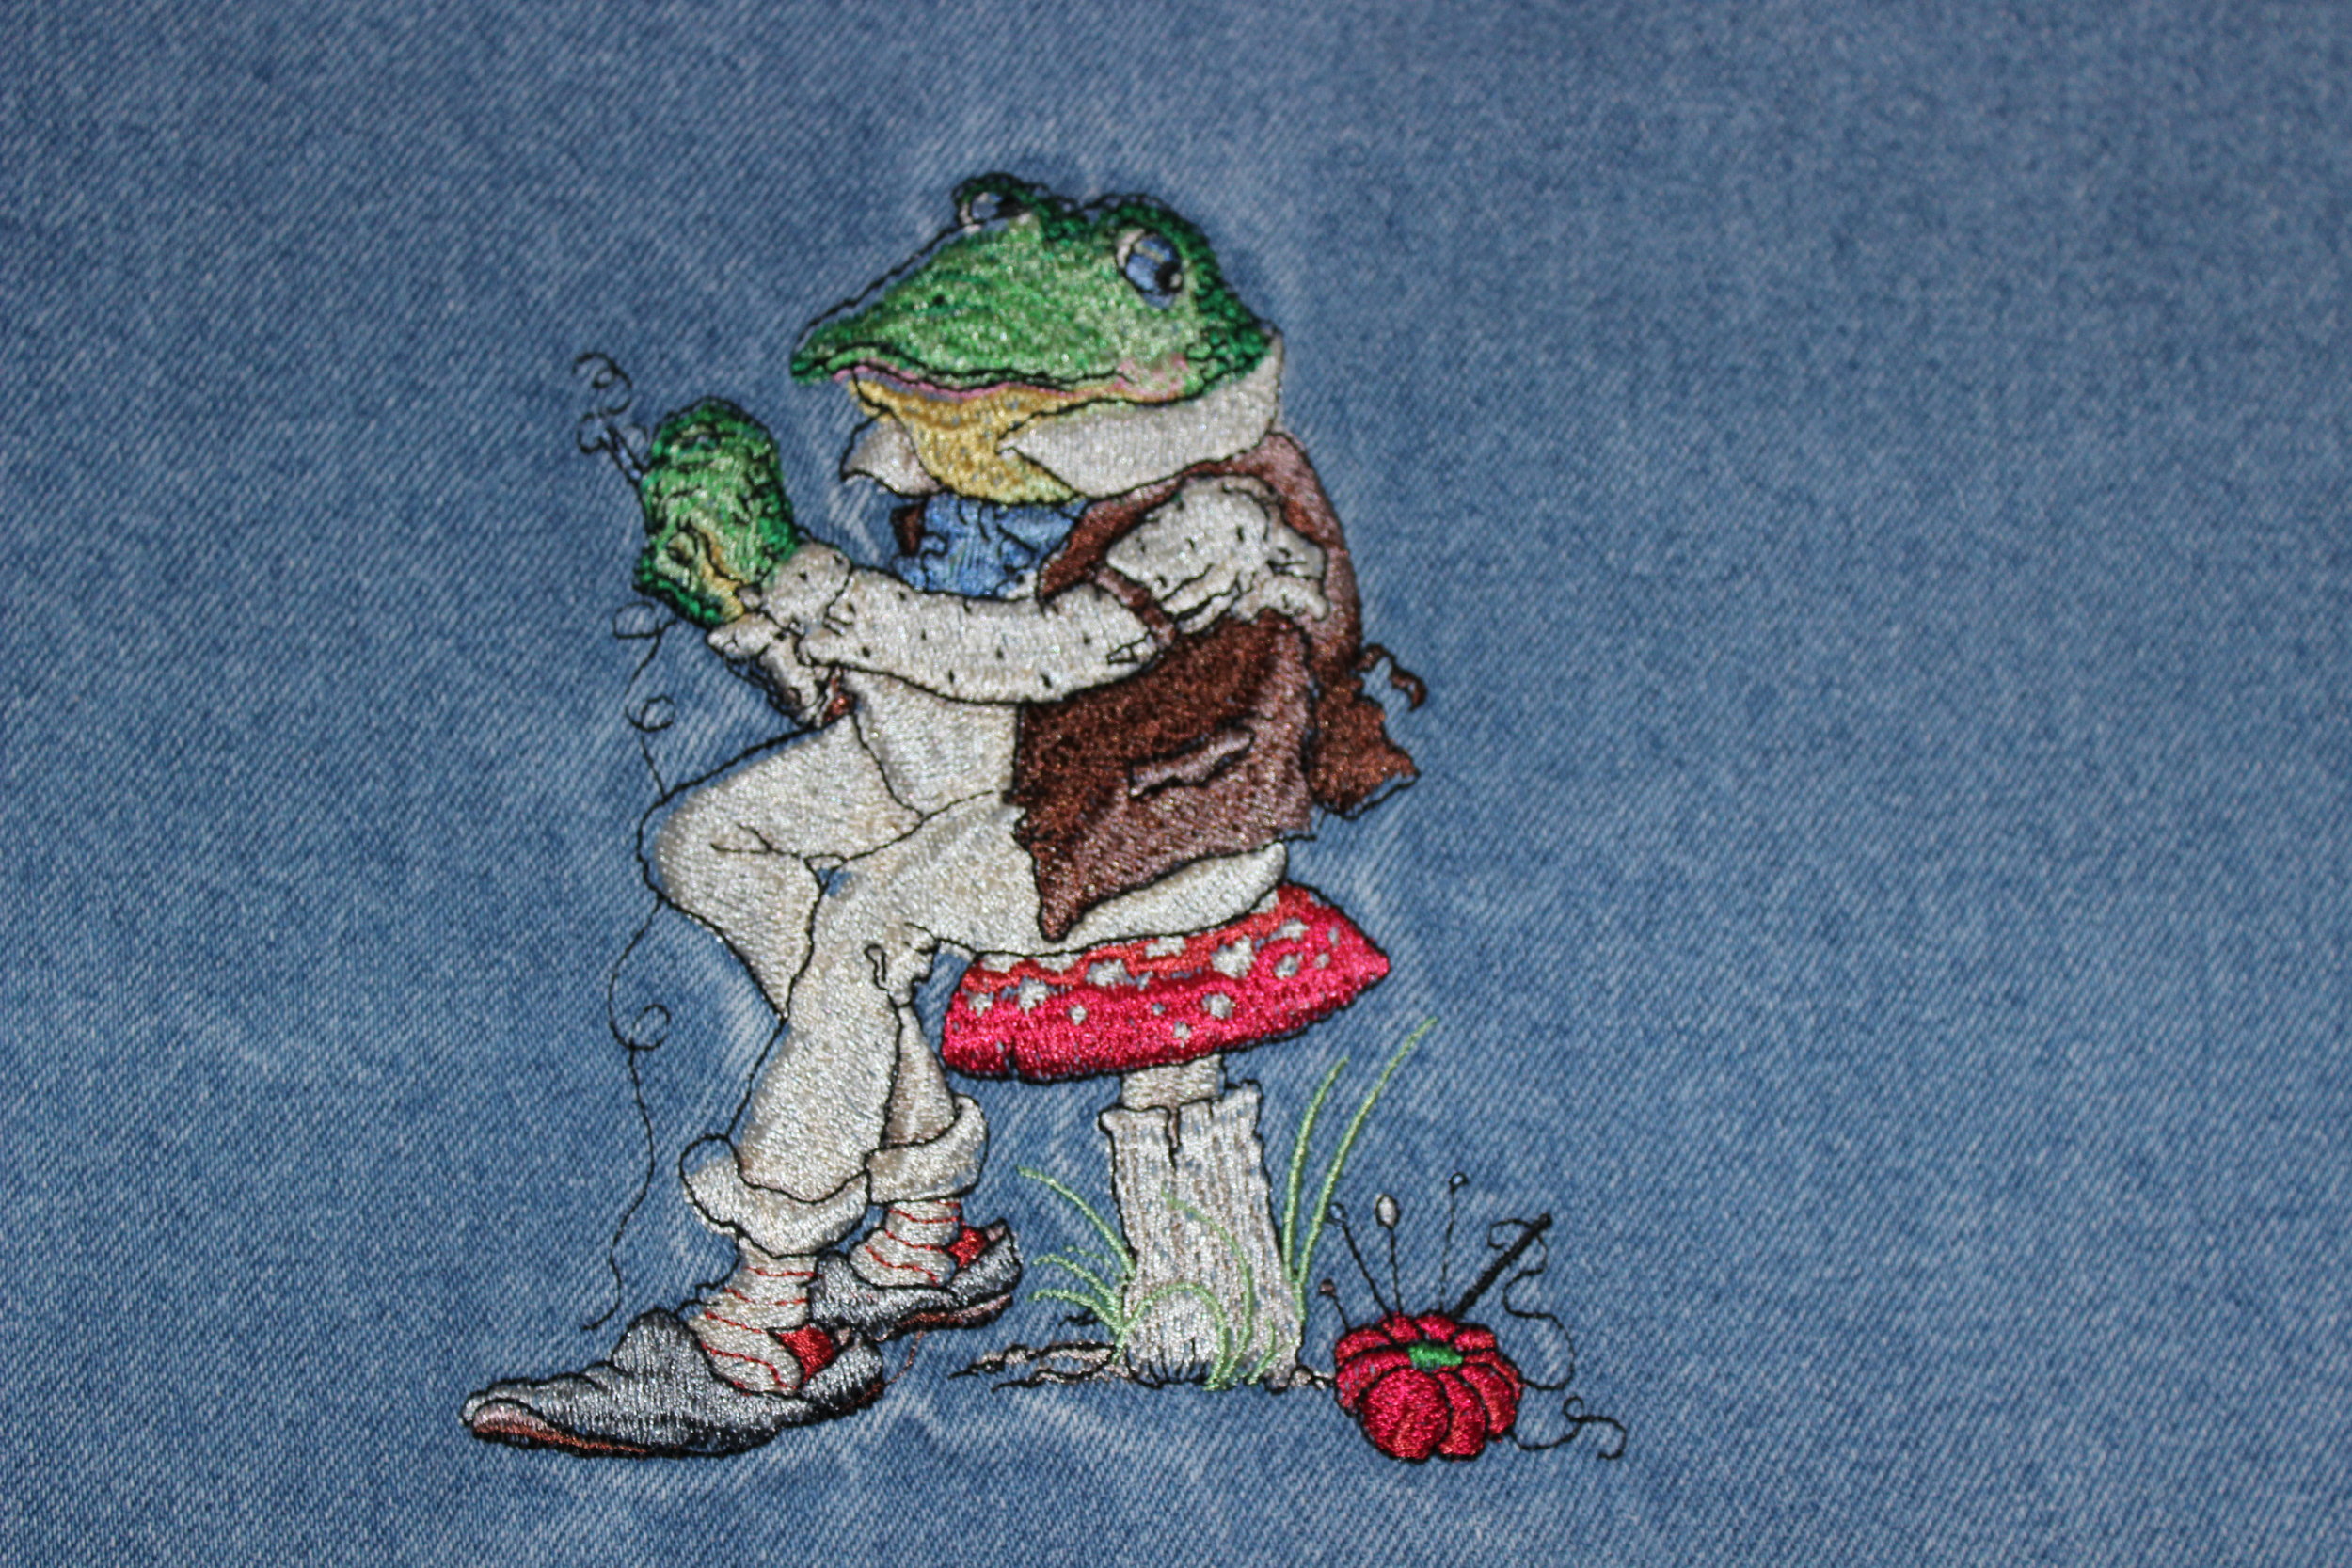
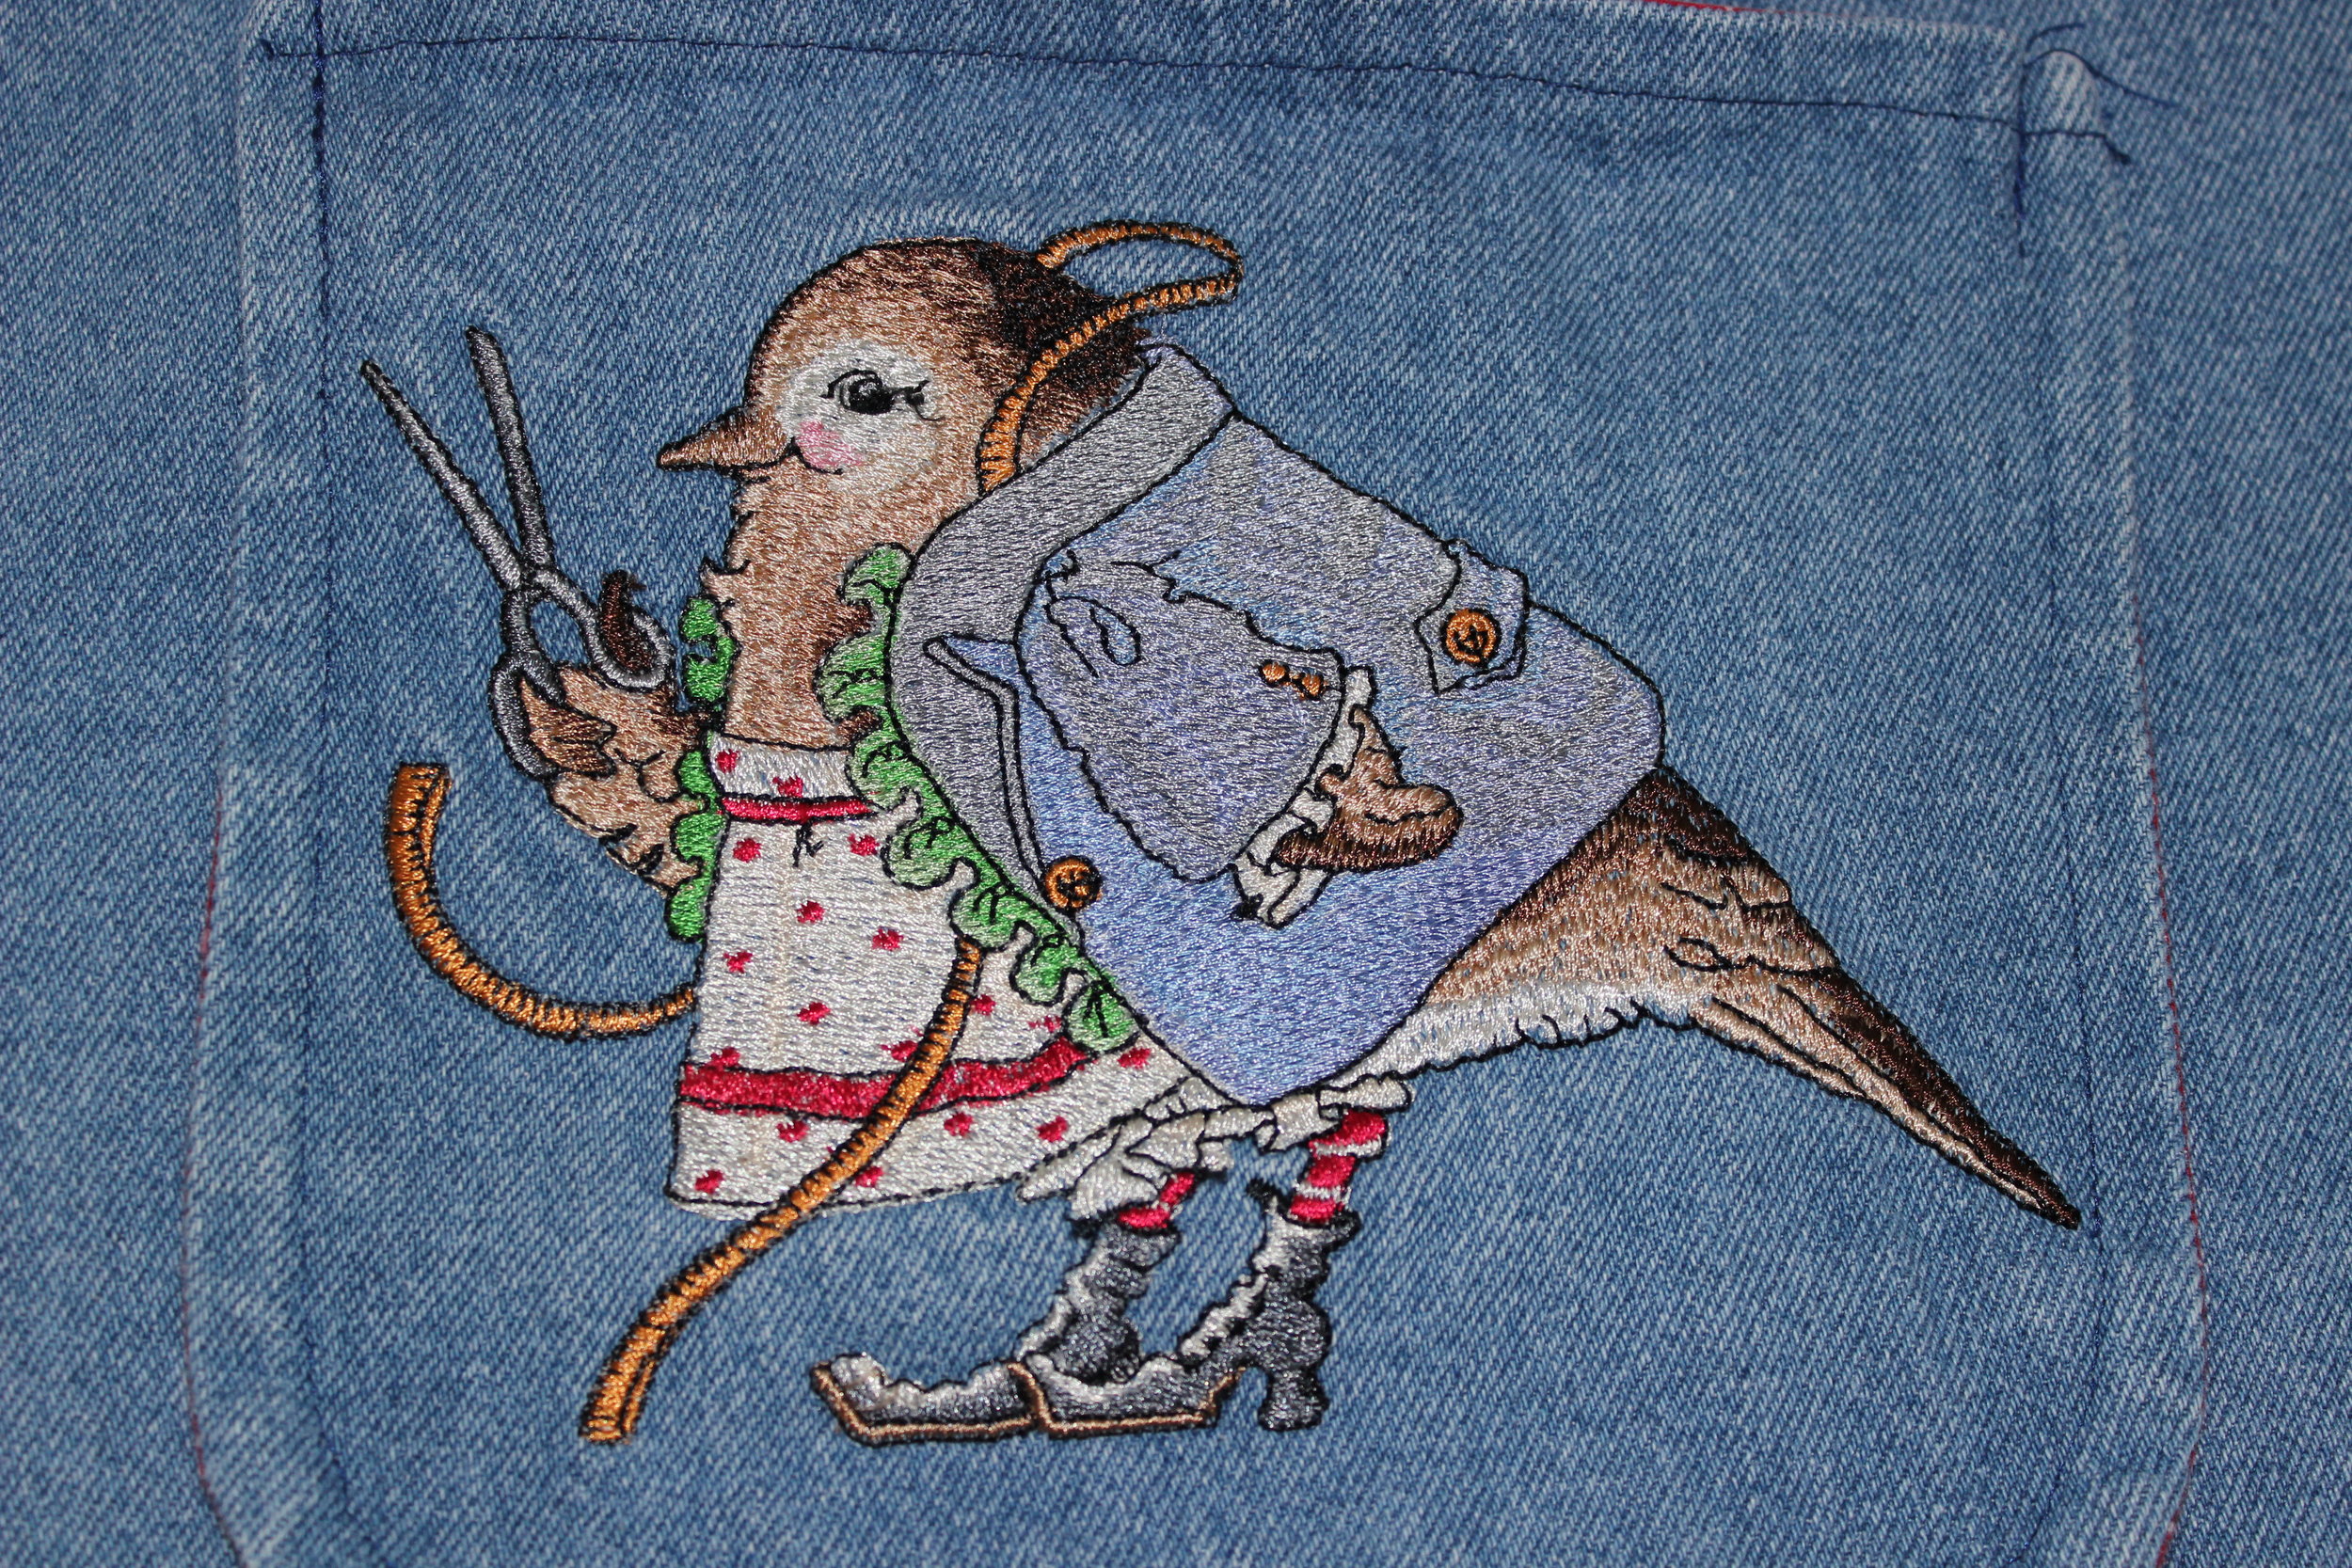
Each participant was given two panels of the pre-printed fabric and a download of designs. We were asked to be creative and present our projects on a blog post during the month of February. The two panels and designs are just beautiful.

IMG_5105.JPG

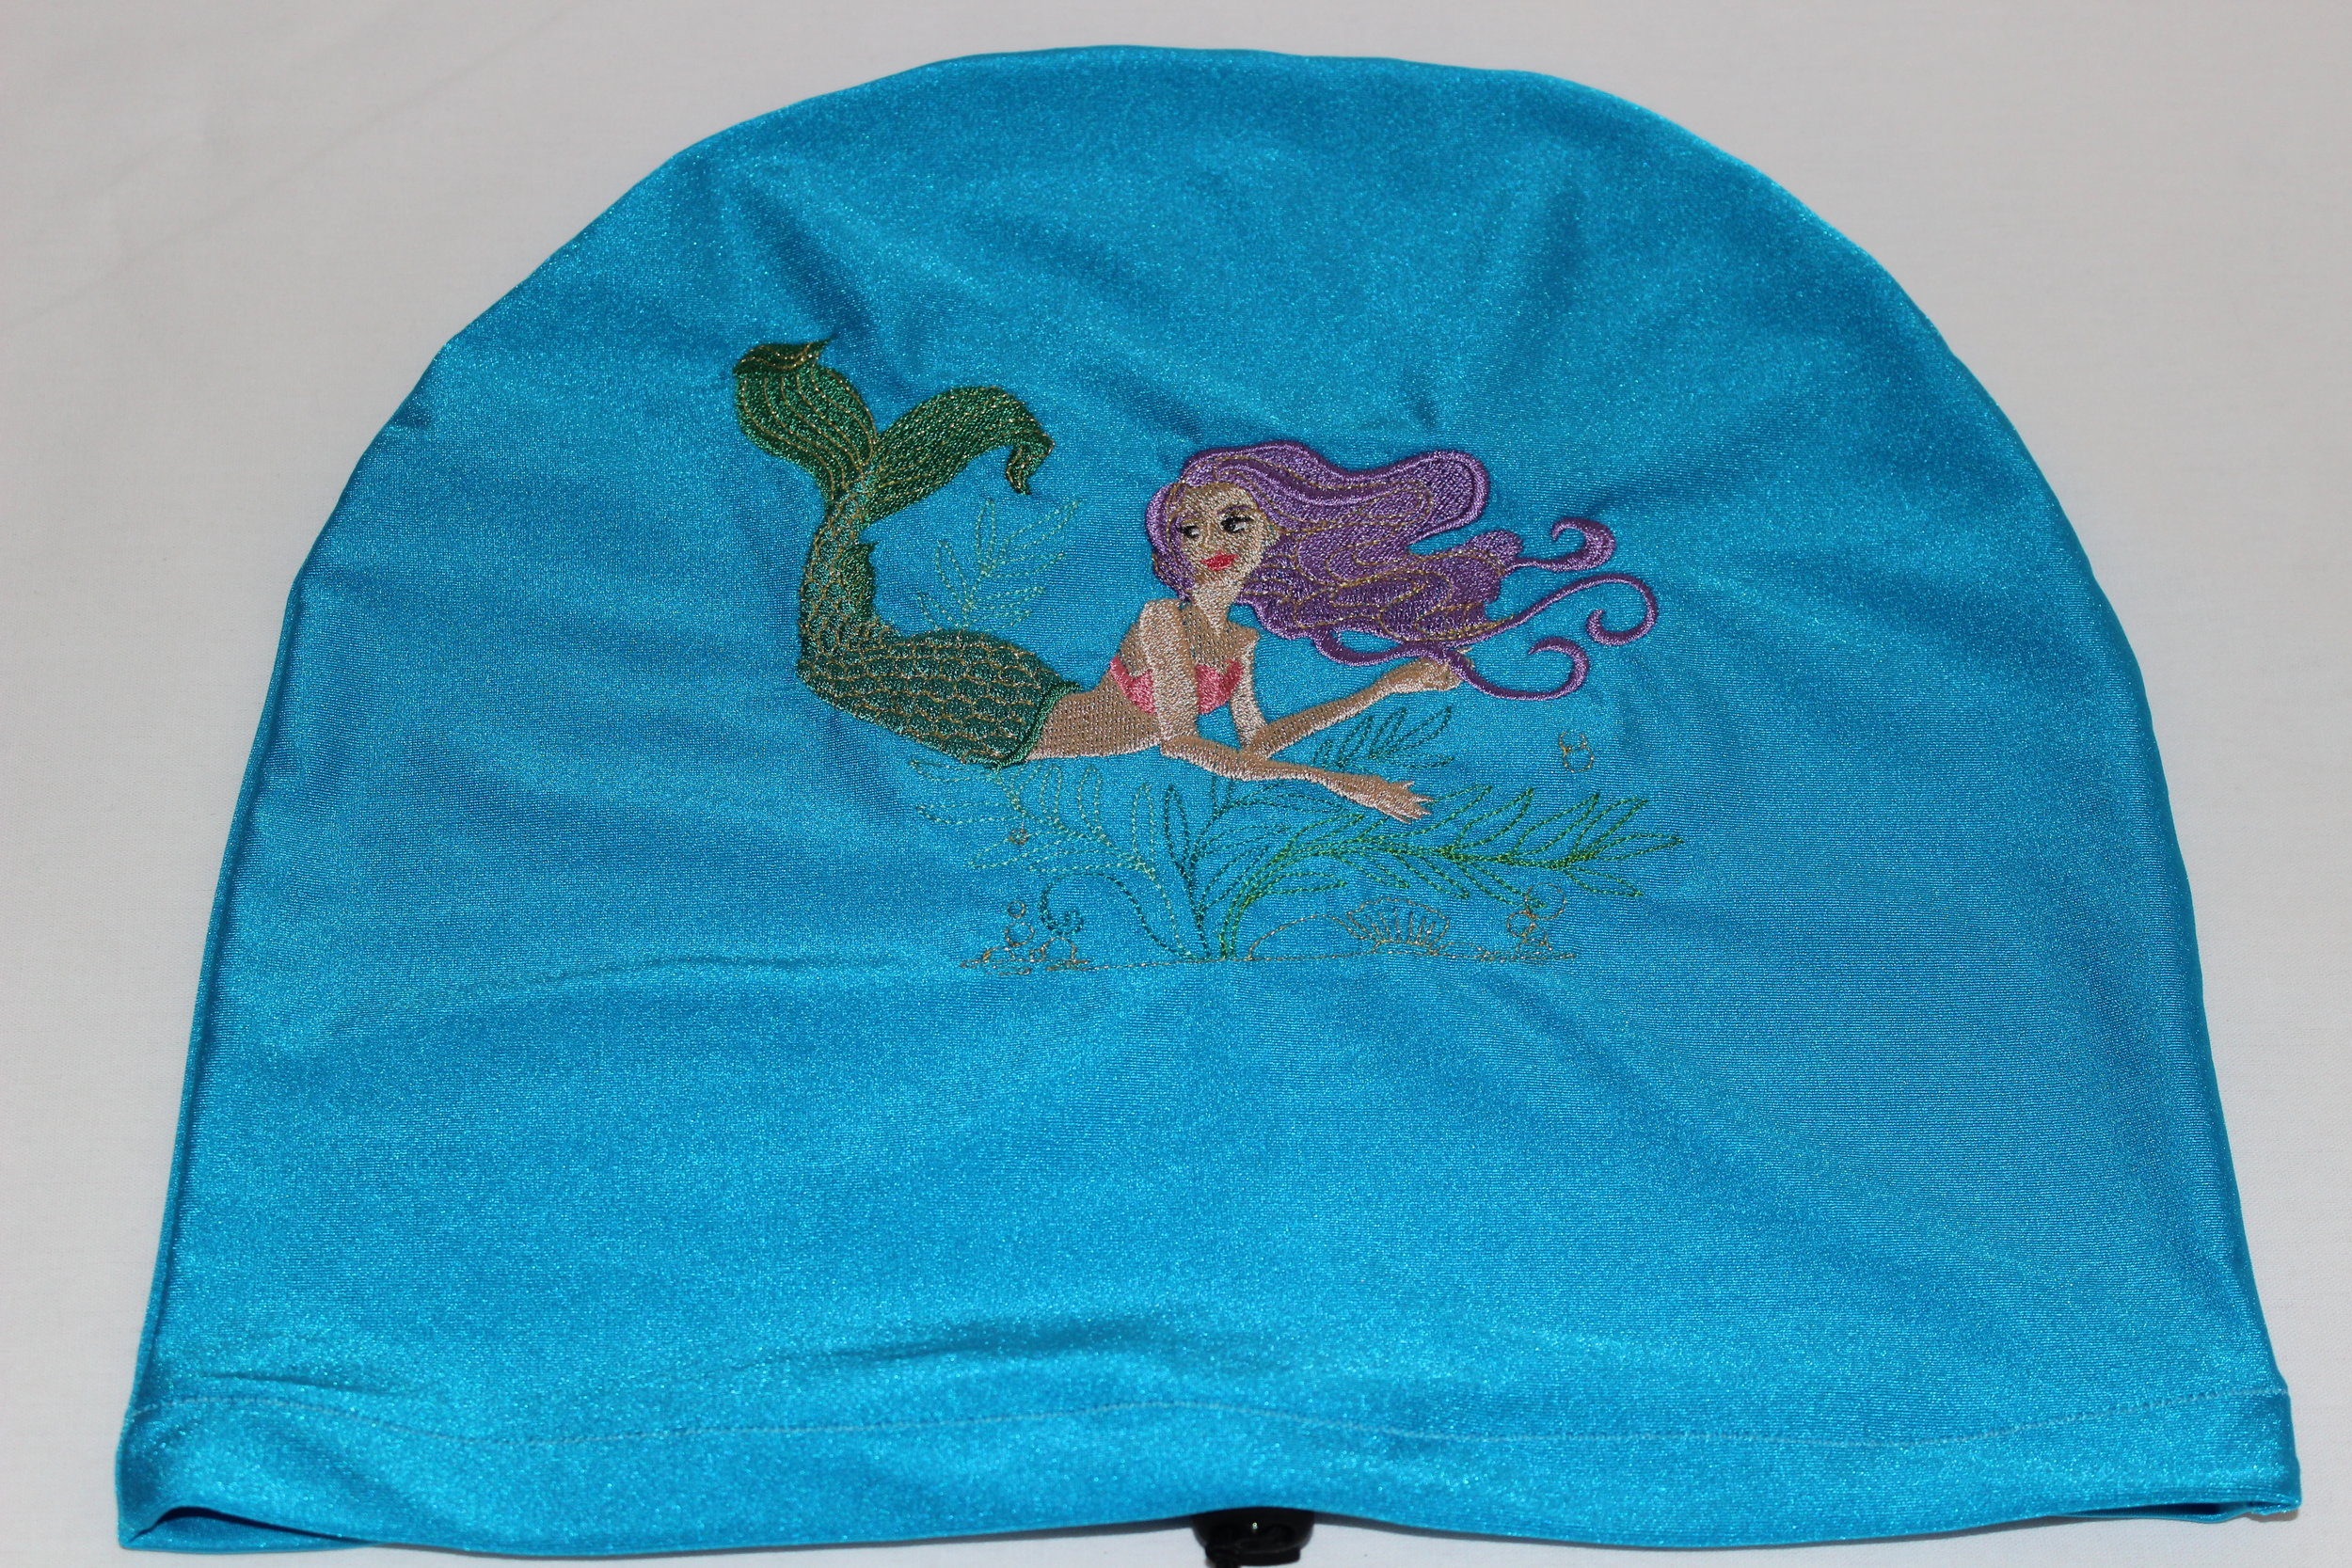
The project was designed to be quilted with a wood grain look, then add machine embroidery, and finish it by stretching it onto an art canvas. What an awesome idea! How could I possibly change what I already loved? So I did not change a thing, but I added to it.

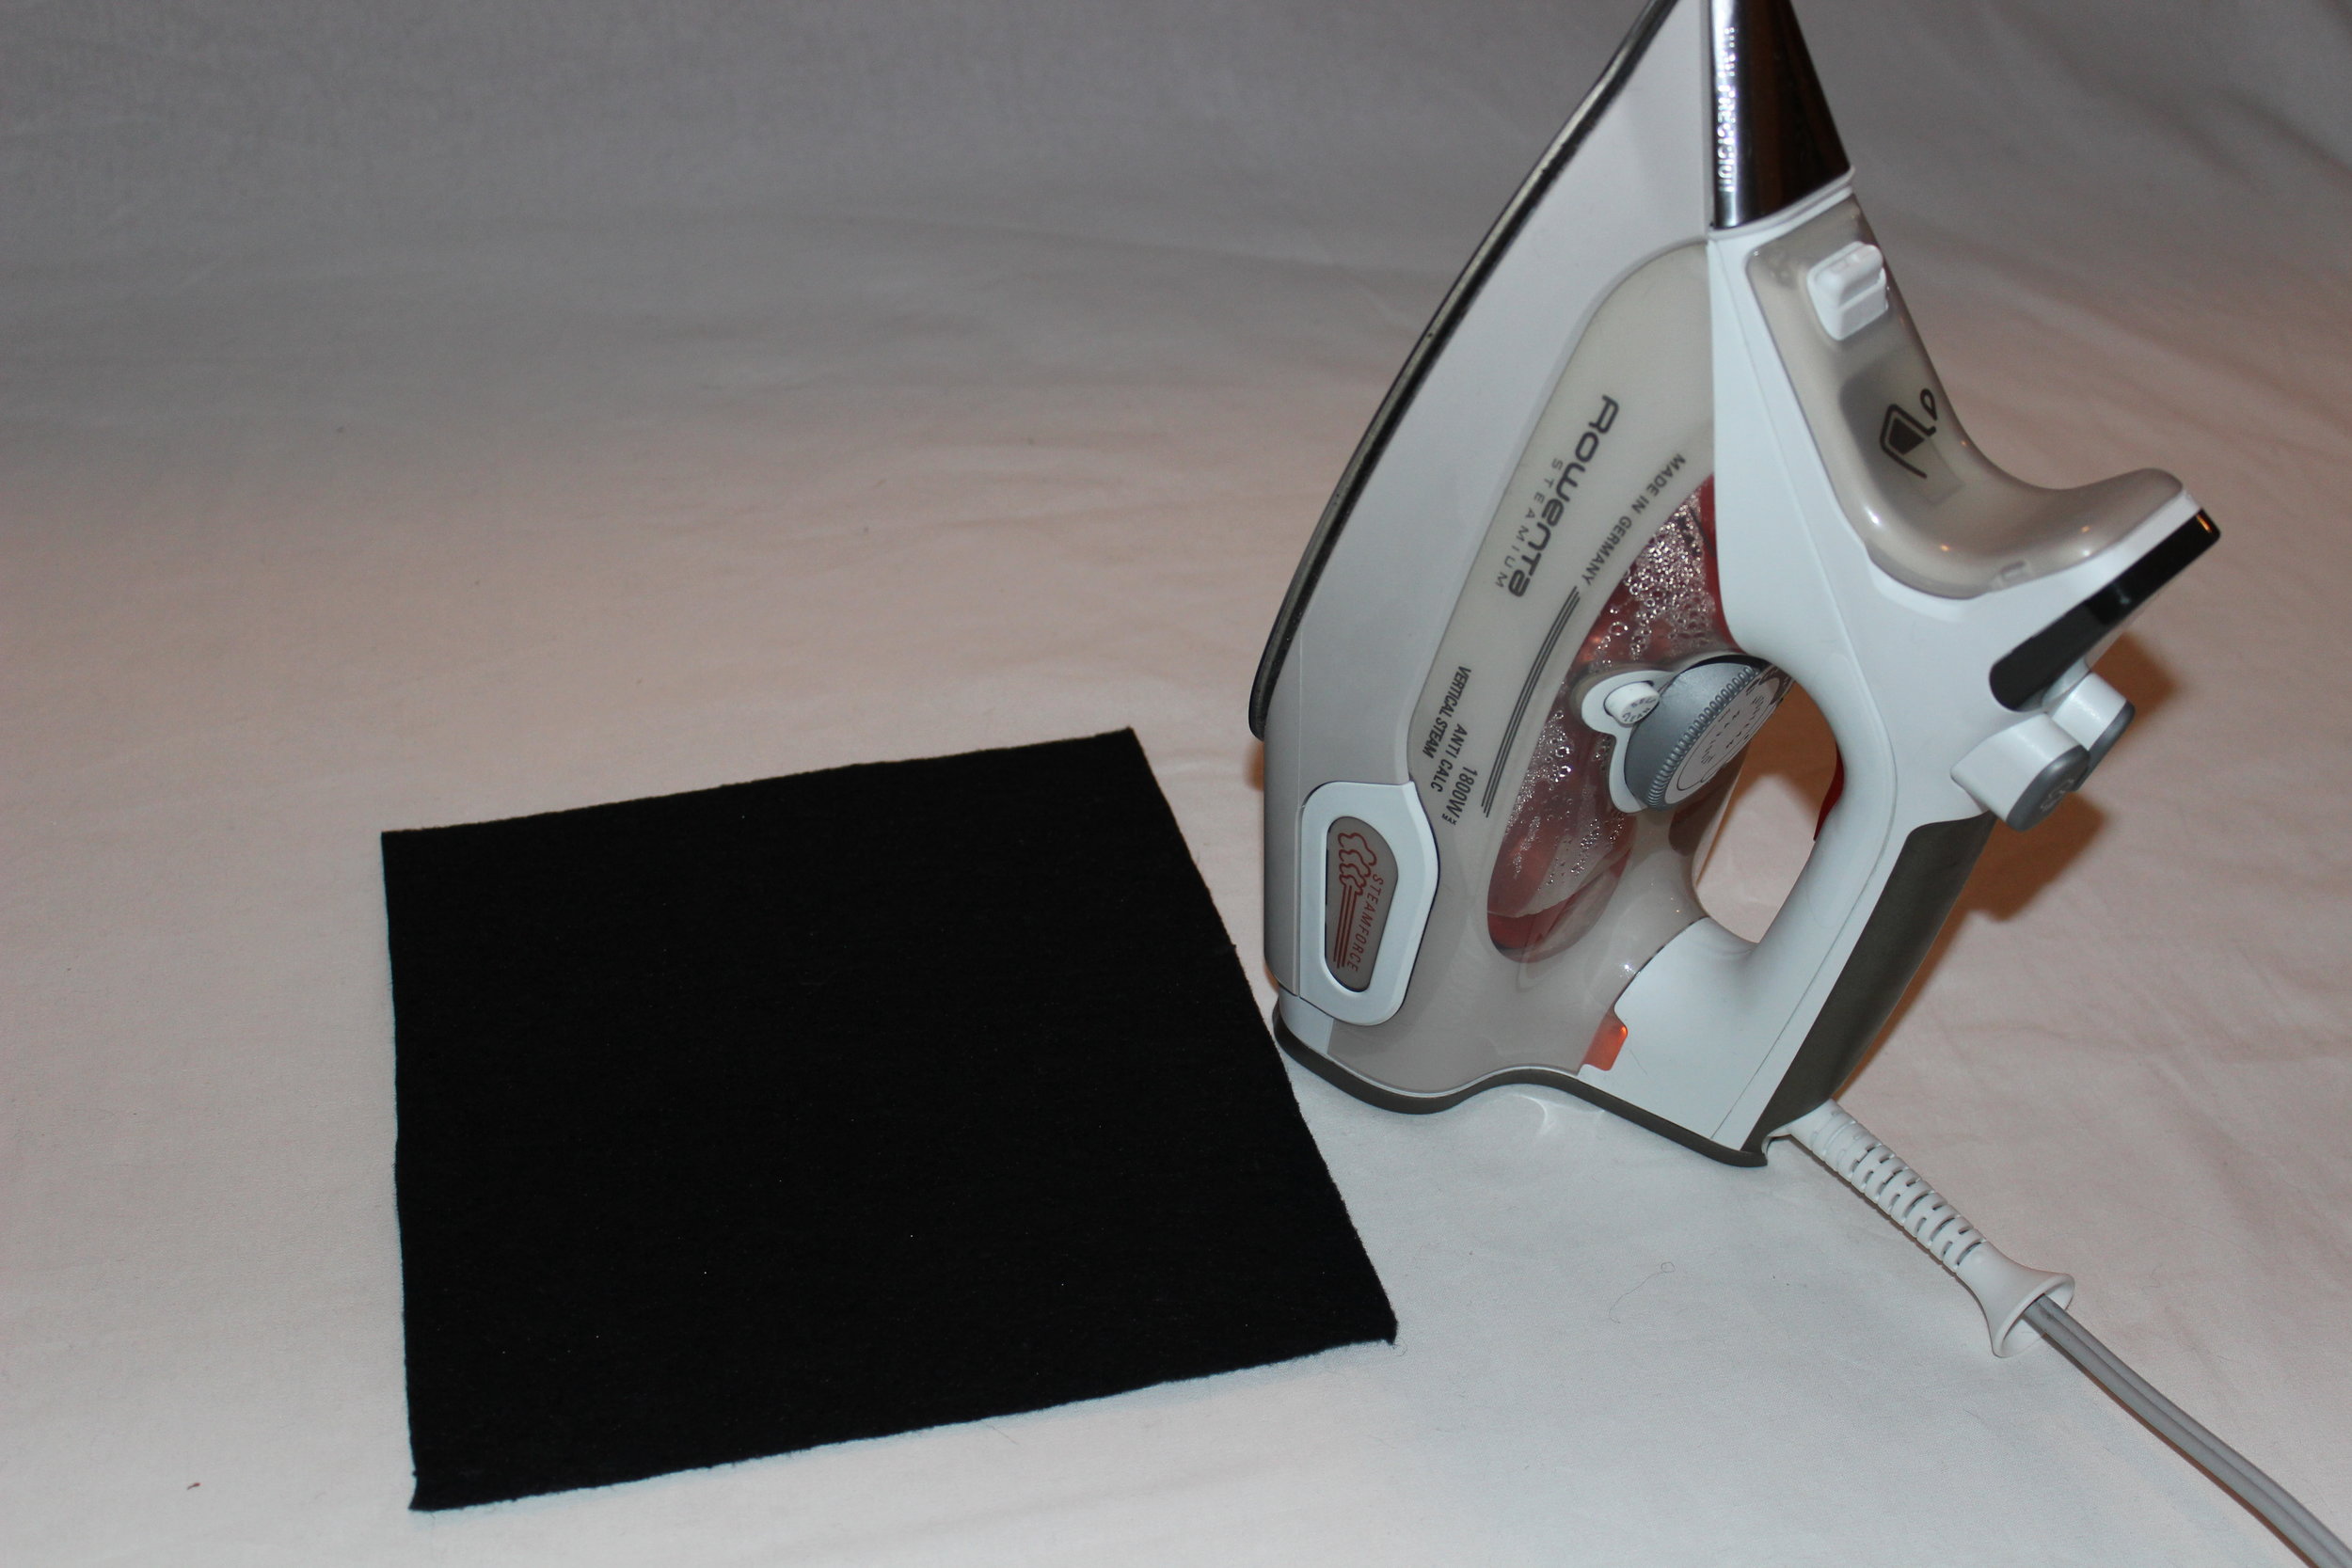
We have a large family of nine children and one question that I can be asked repeatedly is, “What is for dinner?” Try answering that ten times nicely. So my solution is to hang Eileen’s “Gathering Place” panel in my kitchen with my newly created “Menu.” That will take care of all those questions. I designed it with that clever black chalkcloth fabric and used the machine embroidery designs to compliment the pre-printed panel. It is a win-win for me. Wait till my growing family sees this!

DIME Blog Tour Feb19 CBell Image 5.JPG
What is your family’s favorite dinner?

What is your family’s favorite dinner?

INSTRUCTIONS

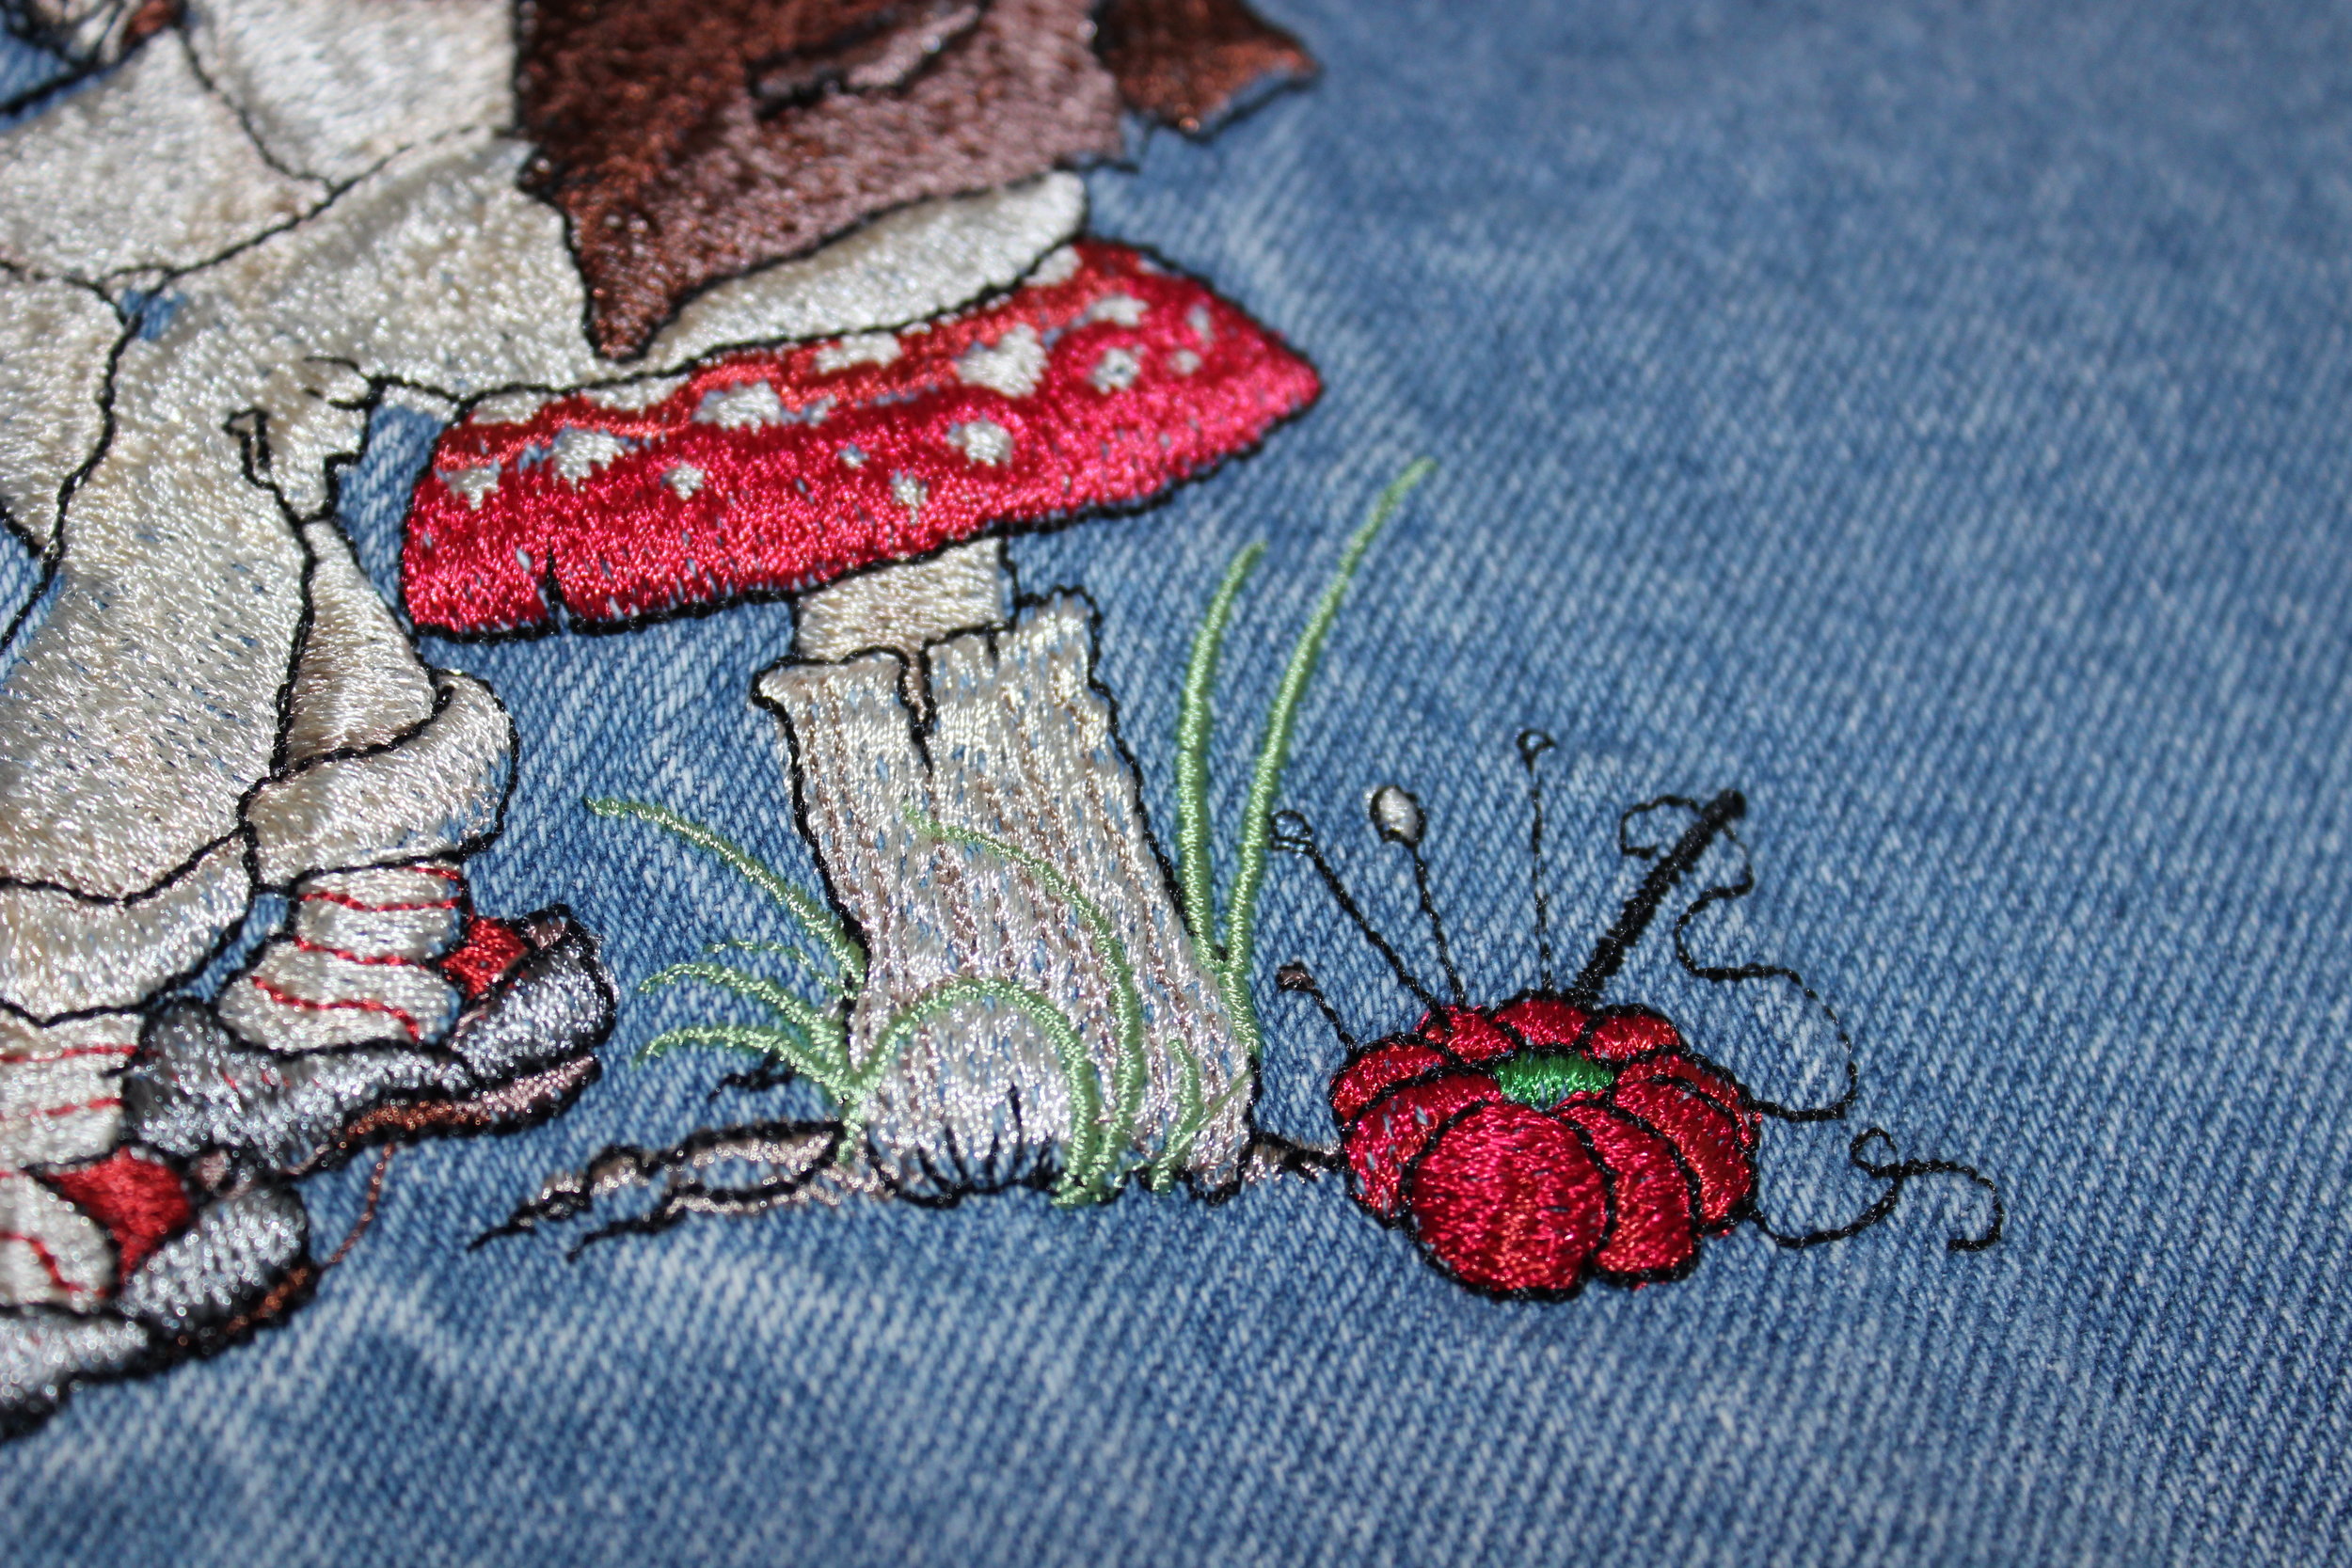
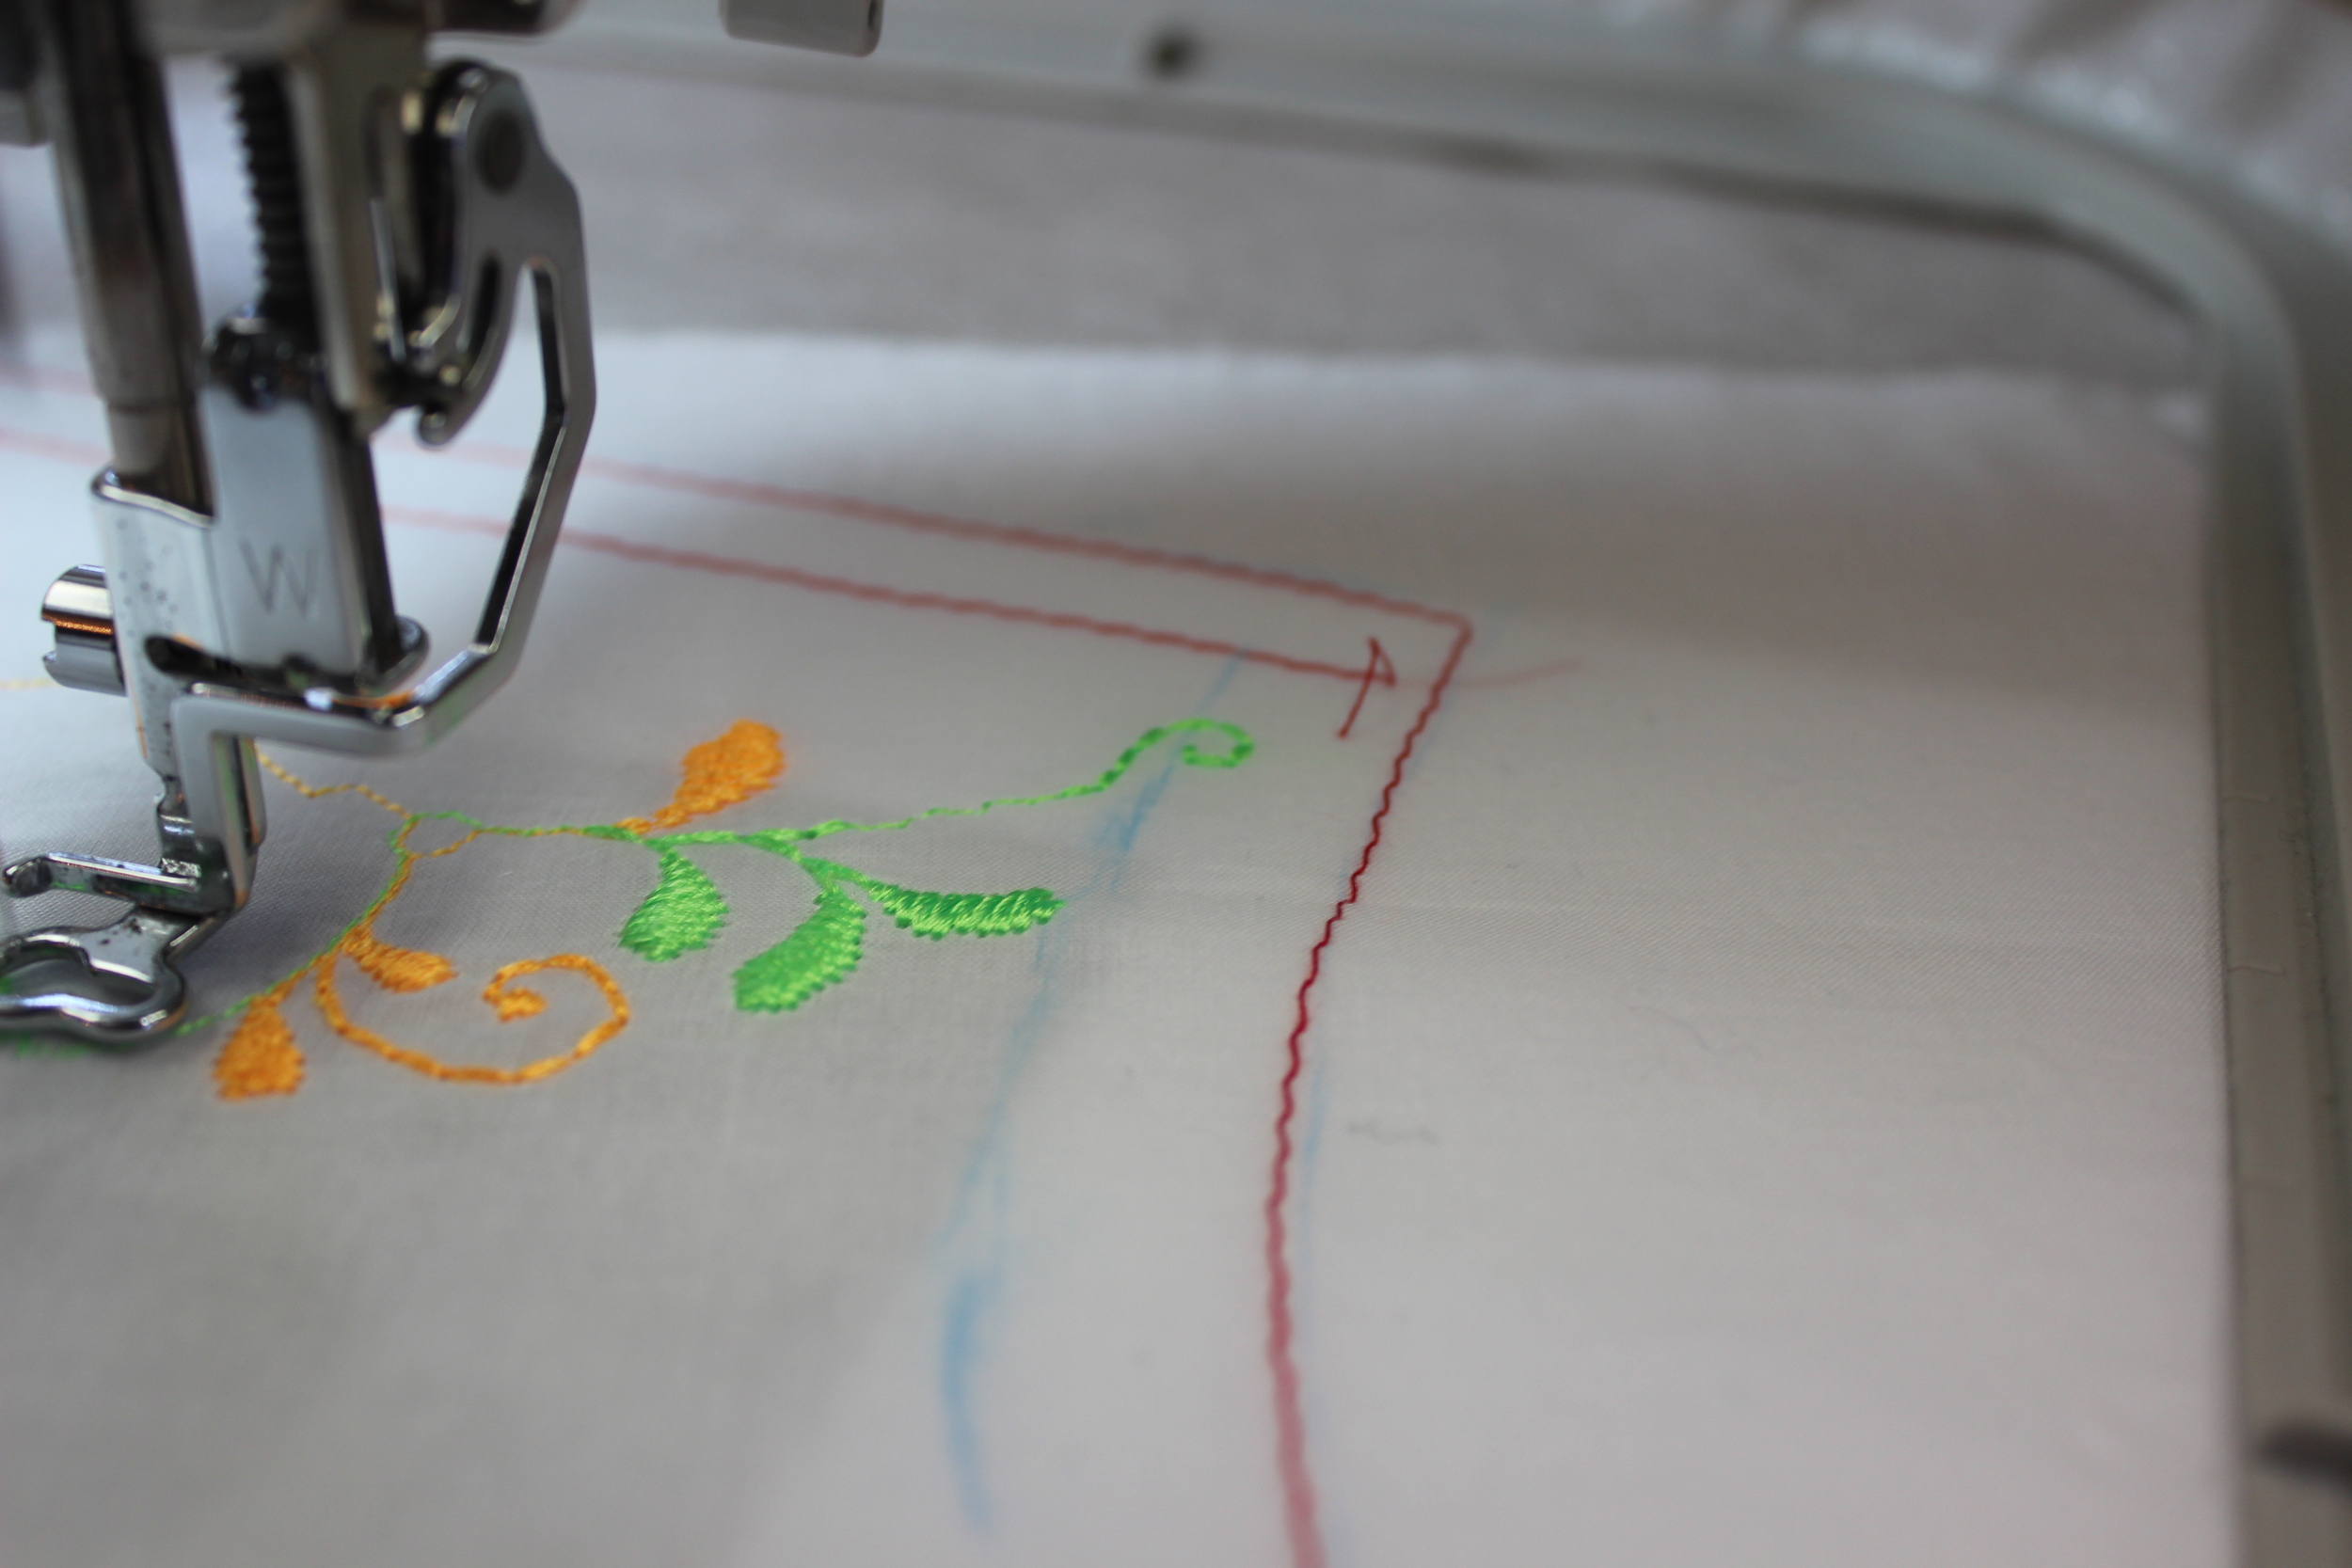
To make the “Gathering Place” panel follow Eileen’s instructions in the download. I chose the floral spray, knife, and fork, designs from the collection to embellish my pre-printed panel.

DIME Blog Tour Feb19 CBell Image 1.JPG

In addition to following Eileen’s instructions, to keep my wood grain quilting designs straight, I used black art tape to line it up and then scan it in the camera as sometimes I cannot see the designs in the camera.

IMG_5094.JPG

When embroidering the wood grain designs, it is easier if you put one and two together, save it and embroider quadrant one and then quadrant two. Then do the same for designs three and four, and quadrants three and four.

IMG_5093.JPG


To make the “Menu” I used my Baby Lock Ellisimo Gold built-in editing feature.

DIME Blog Tour Feb19 CBell Image 2.JPG

I added the words “MENU” from the built-in fonts then added the spray below the words. The knife was added to one side then the fork to the other side. I saved mine to memory in case my electricity went out like it did the other day (We were one of 15 and I was machine embroidering for the Designs in Machine Embroidery magazine. UGH!)

IMG_5103.JPG

The chalkcloth fabric was purchased from Nancy Notions at: https://www.nancysnotions.com/black-chalkcloth-fabric.html

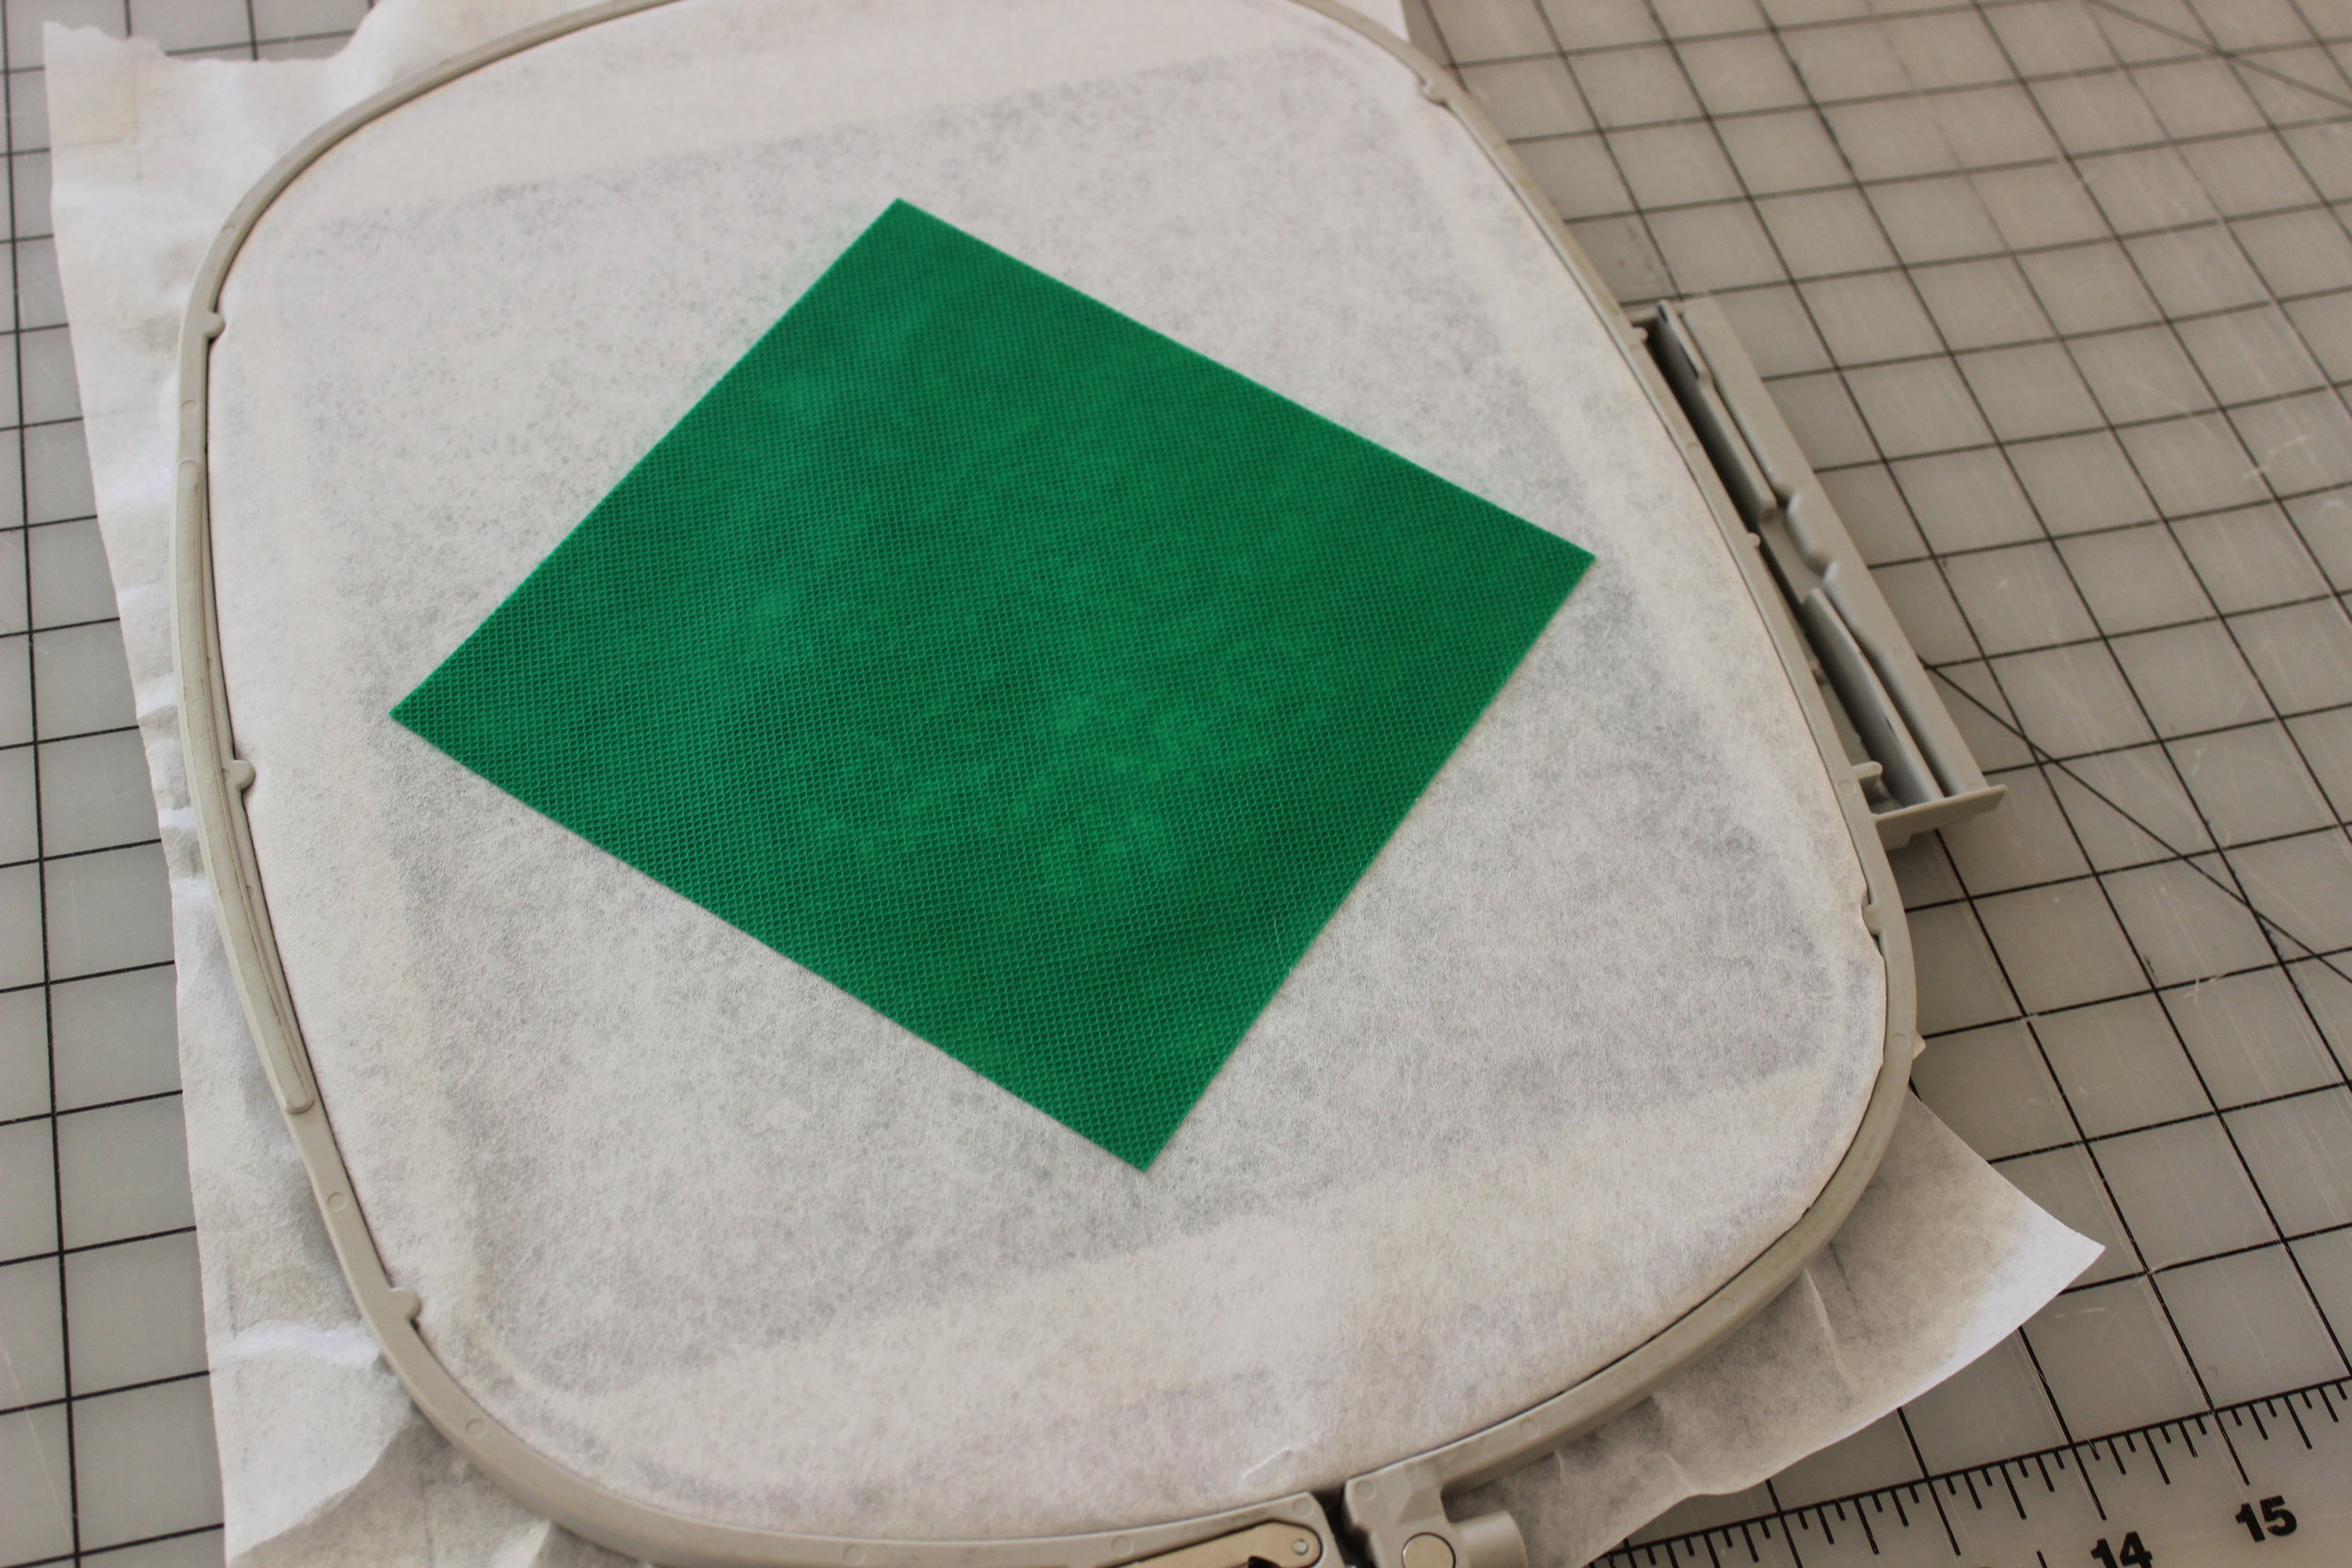
I cut a piece of chalkcloth the same size as the panel and hooped it such that the design would be at the top. 

I hooped a piece of cutaway stabilizer the size of the hoop from Fairfield World at: https://www.fairfieldworld.com/store/20-x-20-yds/stabilize-interfacing-20-x-20-yds/

Thank you to Fairfield World at www.fairfieldworld.com for donating this stabilizer and the batting for the “Gathering Place” panel. You guys are awesome and “at the heart of my project!”

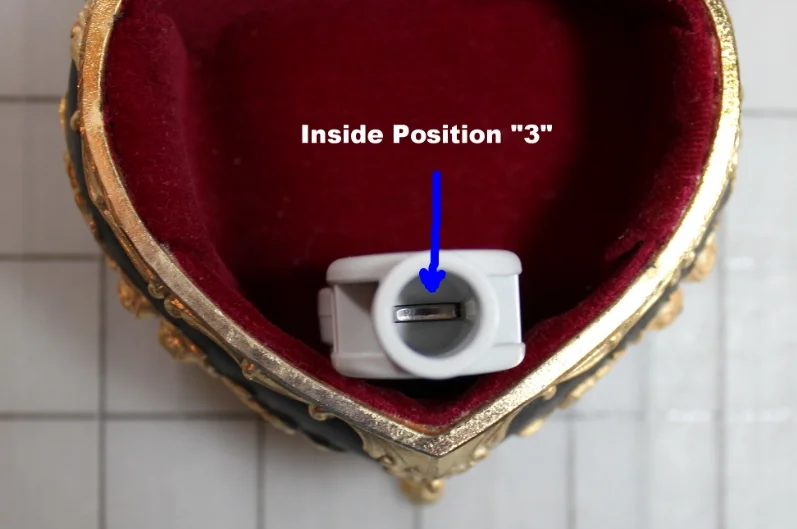
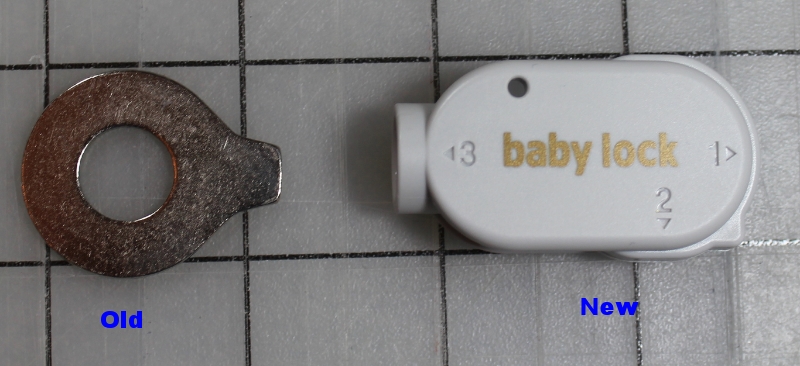
I also used a magnetic hoop from Designs in Machine Embroidery. This is actually very critical so the fabric does not get hoop burn. If you do not have a magnetic hoop, do not be dismayed. You can use a sticky stabilizer, but do not use a tack down stitch. The extra holes in the chalkcloth are not removable. 

IMG_5102.JPG

Another recommendation for embroidering on chalkcloth is to change the needle to a Microtex needle by Schmetz Needles https://www.schmetzneedles.com/item/Microtex-Sharp-Needles-3. This needle has a smaller hole and does not penetrate the chalkcloth as much as other needles. 

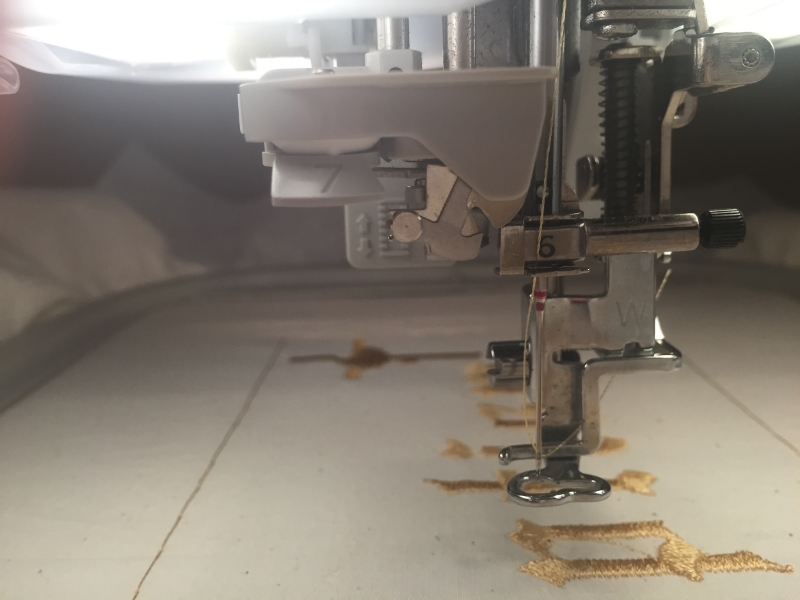
Other than that, I machine embroidered on the chalkcloth just as I would any other fabric. 

Once the design was finished, I sprayed the back of the chalkcloth with Scotch permanent adhesive before stretching it onto the canvas. This helped reduce the wrinkles and keep the chalkcloth from puckering as it did not want to stay close to the canvas without this adhesive. 

GIVEAWAY!!!

IMG_5104.jpg

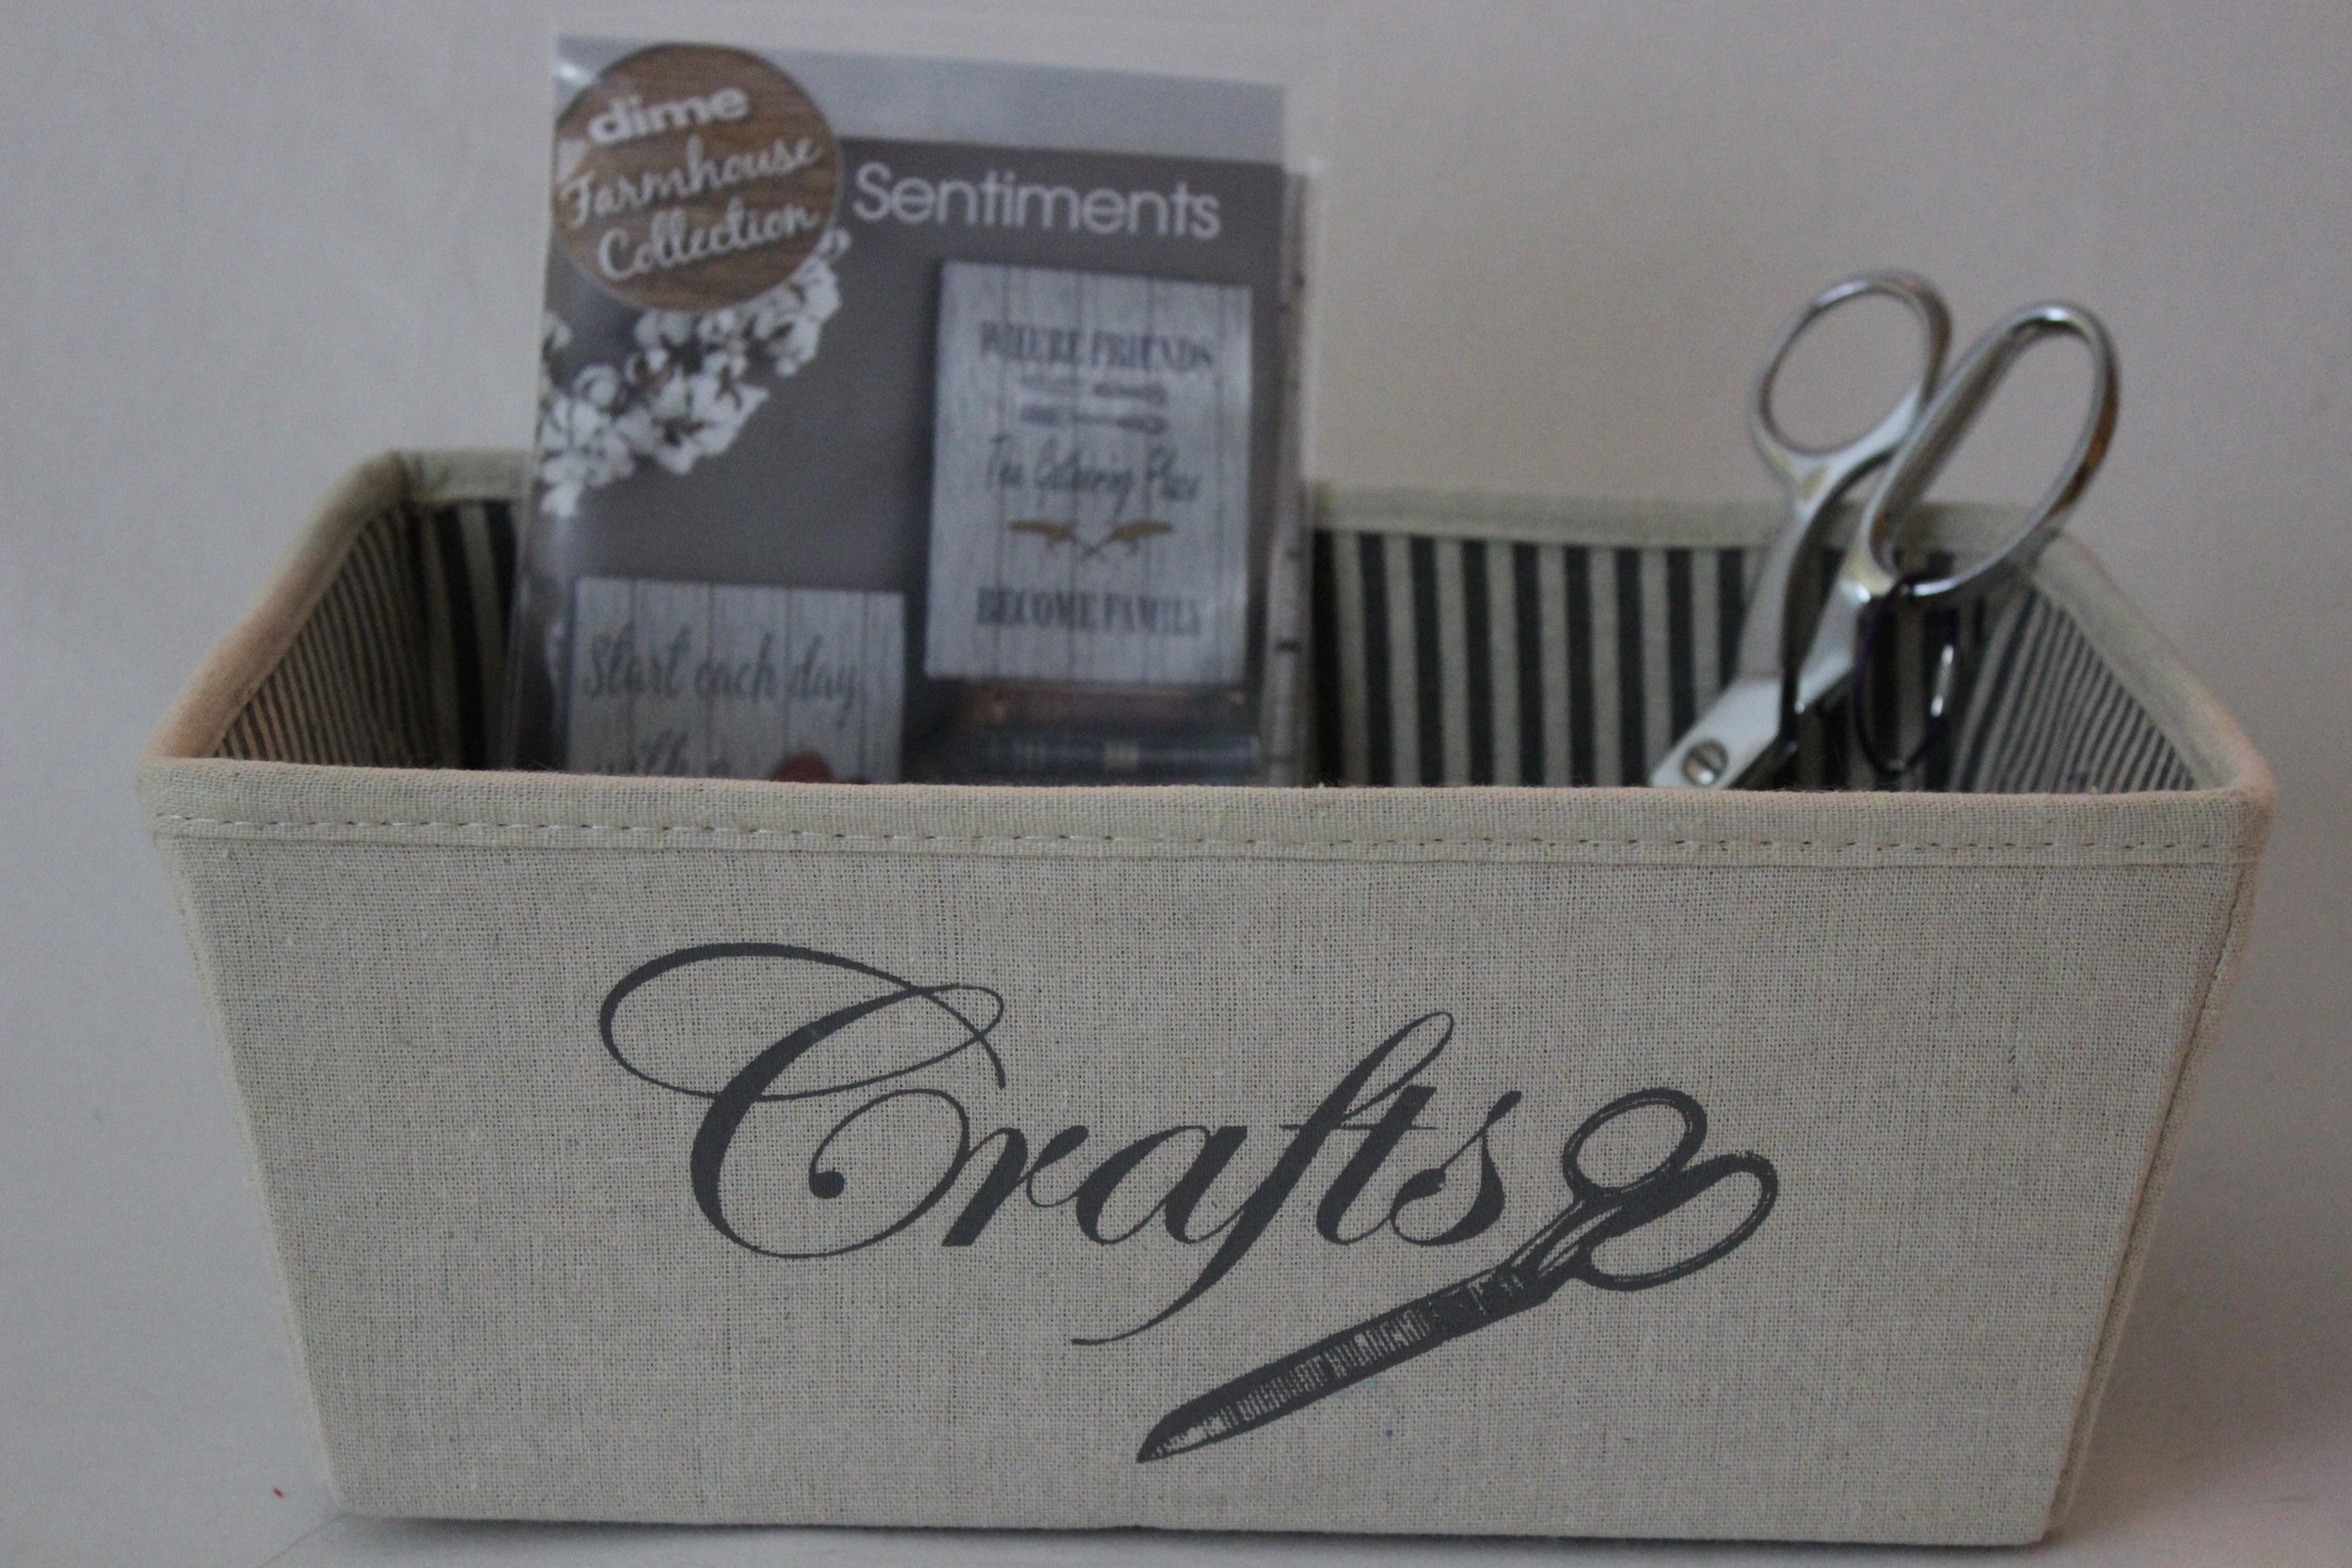
Woohoo! Designs in Machine Embroidery www.dzgns.com and Baby Lock www.babylock.com have generously donated the “Farmhouse Collection Sentiments” package to giveaway to one winner. To be entered into the random drawing you have two simple requirements:

  1. Sign up for my newsletter (click on the button on the right). If you have already done this, thank you. You are awesome.

  2. Comment below so I know you want to be entered.

 That’s it! Have fun! 

GIVEAWAY RULES: This giveaway is open to all contestants. It will open February 20, 2019, and close February 22, 2019, at 11:59 PM EST.  A winner will be announced on February 23, 2019. The winner will randomly be chosen who has completed the requirements above. Their name will be announced here on this blog post. Please check back to this blog post to see if you were chosen and email me with your address to receive your prize. This giveaway is open to anyone with a US mailing address and who is at least 18 years old. This giveaway has no affiliation with Instagram, Facebook, or any other social media, and they are all completely released. You are not eligible to participate if you have any affiliation with a sponsor or are related to someone who is. By commenting below you agree to these terms.

For those of you who do not win, thank you for reading and participating. You still have an opportunity to make your own “Farmhouse Collection Sentiments.” It is available to purchase at “Designs in Machine Embroidery” https://www.shop.dzgns.com/collections/specials/products/farmhouse-collection-sentiments where it is on sale and there is free shipping. If you make one, we would all love to see it. Please use the hashtag: #EmbroideryMonthStitchAlong

2019_StitchAlong_Badge_Web.png

Sara Gallegos of Sew Positively Sara http://sewpositivelysara.com/articles/ (Love that name!) will be next in the 2019 Stitch Along Tour. Hope you join her this Friday, February 22, 2019. You will have another chance to win the “Farmhouse Collection Sentiments.”

DIME Blog Tour Feb19 CBell Image 3.JPG

Eileen, thank you for solving my problem, and the honor of participating in this blog tour.

Having Fun with OlyFun Ornaments

OlyFun is a techy fabric that is so cool to work with. It does not fray, has no grain, and is water-repellent. It comes in 18 different colors so it is a perfect match for making in-the-hoop machine embroidered ornaments. I had so much fun playing with it, but I decided to step it up a notch and  I did three ornaments as a test using "Support Soft Foam Stabilizer" with the OlyFun. 

Machine Embroidery Designs by "Embroidery Library" -Gingerbread Cookies in-the-hoop

Machine Embroidery Designs by "Embroidery Library" -Gingerbread Cookies in-the-hoop

Thank you to Fairfield World for supplying the OlyFun, the "Support Soft Foam Stabilizer"  used for these ornaments, and the inspiration. 

OlyFun is readily available at many of the big chain stores. In my area in the Connecticut shoreline, the best place is Hobby Lobby. There is a whole display at the end of an aisle where the home decorating fabrics are. I have seen the "Support Soft Foam Stabilizer" at Joann's. 

IMG_3764.JPG

OlyFun did not require anything special and it stitched like a dream.  Because it does not fray I could use it in the designs that left the edges raw. It is thinner, so I did not need to worry that it would catch in the feed-dogs or in the foot. I wanted to see what the different colors looked like in these gingerbread cookie designs so I tested with green, red, and sand. 

The first design was the Christmas tree in green. The project instructions call for leaving it open and stuffing it with a poly-fil then closing it by hand.

IMG_3769.JPG

 I had done many ornaments that way and to be honest, I wanted to see what an ornament looked like that was flat. So here it is...the flat Christmas tree. It turned out pretty well if you ask me. I know that if I am ever in a pinch, I will feel comfortable leaving out the poly-fil.

IMG_3771.JPG

On to test two - OlyFun with Support Soft Foam Stabilizer" (I'm just going to call it Support herein) in the gingerbread man in sand. Support is a foam stabilizer that I found out about this summer. It takes a bag from looking sewn to looking store-bought.  It helps anything keep its shape, which Is why I thought I would use it here. One layer of Support on the back just before the back was tacked down made it a wonderful ornament with depth.  

IMG_3775.JPG

It was so quick and easy that I plan on using this from now on to fill my ornaments. It gave the ornament just the right amount of loft and texture. 

IMG_7282.JPG

Last but not least, I used two pieces of Support in the bell ornament in red. The first piece was added just before I put the red OlyFun on the top. This allowed the design to stitch through both the OlyFun and the Support.  The second was at the same place as the one above.

IMG_7284.JPG

I was not sure if my machine would think it was too thick, but it did not have any problems. The only issue I found was that when I cut away the ornament, the foam could be seen on the edges because the OlyFun was popping up. This could be rectified with trimming it before or after the final stitching.

The testing was so much fun and helped me to venture into new fillings for Christmas ornaments in the future. I think you will be seeing more of that Support in this blog as my overall favorite was the gingerbread man in sand with one layer of Support. It seemed to have all the chemistry for these designs.  

They will be cute as a whole set of gingerbread cookies in sand with Support. 

IMG_7281.JPG

Hope you have time to stitch out a few for yourself. Happy Holidays!

Leftover Batting Tags

Over the holidays we get so many leftovers from food to fabric scraps. If you are a quilter or use batting for other projects, you probably have a lot of leftover batting. We cut off those wide portions and save them for just the right project.  Well, the right project is here.  It is so quick and so easy to use leftover batting for tags. 

Machine Embroidery Design X3580 by "Embroidery Library"

Machine Embroidery Design X3580 by "Embroidery Library"

Thank you to Fairfield World for supplying the black batting used for these tags and the inspiration. 

IMG_3747.JPG

Gift tags are the perfect way to make a gift extra special and with leftover batting, there is no added expense involved. It only took 30 minutes to stitch three gift tags - super easy. 

These tags are machine embroidered in-the-hoop tags from Embroidery Libraryyou could use this same concept with a sewing design for gift tags. 

Some tips for machine embroidering with batting:

  • You do not need to cut each piece of batting and line it up before the stitch down, merely cut a piece of batting larger than the area and place it on top before the normal placement step.
  • Press the batting before placing it over or under the hoop. 
IMG_3749.JPG


  • Use a black "No Show Mesh Nylon Cutaway Stabilizer." 
  • Use a water-soluble topper on the top as well as the bottom of the batting.  Batting has loose fibers and they can get caught in the feed dogs especially.
  • Do not use a heat activated topper as I did. The loose fibers of the batting will stretch and make permanent rolls of the topper that must be cut loose. 
  • Remember to use the same colored thread in the bobbin as in the top thread.
IMG_3750.JPG


  • Do not use a spray adhesive to keep the parts together as it will leave a sticky residue on the batting.
  • Use a basting stitch to keep the top pieces together.
IMG_3751.JPG


  • Use painter's tape to keep the bottom pieces together. First apply it to the batting and then apply it to the topper. 
IMG_3753.JPG
IMG_3754.JPG


  • Remove as much topper as possible by hand. 
  • Cut the tags with a rotary cutter or scissors after it has been removed from the hoop.  This step alone makes using batting so much easier than other fabrics. 
IMG_3757.JPG


These gift tags are so easy that you can make lots of them for those last minute gifts. Happy Holidays!

Designs in Machine Embroidery – Article "Headrest Covers"

IMG_3259.JPG

The September/October issue of Designs in Machine Embroidery has a spectacular cover featuring Katherine Artines’ “Shapely Sunflower.” The theme of the magazine is techniques and technology in the machine embroidery world, and she exhibited the many aspects of machine embroidery.

Magazines routinely work many months in advance of the publication date and some magazines publish an editorial calendar that reflects the different themes for each issue. They release it to prospective freelance writers, which is terrific if you are on that list. However, when you are new to freelance writing, you do not have this privilege and have to submit a proposal blindly and hope that the editorial staff finds it attractive enough to include it or put you on their list to submit proposals for the future.

Blind proposal submissions are difficult as not only do you not know the theme but also you do not know their timetables. You do not know if you are close to a proposal deadline or if you just missed one. It is just a shot in the dark. The hardest part is waiting many months to hear a response, let alone receiving that rejection, which in the worst case scenario never comes.

Designs in Machine Embroidery has an amazing editorial staff and submitting a first-time proposal to them was way beyond my expectations. Personally, I do not believe they would ever ignore a proposal or let one sit for months before responding. To my astonishment, they accepted my first proposal, which happened to be for this issue.  It did not include any new technique or technology, but it was unique in that it had a broad base of interest. It appeals to all ages and genders. 

Circle Monogram Set 1 by Embroidery Arts

Circle Monogram Set 1 by Embroidery Arts

Many of us drive or ride in cars, so “Headrest Covers” is something that appeals to most and, as it turns out, they are a status symbol in some areas. When my then twenty-something Army Drone pilot came home on leave and asked me to make him a set for his new car that reflected his favorite sport’s team, of course, I dropped what I was doing and started them immediately. I measured his headrests and googled what they look like when you buy them from the professionals and finally came up with an idea and a pattern. He loved his first set so much that he asked me to send him a set that would be for each season’s team. I loved doing it, especially since he was the one that had said so adhamantly, “Sorry Mom, machine embroidery is just not for me!” Huh! We showed him that we machine embroiderers could come in handy.  We just needed to think of the right project. Well, in this instance, he thought of it and I am so glad he did because now I get to share it with all the machine embroiderers that read Designs in Machine Embroidery.


  Normal
  0


  false
  false
  false
  
  EN-US
  JA
  X-NONE


&n…

Longhorn Skull Single L4939 by Embroidery Library, Inc., 

Machine embroidered headrests can appeal to everyone and with the holidays coming up, I think they would make great gifts. They are super simple to embroider and sew. The trick is finding the right fabric in your local shop.  I used fabric that is typically used for swimwear.  This gives it the stretch to go over any headrest and adjust smoothly. The embroidery possibilities are endless. You can find the article starting on page 58, and the pattern is at this link.

PATTERN CLICK HERE

For a behind the scenes of the photo shoot for this project, click on this link to see just a little of what it takes to get a great picture for a magazine article. Personally, when I was making these, I kept thinking that they would bring a car seat into the studio for the shooting. I never dreamed that they could possible do a photo shoot actually in the car. Wait till you see them all scrunched up in that car. 

Mermaid Magic Design M5165 by Embroidery Library, Inc.

Mermaid Magic Design M5165 by Embroidery Library, Inc.

I would love to see your version of machine embroidered headrests. Please use the hashtag #TheEmbroiderist so that I can see them. Happy embroidering and thank you Designs in Machine Embroidery for publishing my first article.

These DIME goodies arrived with a copy of the magazine and my headrest.  I felt like I was officially inducted. 

These DIME goodies arrived with a copy of the magazine and my headrest.  I felt like I was officially inducted. 


WEDNESDAY WEBSITE CRUSH – Amazing Designs

 Amazing Designs  is a very versatile machine embroidery resource. They are owned by Tacony Coporation, the mother company of Baby Lock, Madeira, and Koala Studios, so you know their name is reputable. Their high-quality designs are worthy of the family name. Their meta tag touts of having 11,000 embroidery designs.  That is a lot of designs from which to choose.

Amazing Design's Bazooples Collection and Baby Lock's built in font

Amazing Design's Bazooples Collection and Baby Lock's built in font

Amazing Designs has an artistic flair with their anthropomorphism that I just love.  

Amazing Design's Tiny Tailor Collection

Amazing Design's Tiny Tailor Collection

Their little animals all dressed in the cutest clothes and doing human activities are so adorable. 

Amazing Design's Tiny Tailor Collection

Amazing Design's Tiny Tailor Collection

My absolute favorite is their Tiny Tailors Collection by Janet Wecker-Frisch. If I were not afraid of embarrassing my family, I would wear these designs on everything, but as it turns out, I only have a cleaning jumper that I embroidered them on. Even then, I get the, “Seriously, Mom!”

Amazing Design's Tiny Tailor Collection

Amazing Design's Tiny Tailor Collection

For those of us who love coloring (so glad that is such the rave these days!), you will love many of their designs, as many of their designs are outlined in black.  I am so drawn to them (pun intended). I think the outlining makes them pop, but these are the kind of designs that you really have to make sure that it is hooped tightly or the outline will shift even so slightly.

Amazing Design's Bazooples Collection

Amazing Design's Bazooples Collection

As you would expect they have pages for tips and techniques, projects and lots of other resources. There are several links, so surf around, you will find lots of treasures.

They have a page of freebies that can be downloaded monthly.  Do you have a list of websites that you can click on to download their free designs monthly? I am in the process of developing such a list that I will share publicly, and would love to add your favorite, quality developers to the list.

Amazing Design's Tiny Tailor Collection

Amazing Design's Tiny Tailor Collection

While I have fun writing about quality machine embroidery websites regularly, I must admit that I do not have much will power, and wind up finding a collection or two to purchase when I am gathering the links for this blog. This week I noticed that Amazing Designs was having a great sale under the “Specials” category on so many of the designs I had on my wish list.

So many designs, so little time! Happy stitching!

Wednesday Website Crush - Adorable Ideas

John Deer is the driving force behind the website Adorable Ideas and technically, Ultimate Stash is the website that offers the machine embroidery designs.  Adorable Ideas is the parent company that also owns Digitizing Made Easy, for which John Deer is really known. To make it even more confusing, do not type in “John Deer machine embroidery” into google or your hits will come back with lots of tractor designs. You probably noticed this, but John Deer does not spell his name the same as the tractor company John Deere.

Ultimate Stash Design Aspm051

Ultimate Stash Design Aspm051

John Deer is a third generation embroiderer.  His family began designing Schiffli lace on looms around 1910 and has passed down that skill to John Deer. [Digitizing Made Easy by John Deer, 2007] What an incredible heritage. 

On the top bar of their website is the Learning Center that includes: Classroom, Inspiration, and Tutorials. All three of these sections will keep you busy learning for a long time.  Personally, I love seeing the exquisite gowns made with the Schiffli lace.

Close up Ultimate Stash Design Aspm051

Close up Ultimate Stash Design Aspm051

The designs on the Ultimate Stash website are a very high quality. You can tell that it comes from many years of experience, but it is most evident when you click on the lace designs. They are gorgeous.  This is really authentic Schiffli lace that is available to every home embroiderer.  Before my husband bought me my embroidery machine, I never dreamed that I would have the ability to create such beautiful, authentic lace.  It has been such a joy to me to find this site.

Close up Ultimate Stash Design Aiml015

Close up Ultimate Stash Design Aiml015

My favorite purchases are from his “Vintage Lace Project Series” hosted by Janet Carley.  These lace projects are so elegant. You learn professional methods of using the lace designs on projects. I am not sure if they are still available as I could not find them on the website any longer.  I now wish I had purchased all of them. 

The website does have many designs that are not lace oriented.  They have a free design for you to try. In addition to regular designs, they specialize in “Sparkle Designs;” and they offer kits as well to accompany the designs.

This bride and groom lace motif is just lovely and makes a wonderful wedding card or can be added to even an anniversary gift.  

Ultimate Stash Design Mesa043

Ultimate Stash Design Mesa043

Have fun machine embroidering and I hope you enjoy the Adorable Ideas website. 

Wednesday Website Crush – Sue Box Creations

Lace is incredible to make on an embroidery machine. It is so gorgeous and so easy to sew.  It uses a technique called free-standing, which basically means that the design does not need it to be embroidered onto fabric.  It is embroidered on a stabilizer that is water-soluble.  It washes away and only the threads remain.  The digitizing for free-standing lace is a different technique than for regular designs. Each thread must connect to another thread and they must build upon each in order for the threads to not separate when washed.  This technique is difficult to master and it is where you can tell a novice from a master.

"Just Lace" machine embroidery design by Sue Box Creations

"Just Lace" machine embroidery design by Sue Box Creations

Sue Box Creations is a website from Australia that specializes in beautiful laces and exquisite designs. She offers a variety of free-standing laces that can be made into doilies and hankies, as well as traditional galloons.

"Just Lace" machine embroidery design by Sue Box Creations

"Just Lace" machine embroidery design by Sue Box Creations

While galloon laces are traditionally sewn free-standing and then sewn along the edge of a garment, they can be sewn directly onto the garment.  This is especially useful when it is a child’s garment that will used for every day use or as in this case a blue jean garment that is used around the house for every day chores and gardening.  It withstands a lot of abuse and has held up over the years because the lace was sewn directly onto the front of the jumper. This way it cannot snag or get caught on anything while I am working.

"Just Lace" machine embroidery design by Sue Box Creations

"Just Lace" machine embroidery design by Sue Box Creations

In my mind, there is nothing like her 3-D swan. It is so awesome and so impressive to give as a gift. People will not believe that it is all thread. We have made several of these swans that take many hours and lots of thread to complete, but they are worth every bit.  The picture below is from their website as we did not keep any for ourselves and did not take a picture before we gave them away.  Of course, I will have to fix that soon. As you can tell, they are just as much fun to give-away as they are to keep.

"3D Lace Swan" machine embroidery design and image by Sue Box Creations

"3D Lace Swan" machine embroidery design and image by Sue Box Creations

As with great machine embroidery digitizers, she has free downloads. There are currently thirteen free designs that show off her talents and one template. I personally just love the detail of the dragonfly.

If you love 3-D lace or are just curious on how it works, she has a free lace motif that when sewn together creates a lovely 3-D bowl. It takes 6 of the triangles to make one bowl.  You sew them together by hand or with the sewing machine. She has instructions with the download.

Free "Lace Gift" machine embroidery design by Sue Box Creations

Free "Lace Gift" machine embroidery design by Sue Box Creations

Make sure that you sign up for their newsletter as they offer complete CD’s with free shipping for half off, free designs, $1 and $2 designs, and many other wonderful offers. Hope you enjoy these designs as much as I do. 

Wednesday Website Crush – Martha Pullen Company

Martha Pullen Company is known for many wonderful things in the sewing world.  I think heirloom sewing and Martha Pullen's former magazine, Sew Beautiful, would be first in most people’s minds, but they are equally known for their exquisite machine embroidery designs. 

They have two ways to purchase machine embroidery designs.  The first is the standard way of searching for a design on their website and downloading it or having it sent to you in the mail, but they also have an incredible embroidery club. 

The embroidery club has an abundance of gorgeous designs for a set price. At $69 a year, it is a wonderful deal.  In the years past, you received at least two alphabets, a total of nine sets of designs to start the membership, and then at least two designs each month.  The design sets have included exquisite christening gown designs, smocking in-the-hoop, Christmas ornaments, baby booties with matching bonnets, and so many other designs. 

In addition to their designs, Martha Pullen Company offers videos and classes on how to machine embroider.

My all time favorite design from Martha Pullen Company is their free-standing lace nativity ornaments.  They are just beautiful and stitch out so precisely. I just love making and giving them every year as gifts. In case you are looking for them, they are still available in their 2013 collection.

While you are at it, if you are not familiar with heirloom techniques, you may want to add them to your repertoire. Martha Pullen is the originator of French hand sewing techniques on the sewing machine. 

Wednesday Website Crush - Urban Threads

There are some companies who just seem to know what is trendy and can set the pace before everyone else.  Urban Threads is definitely one of those companies in the machine embroidery industry. If you want to know the latest and impress your friends and family with your “in-the-know,” spend some time perusing their website


At first glance you might judge them to be all skulls and tattoo type designs, but look a little further and you will find something for everyone.  While they may have a very hip culture, they also are very diverse.  They range from a typewriter letter font to a gorgeous lace envelope to heraldic lions to French Napoleon bees. They even have unique wedding designs. These designs just do not get any better from a style as well as a quality perspective.


In addition to offering high quality and versatile designs, they provide a great “Lookbook” gallery and tutorials.   One year my teen boys loved the non-traditional placement of designs on their T-shirts that had been featured on the Urban Threads website. This website keeps me up to date with the latest trends that really surprise my children.


Signing up for their newsletter insures that you will be able to take advantage of those wonderful sales and keep informed on all the latest addition of designs.  However, it will not keep you up on the freebies.  You will have to check periodically for those. Have fun surfing through this great website and do not forget to try one their designs for free or on sale.

Wednesday Website Crush - Zundt Designs

Machine embroiders have the unique ability to create one of a kind projects, but they also have to ability to have access to quality embroidery designs that are only available to the elite of the fashion industry. Zundt Designs is one of those high-end embroidery designers, which also has a long legacy with the historic embroideries of St. Gallen, Switzerland.

Zundt Designs is known for their exquisite lace. They have every kind of lace your can think of such as motifs, corners, jewelry, ornaments, 3-dimensional, and of course, the traditional galloon.

The typical machine embroidery design is always realistic and highly detailed. They range from animals to children designs, but their precision flourishes in their vast flower collection.

Zundt has a unique project section entitled “Adorations.” It showcases their gorgeous designs in projects. Each project has designs and design workbooks that fully explain the projects and demonstrate how to use lace like the professionals. These projects encompass a vast breadth of areas from garments and quilts to window treatments and tablecloths.

As to be expected, the alphabets designed by Zundt are impeccable and follow the lines of elaborate historical fonts. Any one of them would make a monogram that would impress even the hardest to please.

To allow machine embroiders to test their superb designs, they currently offer three designs for free – a beautiful rose bud, a lace bow, and a free-standing lace ornament.  All three are just wonderful and are a delicious taste of their other elegant designs.  Hope you have fun trying them. 

Wednesday Website Crush – Embroidery Library

What is the one thing you would want on a deserted island?

Ask ten people that question and you will get ten answers. 

"Desert Island" Image courtesy of Wikipedia.

"Desert Island" Image courtesy of Wikipedia.

Honestly, how can you ever answer that question. Just thinking about it can boggle your mind.

Well, in my fantasy world, my deserted island has running water, electricity, and of course, an embroidery machine under a palm tree. (Did you see it all in the photo?) What more could I ask for? Unlimited blanks and designs!

Embroidery Library, Inc. would be one design supplier that would be able to keep me happy on my deserted island. With over 100,000 quality embroidery designs, how could I ever run out? Can you imagine how many designs that is! In a hundred year period, I would have to embroider over 2 designs a day just to use them all.  Now granted, not all of those are unique designs.  Some are just size differences, but even if you take that margin off, it still leaves you with a lot of designs.

These designs seem to fill most of my needs when I am thinking of a project.  They seem to have every style imaginable: filled, watercolor, red work, black work, sashiko, trapunto, embossed, free-standing lace, applique, in-the-hoop, etc. Personally, I cannot think of a category in which they do not have an embroidery design.

While their designs are of the highest quality and they offer so many, you would think that would be the end of it. However, they far exceed our expectations as they are also an educational website.  Do you need to know how to embroider on velvet, paper, or that ever so popular toilet paper? They have it all explained in their “Projects” section. 

The “Projects” section has a wealth of information.  Think of a project and it is there with a complete description of how to complete the project with the appropriate types of fabric that work well with the specific designs, the best stabilizer, threads and needles.

The “Fabric 101” section is my favorite.  I have never needed to buy expensive embroidery books or take classes because this website was right at my fingertips.  It is books and classes on machine embroidery all wrapped up in one nice spot.

As to be expected of their professionalism, they have a weekly newsletter that highlights their latest additions to the library and includes the wonderful weekly sales.

The best part is that every month they offer free designs, which is from their normal library of designs.  They are not simple or watered-down designs, but actual designs that are normally for sale.

Now the question almost as hard as the deserted island question, “What is your favorite design from Embroidery Library, Inc.?”

Wednesday Website Crush

Welcome to Website Crush Wednesday – a new series for machine embroiderers.  This week is just an introduction to the future series because the first website is a biggie.  It has such a wealth of information that it will take a very long blog post to cover.

Each week (hopefully) a new machine embroidery website will be featured. There are so many great websites out there and so many that need to be discovered.  Probably in the beginning you will be quite familiar with the websites, but for those of you who are new, maybe not.

To be honest, I will only review a website that I have personally tested one of their designs. This is to make sure that the designs themselves are high quality, which is a topic for another blog post. The website must have a good reputation and sell original designs.  Initially, I will focus on freestanding shops that produce their own designs in house.

Is there a website that you go to regularly or on special occasions, please let me know about it. I would love your recommendations. Maybe you are a shop owner and would like to be featured.  I am open to your recommendations also, but I will make a disclaimer that I was contacted for review.

All the commentary will be my own and there is no compensation involved. I would love to know your comments as well.  

The best part is that eventually I will publish a list of all the websites reviewed and you can use it to click on or to remind yourself when you are looking for a particular design.

So until next week, happy embroidering!


How to Prep Fabric for Neckline Embroidery

Machine embroidering a garment is so much fun.  You get the pleasure of both embroidering it and wearing it.  Many of us just embroider to enhance premade garments, but on those special garments, we even break down and create the whole garment. We do not get to do as much embroidering, but for some of us, garment construction is as much fun (well…almost).

Personally, I get extra enjoyment when I am embroidering for my family. My college daughter asked me to embroider her a Mexican flower peasant blouse, but after purchasing several patterns and fabrics, we settled on a tunic design.

She chose Simplicity 4149 with the cap sleeves from Simplicity 1461.  The fabric is a handkerchief weight cotton from Spechler-Vogel. Choosing the embroidery design was the easiest part.  I just loved Embroidery Online's Flores de Mexico. It looks and sounds so authentic. Their color combination that they chose to stitch out is just beautiful with a rich turquoise. My daughter chose a bright and neon combination from Floriani that just pops and screams, "Young."

It took me a little while before I had to courage to tackle this project as my daughter is a great machine embroider and I knew she would not be happy if the placement was not just right, but I also knew that if anyone would appreciate it, it would be her. 

The best strategy that I decided was to prep the fabric with all the necessary markings. When I purchased the fabric I did not have the foresight to buy extra since I knew it did not have a nap or a design. Next time I would definitely buy an extra half yard so I could put it in the hoop comfortably. Since I was right up to the edge on everything, I decided that I did not have any room for mistakes and would embroider with that mind set.

All the other pieces were cut out and I left the front of the pattern uncut. I traced the front pattern with a blue chalk onto the fabric. I knew that after multiple hoping that the chalk lines would not remain and I was not sure if they would be visible to the sewing machine's camera, so I decided to baste the chalk lines with a red cotton thread.

The seam allowance on the neckline was very important, as well as, the center front line and the placement for the front placket.  

In hindsight I needed the sleeve seam allowance also, so I wound up drawing them in when I was at that point.

For me the biggest decision was what stabilizer to use.  My daughter kept insisting that she wanted a wash away, but my I did not feel comfortable doing that with such a lightweight fabric combined with a heavy design.  That was not a good mix in the first place. I practiced with a wash away and was not happy with it. She loves the convenience of the tear away, but I went against all her wishes and used the "No Show Mesh Nylon Cutaway Fusible Stabilizer" by Floriani. Of course, I was a smart mom and did not tell her what I used until she said she loved it. 

The stabilizer was applied to cover the entire area that was going to be embroidered, including the area where it would need to be hooped, but the fabric would not be in the hoop. Here is where I would have loved to have had those extra inches of fabric, but since the fabric was so thin, it would hoop so evenly and tightly that it would not even make a difference.

My daughter loved the placement of the Embroidery Online tunic, so I tried to duplicate it as much as possible. After close examination, we determined that the main bottom center design was actually two designs stitched on top of each other. 

The camera and snowman feature of my Babylock Ellisimo Gold were lifesavers. Even in the placement of the first design I used the snowman first, then the camera, to make sure the placement was exactly matched up with all my stitching lines.  Thankfully, it was right where I wanted it. I stitched the first design and then used the camera to find the placement of the second design. Presto! Right on the mark again. I cannot imagine having embroidered this project without that scanning feature. 

Most everything fit exactly as I had imagined it, with the exception of the sleeve area.  The very end of the scroll goes into the seam allowance, but that was adjusted when I sewed by taking it just right to the edge of the scroll and right there is the best part about constructing your own garments instead of purchasing them to embellish. 

Which do you prefer to embroider on - ready-made garments or constructing your own garments?


Machine Embroidery Thread Organization with Dixie Cups

Machine embroidery is so much fun and part of the fun is playing with all those threads. Recently, I made my college daughter a Mexican flower peasant blouse that had 53,877 stitches using thirteen different bright and neon colors. I had so much fun organizing all those threads.

Many machine embroiders use these wooden or plastic spindle type racks to display their vast assortment of threads, aka, their stash. I also use this method and have several to keep them all sorted by color, but I also have one wooden "June Tailor" rack that is collapsible.  I can conveniently fold it away when I am not using it. 

It holds thirty-four different spools, allowing me to sort that many thread jumps. Personally, I have never had a design loaded into the machine that was more than that, as I have always had to re-hoop to get that much onto my surface.

Most embroidery machines today have the capability to show the sequence order of the thread jumps.  This is such a wonderful feature and allows you to keep everything organized by referring to the sequence number on the machine compared with that on the design sheet and then keeping the threads in the same order on the rack. Checking and rechecking all three constantly makes for a perfect stitch-out.

Inevitably, the threads will be used more than once.  There is the dilemma - what to do with that open space.  You could just leave it open, but then you run the risk of loosing track of your placement, or if you are like me and have accidentally purchased the same color twice, you could use the duplicate. However, it never seems to work out that that is the color that is duplicated and you are still left with that gapping hole. Dixie cups to the rescue! 

Those Dixie cups are the best! You turn them upside down and write on the number of the thread color on the bottoms that should be next in order. Voila! An inexpensive placement marker and you will not loose your place again. 

The best part of those cups...they can be filled with your sweet pick-me-up when not in use. 

What is the most unusual thing you use in your sewing room?

Machine Embroidered Flower Headband

One of my college daughters asked me to make her friend a flower headband. Since my daughter also machine embroiders, it was so much fun to be facetiming while looking at machine embroidery designs at the same time. This truly is a wonderful technological age! Who would have guessed that you could see your daughter who lives over 800 miles away and still go shopping all at the same time – let alone, be planning for an embroidery design that will be stitched by a machine! Sometimes it just boggles my mind!

Free Standing Sunflower Beads by Sonia Showalter

Free Standing Sunflower Beads by Sonia Showalter

We settled on a free standing flower design by Sonia Showalter, entitled “Sunflower Beads.”  It is a very versatile design and can be stitched in any color combination. My daughter chose white with a single grey center.  It was designed with a three-color combination – one for the petals and two for the center design – with two parts to the flower.  There is an upper and a lower part of the flower.  The bottom flower has a loop on each side where a ribbon can be threaded through, which is the main reason why we picked this design.  It was cute, the right size and could be simply made into a band by looping them together.  Perfect!

The instructions state, “When completely dry, the flower pieces need to be glued together before stringing.” Ugh! This is machine embroidery! Surely we can do all this in the hoop and skip the gluing phase. There was my challenge!

So here it is.  Here are my instructions for machine embroidering the two flower parts together without gluing them.

For this project, I used Floriani’s water soluble stabilizer, “Wet N Gone.” This product is not the plastic type of stabilizer, but has more body like a true stabilizer.  I used two sheets in the hoop initially and then I added one more sheet in step 8. 

Floriani Wet N Gone Water Soluble Stabilizer

Floriani Wet N Gone Water Soluble Stabilizer

SUNFLOWER BEADS SPECIAL INSTRUCTIONS

STEP 1

Follow Sonia’s instructions to machine embroider all the “bottom” flowers first.  Trim the threads at this time. Wash them and set them aside to dry overnight.

STEP 2

Follow Sonia’s instructions to machine embroider the “top” flowers next. However, stitch colors 1 and 2. STOP before stitching color 3.  If you are stitching several flowers in one hoop, you will have to carefully watch your stitch out and advance your machine manually from color 2 in one flower, back to color 1 in the next flower.

STEP 3

Trim all the threads from the top flowers at this time.

STEP 4

When all the flowers are stitched for colors 1 and 2, advance your machine back to the starting point and then advance it again so it begins at color 3 of the first flower.

STEP 5

Take your hoop out of the machine.

STEP 6

Carefully turn your hoop upside down on something that is approximately the width of the inside of your hoop. [For me, it was a Body for Life for Women book that was sitting on my cutting table just dying to be opened.]

STEP 7

Individually spray the front of each “bottom” flower lightly with Sulky KK 2000, but completely. [I tried using a fabric glue stick, but it was not strong enough to stick the two flowers together.]

Do not use Fabric Glue

Do not use Fabric Glue

TIP: I have a tall, but medium sized cardboard box that I use for spraying with Sulky KK 2000. I put the item in the bottom of the box to spray it and then all the sticky mist does not get onto everything.  I keep the box folded up against a wall so it does not take up any space and it is readily available when I need it.

Sulkiy KK 2000 Spray

Sulkiy KK 2000 Spray

STEP 9

Cut another piece of water soluble stabilizer larger than the size of your hoop and lightly spray it with the Sulky KK 2000. Place it sticky side down on top of the flower sandwich that was just created. This will keep those bottom flowers from getting caught in the feed dogs or any other openings. Finger press this down very securely.

STEP 10

Carefully, put the hoop back into the machine. 

STEP 11

Double check to make sure your first stitch will be color 3 the center of the first flower. (See step 3)

STEP 12

Stitch ONLY color 3 for each flower by advancing the stitch order manually on your machine.

STEP 13

You are now done with the special instructions. You can remove the hoop, trim the threads and wash the away the stabilizer.

The flowers were threaded all together with fold-over elastic and tied with a simple knot to keep it together.

This headband is such a fun spring project.  What will you be making to celebrate spring?

Illuminated Manuscript Quilted Pillow Pattern

Next Saturday, March 19th, is National Quilting Day. I think “National” days are so much fun, but I really like to know about them ahead of time, so a quilted pillow pattern is just the thing to celebrate National Quilting Day next week.  You can accomplish this project in one day and by telling you ahead of time, you can gather your supplies and do it next Saturday – actually on National Quilting Day. Now that is planning. 

Machine Embroidery Designs by Sonia Showalter

Machine Embroidery Designs by Sonia Showalter

Medieval illuminated manuscripts were the inspiration for this pillow. The pillow is a combination of quilting and machine embroidery in gold metallic thread. The machine embroidery designs were from Sonia Showalter and were sewn after it was quilted using the Snap Hoop Monster by Designs in Machine Embroidery. I think another idea would be to embroider actual words in the blank parchment block. 

If you do not have a embroidery machine, do not let that hinder you. The pillow does not need to be embellished or you could even embroider it by hand as hand embroidery is really becoming very popular again. DMC, a manufacturer of excellent embroidery threads, has a page dedicated to the different stitches on their website and there are wonderful YouTube demonstrations just waiting for you to google

ILLUMINATED MANUSCRIPT QUILT TOP

MATERIALS:

1 fat quarter of parchment silk dupioni

1 fat quarter of royal blue silk dupioni (also 1 additional matching fat quarter is needed for the back of the pillow, if you are making the pillow)

18” square of batting

18” square of muslin

CUT BLUE (B) SILK:

B1 = 2 pieces 2.75" by 13.5" for outer border

B2 = 2 pieces 2.75" by 18" for outer border

B3 = 1 piece 4.5" by 4.5" for main block

B4 = 2 pieces 2.5" by 8.5" for stripes off block

CUT PARCHMENT (P) SILK:

P1 = 1 piece 1.5" by 13.5" for inner border

P2 = 1 piece 1.5" by 12.5" for inner border

P3 = 3 pieces 1.5" by 8.5" for stripes background

P4 = 1 piece 8.5" by 9.5" for main parchment block

LAYOUT: The layout is available as a PDF here.

STITCHING ORDER:

  1. Stitch block P3 to each side of block B4.
  2. Attach this new block to B3 on the right side.
  3. Sew P3 and B4 together.
  4. Sew P4 to B4 of this new block.
  5. Attach this new block to the bottom of B3 that was made in step 2.
  6. Connect P2 to the block created in step 5.
  7. Connect P1 to the block created in step 6.
  8. Add B2 to the right sides of the block created in step 7.
  9. Add B1 to the top and bottom of the block created in step 8.

This finishes the creation of the block.  It can now be quilted. I stitched in the ditch to highlight the blue blocks only.

Once the quilt top has been quilted, you would sew it like any other pillow that has piping/cording and a zipper. 

To complete the pillow I also used:

20” matching royal blue zipper

20” square pillow form

2 ¼ yd gold cording 

(also 1 additional royal blue fat quarter of silk dupioni is needed for the back of the pillow, if you did not include it in the quilt top)

_______________________________

When finishing the pillow, Pam Damour’s instructions in her PDF entitled Pam Damour's Foot Notes - Ten Steps to a Perfect Pillow, are fabulous. Take note of her special technique to taper the corners.  This is really important and makes all the difference in making an elegant pillow.  Thank you Pam for sharing this important tip with all of us. By the way, she does have several acrylic templates for sale on her website for tapering those corners.  Pretty clever!

My version of the illuminated manuscript quilted pillow has been submitted to the Second Annual Nancy Zieman Pillow Challenge. The deadline for submissions is March 20th and online voting begins March 22nd, so I will surely be linking to that voting page then. The grand prize is a Baby Lock Anna sewing machine and that would be wonderful to take along when I teach sewing. 


Next Saturday is also National Let’s Laugh Day, so truly enjoy next Saturday.  So what are you doing to celebrate?


Replicating Handwriting with Floriani Total Control

Most machine embroiderists get special requests to embroider. This one was a special sentiment of love written on a paper towel that the one gifted wanted to treasure for a lifetime. 

To make the project lasting and as cuddly as the sentiment, I chose a natural soft raw silk (noll) fabric for a rectangular flanged pillow shape that would give the appearance of paper towel. It was just the project to get me kick-started on my Floriani Total Control software. 

Floriani Total Control could not have been any easier to use.  Considering this is the first time I ever opened the program and was able to produce a beautiful project quickly thereafter, I would say it rates an A+.

The software has an Autodigitizer Wizard that with a click of a button I was able to download a jpg file of the paper towel and it did all the rest of the work.  I am telling you that I did nothing further, but to click through the sequence of the Autodigitizer Wizard. 

After practicing stitching on a piece of similar cloth it looked wonderful. I am in love with this program and can not wait to use it again. 

To complete the project, I sewed the inside seams with a straight stitch and finished the edges with a zigzag knowing that noll will fray over time and especially when washed. 

How have you used the Floriani Total Control Autodigitizing Wizard?

The Best Machine Embroidery Tightening Tool

Every occupation has it tools and machine embroiderists are no different. Just like hand embroiderers, machine embroiderers use hoops to keep the fabric taut. As hand embroiderers know, sometimes it can be quite difficult to tighten the screw to make the fabric as tight as a drumhead. This precision can make all the difference in whether the embroidery design is a high quality or just fair.

The embroidery machine manufacturers know how critical this is and want their superior machines to always shine even when the embroiderist may be lacking the strength to tighten that hoop, thus they have been providing hoop screwdrivers for years.  However, this last upgrade produced a new device that was quite innovative. They now provide new embroidery machine owners with a multi position screwdriver. 

IMG_1083.JPG

The screwdriver technically has three positions, and all three positions can be used to tighten the the hoop, but only position “3” grips the screw and does not allow it to slip, so this is the best option for tightening the hoop.

Position "1" is designed primarily for tightening the needle or the feet.

Whereas, position "2" ideally was made for the screws in the metal plate around the feed dogs. 

The previous screwdriver looked like a flat piece of metal. Inevitably it would slip while tightening and was difficult to get a grip. However, the old screwdriver is still great for all the other functions, because it gets into the small spaces so nicely.

You can own the multi position screwdriver without having to own the newest embroidery machine. They are fantastic. No more sore fingers! 

This new screwdriver is a bit pricey to buy at the retailer, but it is worth every penny. 

What do you think of the multi position screwdriver for embroidery machines?

How to Find a Machine Embroidery Thread using an iPhone

Sewing Machines are so sophisticated today.  Back in the dark ages – well at least when my husband bought my first sewing machine as a wedding gift almost forty years ago (He was so loving and thoughtful. How could have he have known it would lead to this.), sewing machines were much simpler to repair. Everything opened up and came apart. Even the manual told you how to repair it.  You were just expected to repair it yourself.

Today, the sewing machines are so complicated.  They are computerized just like our modern cars. The sewing manual is a tome and it does not even address repairing it. I have asked my beloved sewing machine salesman/owner/repairman if he would tell me how to open it up so that I could make sure that I did not have an illusive thread floating around when it breaks, but he assures me that I would forfeit my warranty and that I should just bring it in any time I have an issue.  Who wants to forfeit that incredible warranty and yet I do not want to drive an hour and fifteen minutes to his shop (yes, his price was well worth the savings, service and training).

Embroidery Design by Sonia Showalter

Embroidery Design by Sonia Showalter

As I was embroidering the muslin bags to keep our church’s baptism towels from getting dirty while they are stored, that upper thread broke for no apparent reason.  It sprang up into the upper thread tension area and balled all up.  I could see its gold little head peeping through the little crack. I searched for my tweezers. UGH! One of the boys took them.  I hid my eyebrow tweezers and did not think they knew to look for my sewing tweezers, but at least they know not to take those scissors! Of course, after realizing that the boys uses them, I decided to just buy new ones and never ask what they were used for because I really do not want to know.

Thread Ball Discovered!

Thread Ball Discovered!

Thankfully the edge of the thread was barely peeking out of the crack and I could pull it ever so gently by hand. Oh, so tenderly. I knew it could break inside. I pulled. It slowly began to unwind. Not what I wanted.  I wanted it all to just lift up and stay together. Gentle! Gentle! It was coming. It broke! I could see there was some still in there. Nothing would fit inside the crack that had the ability to grab. I did not, under any circumstance, want to break the plastic casing. It was not worth it. 

Using the iPhone to look up the in the upper tension area to see the thread ball.

Using the iPhone to look up the in the upper tension area to see the thread ball.

Modern technology could help me out, but how? I had to think like a surgeon.  I wanted to look inside and magnify it. If I used my iPhone to look under the plastic casing and it would show me where the thread was and then I could use it to look inside the crack to see if it was still there by magnifying it. It worked. I finally got it out and now it is running just fine. 

How has your iPhone gotten you into places you never thought you could see?

How to Hoop Plush Towels

Machine embroidering plush towels can be a challenge, as they are very difficult and sometimes impossible to hoop in a traditional manner.  No matter how hard you try, when you put that thick terrycloth between those two rings, it pops out when you fasten it down. If your terrycloth is a thinner grade or has been washed many times as my test sample was, then it is not a problem and can be hooped like other fabrics.

Font by Sonia Showalter

Font by Sonia Showalter

There are many ways to conquer this problem, but here are the three easiest. All three options use a sandwich approach, which consists of a bottom layer of water soluble stabilizer (this differs depending upon the method chosen), the towel itself, and then the important water soluble topping stabilizer which serves to keep the pile of towel down so it does not get caught up in the needle or the foot as it travels across the design, but it also keeps the pile down while actually embroidering so the design is very uniform. It really makes a difference by using this topper. It takes the embroidered finished product from amateur to professional. 

The first option for hooping the towel sandwich is to purchase the Snap Hoop Monster from Designs in Machine in Embroidery, if you have the time and the funds for the purchase. This magnetic wonder solves all your problems and is the easiest solution.  You lift the top magnetic hoop, line up your towel sandwich of water soluble tear-away stabilizer, towel and topper, then put the hoop back on top. Presto, no further issue.  It is an amazing invention, by a very creative lady, Eileen Roche. I have the 5 x 7 model and it is fantastic.  It is worth every penny, but I chose not to purchase the largest hoop, which I am now regretting.  It is on my wish list for sure. The design I chose for these towels is larger than the 5 x 7 hoop. I could have opted to split the design in half and then hoop it twice, but I decided against this method as I thought it would take me longer in the long run. 

The next two methods are similar in that you hoop a tacky or pressure sensitive stabilizer instead of the water soluble tear-away used with the Snap Hoop Monster,  in between the two rings and then stick the towel to the stabilizer. This is another amazing product that I do not know how we lived without.

Wet N Gone Tacky Stabilizer by Floriani

Wet N Gone Tacky Stabilizer by Floriani

It is easiest to hoop the stabilizer before removing the protective paper as it is very difficult to hoop it tightly since it will stick to the top hoop and not allow you to readily tighten it. Also, it will leave a residue on the the hoop. This process solves both of those issues. Once the stabilizer is hooped, you lightly score the paper with scissors being careful not to push too hard as it will cut through the actual stabilizer and you will need to start all over again.

Thicker scissors seem to score better than thinner ones. Maybe I just apply less pressure.

Thicker scissors seem to score better than thinner ones. Maybe I just apply less pressure.

Once it has been scored, remove the protective paper being careful not to touch the stabilizer.

Finger prints and score marks on the tacky stabilizer.

Finger prints and score marks on the tacky stabilizer.

Then align the towel onto the stabilizer with both rings of the hoop under the towel.  It seems counterintuitive, because it looks like the towel is just floating on top of the hoop, but with these next two steps it works really well and this is were the methods differ.

This towel has a border that can easily be used to line it up with the edge of the hoop.  You can see the hoop placement in the right corner.

This towel has a border that can easily be used to line it up with the edge of the hoop.  You can see the hoop placement in the right corner.

This topper must be secured to the sandwich. It can be done in many ways such as basting it by hand or machine to the towel before it is attached to the sticky stabilizer or it can be done after it is attached.  Most machine embroiders opt to baste after and use the built-in basting feature on the newer machines. With the click of a button it adds the basting lines and knows to sew it before the design begins. 

On the Baby Lock machine, basting is simply added automatically at the beginning of the process by the press of a button.

On the Baby Lock machine, basting is simply added automatically at the beginning of the process by the press of a button.

The hard part is keeping it secured while it is basting.  I have seen some embroiderists hold it in place with their hands, but I strongly do not recommend this method.and yes, I have tried it.  You know those times when you are in a hurry and you want to skip a few step.  It never pays.

The second method is to pin it in place, but it is difficult to get it taunt and to especially get the pins to go down and back up without loosening the stabilizer. 

Topping pinned to the towel and underlying stabilizer.

Topping pinned to the towel and underlying stabilizer.

The third method is the method that I chose.  Use a tacky water soluble stabilizer on the bottom, with the towel in the middle and then spray the towel with a temporary adhesive (I used Sulky KK 2000). 

KK 2000 Temporary Spray Adhesive by Sulky and Water Soluble Topping by Floriani

KK 2000 Temporary Spray Adhesive by Sulky and Water Soluble Topping by Floriani

Once the towel is sprayed, I affix the topper directly to the towel and smooth it out by pressing in the middle first then working out and down firmly, so all the air bubbles are removed and it creates a nice tight suction with the towel. If you misplace it, the nice part is that is lifts right up and you can reposition it, starting all over again.  

The basting keeps the topping in place and taunt while the design stitches.

The basting keeps the topping in place and taunt while the design stitches.

Now you are ready to baste and begin your beautiful design on your towels.  This Sunday our church is having a baptism that will now have six embroidered towels for the occasion.

Fleur de Lis Capital and Lower Case Alphabet with the Baptism Cross Designs by Sonia Showalter

Fleur de Lis Capital and Lower Case Alphabet with the Baptism Cross Designs by Sonia Showalter

What method do you use to machine embroider plush towels?